
Picture yourself in an autumn kitchen, the scent of crushed apples filling the air as golden juice drips slowly through cheesecloth into a waiting jar. Apple wine is one of those magical recipes that transforms humble fruit into something sophisticated, slightly sweet, and utterly rewarding to sip months later.
This recipe is special because it’s achievable for beginners yet produces results that rival store-bought varieties. You’ll love the balance of crisp apple flavor with subtle notes of honey and spice, plus the satisfaction of knowing you crafted every drop yourself.
Making apple wine at home requires patience more than skill, and the process teaches you something real about fermentation and flavor development. Let’s walk through exactly how to create a batch that you’ll be proud to share.
Why You’ll Love This Recipe
This apple wine delivers a smooth, semi-sweet finish that appeals to wine lovers and casual drinkers alike. You’ll appreciate the straightforward process and the incredible return on your investment of time and ingredients.
- Uses simple, affordable ingredients you can source from any grocery store or farmers market
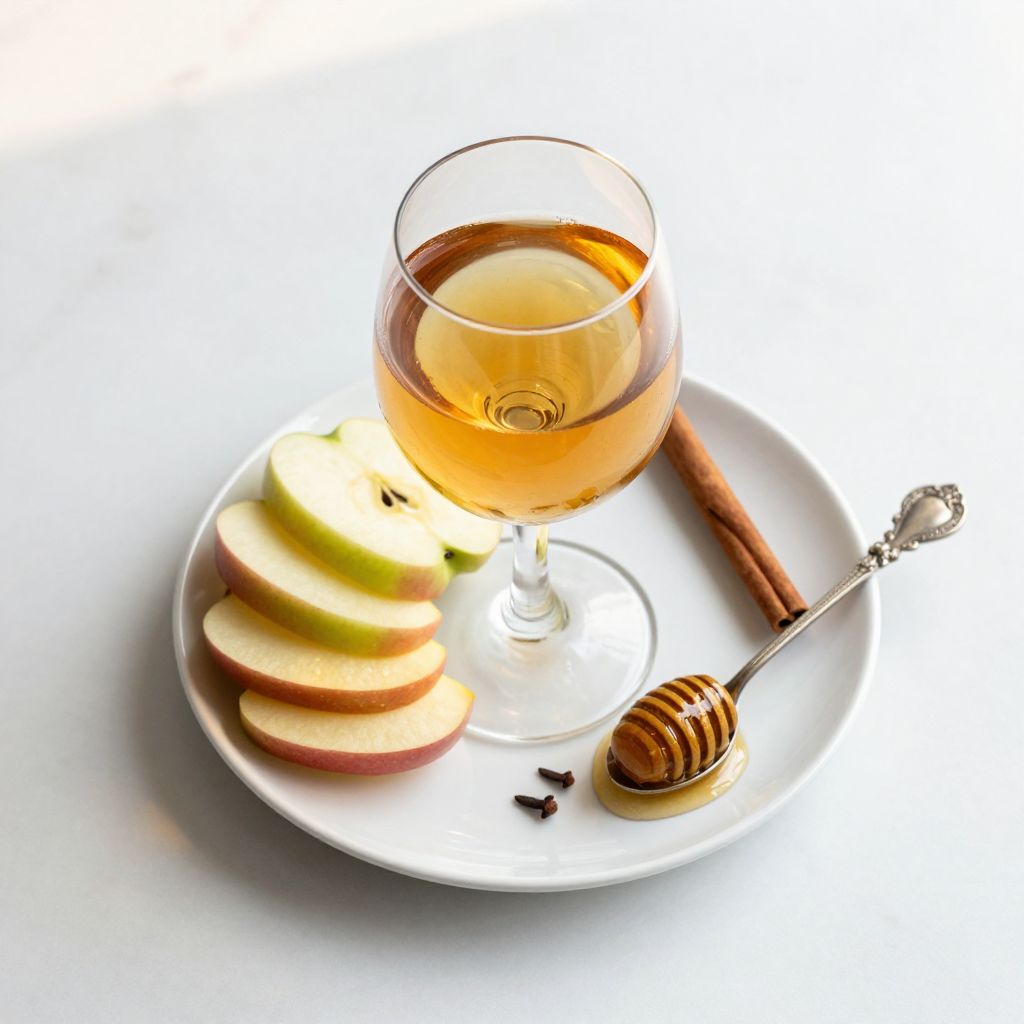
- Produces a beautiful golden amber color that looks professional in a glass
- Ready to drink in 2 to 3 months, much faster than many wine recipes
- Naturally pairs with desserts, cheese boards, and autumn gatherings
- Teaches valuable fermentation skills you can apply to other homemade beverages
My Experience Making This Recipe
I made my first batch of apple wine on a crisp October morning, using apples from a local orchard. The entire kitchen smelled like a cider house, and I couldn’t wait to see what would happen when yeast met juice.
By day three, my airlock was bubbling steadily, and I knew fermentation had taken hold. The wine continued its quiet transformation for weeks, each taste revealing new subtleties as the yeast worked through the sugars and aromatics developed.
When I finally bottled it, friends were genuinely impressed, asking where I’d bought such a refined wine. Telling them I’d made it myself from apples and patience felt like the best part of the whole process.
Recipe Overview
- Recipe Name: Homemade Apple Wine
- Servings: Makes approximately 1 gallon (5 bottles)
- Prep Time: 30 minutes
- Fermentation Time: 8 to 12 weeks
- Total Time: 2 to 3 months
- Course: Beverage
- Cuisine: Contemporary
- Alcohol Content: Approximately 10 to 12% ABV
Equipment You Will Need
- Large food-grade plastic bucket or glass carboy (1-gallon capacity)
- Airlock and rubber bung (fits your fermentation vessel)
- Long-handled wooden spoon or paddle for stirring
- Fine-mesh strainer or cheesecloth
- Glass bottles (wine bottles or similar, for storing finished wine)
- Bottle capper or cork and corking tool
- Hydrometer (optional but helpful for monitoring fermentation)
- Sanitizing solution (such as Star San or potassium metabisulfite)
- Large stainless steel pot (for preparing ingredients)
- Funnel with fine mesh
- Measuring cups and spoons
- Rubber tubing (for siphoning)
Ingredients for Apple Wine
- Fresh apples: 12 to 15 pounds (a mix of tart and sweet varieties works best)
- Granulated sugar: 3 pounds
- Honey: 1 pound (optional but recommended for complexity)
- Water: 1 gallon (filtered or distilled preferred)
- Wine yeast: 1 packet (Champagne or Cote des Blancs strain recommended)
- Yeast nutrient: 1 teaspoon
- Acid blend: 1/2 teaspoon (to balance pH)
- Pectic enzyme: 1/2 teaspoon (helps break down apple solids)
- Ground ginger: 1/4 teaspoon (optional, for warmth)
- Whole cloves: 2 to 3 (optional, for subtle spice)
- Potassium metabisulfite: 1/4 teaspoon (for preservation, optional)
Ingredient Notes and Substitutions
- Fresh apples: A blend of tart (Granny Smith) and sweet (Honeycrisp) varieties gives balanced flavor and proper acidity. If you can only find one type, add 1/2 teaspoon of citric acid or lemon juice to brighten the wine.
- Wine yeast: Active dry yeast or baker’s yeast will ferment but produces less refined flavors and leaves sediment. Use a dedicated wine yeast like Champagne strain, which creates cleaner, crisper results.
- Honey: It adds depth and subtle floral notes that apples alone cannot provide. You can skip it to reduce cost, but your wine will taste thinner and more one-dimensional.
- Acid blend: It ensures proper pH for yeast activity and preserves the wine’s lifespan. Fresh lemon juice (1 tablespoon) works as a substitute if acid blend isn’t available.
- Pectic enzyme: This breaks down cell walls in apples, yielding more juice and clearer wine. Without it, your wine may remain hazy; skip only if you prefer a rustic, cloudy appearance.
- Ground ginger and cloves: These add warmth and subtle complexity to the final product. Omit them if you prefer a clean, pure apple flavor.
How to Make Apple Wine
Step 1: Sanitize All Equipment
Sanitize your fermentation vessel, airlock, spoon, strainer, and any other equipment with a food-safe sanitizing solution mixed according to package directions. Proper sanitation prevents unwanted bacteria or wild yeast from spoiling your batch and ensures clean, reliable fermentation.
Step 2: Prepare Your Apples
Wash your apples thoroughly under running water to remove dirt and debris. Cut them into quarters without peeling or coring; the skins and seeds add color, tannins, and complexity that make the wine more interesting.
Step 3: Extract Juice and Create Must
Place quartered apples in a large pot and crush them by hand or with a wooden spoon to break the cell walls and release juice. Add the water to the pot, then pour everything into your sanitized fermentation vessel.
Step 4: Add Pectic Enzyme and Let Sit
Stir in the pectic enzyme, then cover loosely with a clean cloth and let the mixture sit at room temperature for 12 to 24 hours. This resting period allows the enzyme to break down apple solids and extract maximum flavor and juice.
Step 5: Strain and Prepare the Base
Strain the mixture through fine cheesecloth or a fine-mesh strainer into a clean pot, pressing gently on solids to extract liquid without forcing through sediment. Measure the liquid and add it back to your sanitized fermentation vessel.
Step 6: Dissolve Sugar, Honey, and Nutrients
Warm a small amount of your apple liquid and dissolve the sugar and honey in it, stirring until fully combined. Add this mixture back to the fermentation vessel along with the acid blend, yeast nutrient, ginger (if using), and cloves (if using), stirring thoroughly.
Step 7: Pitch the Yeast
Rehydrate the wine yeast according to package directions, typically by stirring it into a small cup of warm water and letting it sit for 15 minutes. Pour the hydrated yeast into your must and stir vigorously for about a minute to ensure even distribution and good oxygen contact.
Step 8: Begin Primary Fermentation
Cover your fermentation vessel loosely with a clean cloth for the first 24 to 48 hours to allow CO2 to escape while preventing contamination. After two days, fit the airlock into the vessel; you should see bubbling within hours as yeast becomes active.
Step 9: Monitor Fermentation
Keep the vessel in a cool, dark place (ideally 60 to 75 degrees Fahrenheit) and let fermentation proceed for 6 to 8 weeks. You’ll notice the airlock bubbling frequently at first, then slowing as fermentation nears completion; this is normal and expected progression.
Step 10: Rack to Secondary Vessel
Once bubbling slows significantly (bubbles appearing every 30 seconds or less), siphon the clear wine off the settled sediment into a clean, sanitized carboy using rubber tubing. This racking removes the bulk of sediment and helps clarify the wine while protecting it from off-flavors that dead yeast can produce.
Step 11: Allow Aging to Continue
Fit an airlock to your secondary vessel and let the wine age for an additional 4 to 6 weeks in a cool, dark location. Some fermentation will continue slowly; resist the urge to bottle until activity has nearly stopped completely.
Step 12: Bottle Your Wine
Siphon the finished wine into sterilized bottles, leaving about 1 inch of headspace below the cork or cap. Use new corks or sanitized caps and seal each bottle carefully to prevent oxidation.
Pro Tip: Keep detailed notes on dates, ingredient amounts, and fermentation observations so you can refine your technique and recreate batches you especially enjoy.
Tips for the Best Apple Wine
- Use a blend of apple varieties rather than a single type; tart apples provide acidity and structure while sweet apples contribute body and forward fruit character.
- Maintain steady fermentation temperatures between 60 and 75 degrees Fahrenheit; cooler temps slow fermentation and can cause stuck fermentations, while warmth produces off-flavors.
- Be patient and resist opening the vessel frequently; each time you open it, you risk contamination and allow CO2 to escape unnecessarily.
- A hydrometer helps track fermentation progress by measuring specific gravity; take readings weekly once primary fermentation slows to know when the wine is truly dry.
- Taste the wine at bottling time to decide if it needs additional honey for sweetness or citric acid for brightness; you can adjust flavor slightly at this stage.
- Store finished bottles in a cool, dark place on their side if using corks, which keeps the cork moist and sealed over time.
Common Mistakes to Avoid
- Using tap water with chlorine or chloramine: These chemicals can inhibit yeast activity or produce off-flavors, so always use filtered or distilled water for your must.
- Skipping sanitation steps: Bacteria or wild yeast will outcompete your cultured yeast and ruin the batch, turning it vinegary or producing unpleasant flavors.
- Bottling too early while fermentation is still active: Trapped CO2 will build pressure and potentially explode the bottle; wait until fermentation is completely quiet.
- Fermenting in direct sunlight: UV light degrades color and flavor compounds, so keep your vessel in a dark closet or cupboard throughout fermentation.
- Using apples that are bruised, moldy, or overripe: These introduce unwanted bacteria and off-flavors, so select firm, unblemished apples whenever possible.
Serving Suggestions
Serve your apple wine well-chilled in white wine glasses to fully appreciate its color and aroma. The semi-sweet profile makes it incredibly versatile for pairing and sipping occasions.
- With sharp cheddar cheese and crackers for a simple autumn gathering
- Alongside pork roasts, ham, or roasted chicken dishes where its sweetness complements savory meat
- With apple pie, vanilla ice cream, or caramel desserts that echo the wine’s flavor profile
- As an aperitif on a cool evening, either chilled or slightly warmed with cinnamon
- With blue cheese or aged gouda for an elegant contrast between sweet wine and funky umami flavors
Variations to Try
- Spiced Apple Wine: Add 1 cinnamon stick, 4 to 5 whole cloves, 2 star anise, and 3 to 4 slices of fresh ginger during the initial steeping period for a warming, complex spice profile that’s perfect for holiday gifting.
- Dry Apple Wine: Skip the honey and reduce added sugar to 2.5 pounds; the result is a crisper, less sweet wine with higher acidity that pairs beautifully with food instead of standing alone.
- Apple-Pear Blend: Replace 3 to 4 pounds of apples with fresh pears, which add a floral elegance and soften the apple’s sharpness while creating a more delicate final wine.
- Apple-Cranberry Wine: Add 2 to 3 pounds of fresh or frozen cranberries during initial fermentation for deeper color, brighter acidity, and subtle tart berry notes that complement the apple beautifully.
- Oaked Apple Wine: After secondary fermentation, add 1 to 2 ounces of oak chips (French or American) to add vanilla, caramel, and wood spice notes that make the wine feel more wine-like and sophisticated.
Dietary Adaptations
- Gluten-Free: This recipe is naturally gluten-free as written; just confirm your yeast and nutrient packets contain no gluten additives, which is true for most wine yeasts.
- Vegan: The base recipe is vegan-friendly, but some clarifying agents (like isinglass) are not; use vegan-friendly fining agents or allow the wine to clear naturally through racking and time.
- Lower Alcohol: Stop fermentation earlier by cooling the vessel or adding sulfites once gravity drops to around 1.010 to 1.015, which halts yeast activity and produces a wine around 8% ABV instead of 12%.
- Sugar-Free or Low-Sugar: Replace honey and added sugar with a non-fermentable sweetener added at bottling time, though this changes mouthfeel slightly and may reduce body and complexity.
Storage and Reheating
Refrigerator
Properly bottled and sealed apple wine does not require refrigeration but benefits from cool storage at 45 to 65 degrees Fahrenheit. Store bottles upright or on their side in a dark location away from temperature fluctuations.
- Sealed bottles with cork or cap maintain quality for 3 to 5 years
- Once opened, recork tightly and consume within 1 to 2 weeks
- A wine fridge at 55 degrees is ideal but a cool closet works well too
Freezer
Freezing wine causes expansion that can rupture bottles and alter flavor, so freezer storage is not recommended for finished wine. However, you can freeze fresh apple juice before fermentation if you want to make wine later in the year.
- Freeze juice in ice cube trays or sealed containers for up to 1 year
- Thaw juice in the refrigerator before use
- The freezing process breaks down some cellular structure, improving juice extraction slightly
Reheating
Apple wine is served chilled and does not require reheating, though you can warm it gently for mulled wine preparations. Never boil finished wine, as this burns off alcohol and delicate aromatics.
- Warm wine slowly over low heat with cinnamon, cloves, and honey for a cozy spiced serving
- Heat to around 160 to 170 degrees Fahrenheit (just below simmering) and serve immediately
- Mulled apple wine pairs wonderfully with winter gatherings and holiday celebrations
Nutrition Information
| Nutrient | Amount Per 5 oz Glass |
|---|---|
| Calories | 120 |
| Total Fat | 0 g |
| Saturated Fat | 0 g |
| Carbohydrates | 8 g |
| Fiber | 0 g |
| Sugar | 6 g |
| Protein | 0 g |
| Sodium | 15 mg |
| Cholesterol | 0 mg |
Nutritional values are approximate and based on a semi-sweet apple wine with 11% alcohol content; actual values vary depending on your specific ingredients and how thoroughly fermentation completes.
Frequently Asked Questions
Can I use apple juice from concentrate instead of fresh apples?
Fresh apples produce superior flavor and complexity, but quality bottled apple juice (not from concentrate) works in a pinch. You would use about 1 gallon of juice directly, though results taste flatter and less nuanced than wine made from whole fruit.
How do I know when fermentation is truly complete?
Fermentation is complete when the airlock stops bubbling for several days and a hydrometer reading remains stable over a week. Most apple wine finishes in 8 to 12 weeks, though cooler temperatures slow the process considerably.
What causes my apple wine to taste vinegary?
Vinegar flavor develops from acetic acid bacteria that thrive when wine is exposed to oxygen during fermentation or storage. Always use a fitted airlock, keep your vessel covered, and avoid opening it unnecessarily.
Can I add more honey after fermentation to make it sweeter?
Yes, you can back-sweeten the wine at bottling time by dissolving honey in a small amount of wine and stirring it in. Start with 1/2 cup and taste; add more in increments until you reach your desired sweetness level.
Is it normal for my wine to be cloudy after fermentation?
Some cloudiness is normal and caused by residual yeast and sediment; it clears with time and racking. If cloudiness persists after 3 to 4 months, try a secondary racking or leave the bottle undisturbed for additional clarification.
Can I scale this recipe up to make larger batches?
Absolutely; simply multiply all ingredient quantities by the number of gallons you want to produce. A 5-gallon batch uses the same fermentation principles and timeline but requires a larger carboy and airlock system.
What’s the difference between apple wine and apple cider?
Cider is unfermented pressed apple juice, while wine is fermented juice where yeast converts sugars to alcohol. Your apple wine becomes an alcoholic beverage with complexity and age-ability that fresh cider lacks.
Final Thoughts
Making apple wine at home is one of those rewarding projects that bridges seasons and teaches you something real about fermentation. You’ll gain confidence in your ability to transform simple ingredients into something that tastes refined and special.
Grab some apples at your next market visit and commit to this two-month journey into winemaking. You’ll be amazed at what patience and time can produce, and your friends will be equally impressed when you pour them a glass.
Explore More Homemade Wine Recipes
If you loved making apple wine, explore other fruit wine recipes to expand your home fermentation skills and discover new flavors. Check out our muscadine wine recipe for a Southern classic, or try our blackberry wine recipe for a deep, fruity alternative that ferments beautifully.
Homemade Apple Wine
Ingredients
Equipment
Method
- Sanitize all equipment with a food-safe sanitizing solution according to package directions.
- Wash and quarter apples without peeling or coring to retain skins and seeds, then set aside.
- Place apples in a large pot, crush to release juice, add water, and transfer mixture to the sanitized fermentation vessel.
- Stir in 1/2 teaspoon pectic enzyme, cover loosely with a clean cloth, and let sit 12 to 24 hours at room temperature.
- Strain the mixture through cheesecloth or a fine-mesh strainer into a clean pot, pressing gently to extract liquid, then return liquid to the fermentation vessel.
- Warm a small amount of the apple liquid, dissolve the sugar and honey in it, then add back to the vessel along with acid blend, yeast nutrient, ground ginger, and whole cloves; stir thoroughly.
- Rehydrate the wine yeast in warm water for 15 minutes, then pour into the must and stir vigorously for about 1 minute.
- Cover the vessel loosely with a cloth for 24 to 48 hours, then fit the airlock; fermentation will begin as indicated by bubbling.
- Place the vessel in a cool, dark area (60–75°F) and allow primary fermentation for 6 to 8 weeks, monitoring airlock activity.
- Once bubbling slows (about one bubble every 30 seconds or less), siphon clear wine off the sediment into a clean, sanitized secondary carboy using rubber tubing.
- Fit an airlock to the secondary vessel and age for an additional 4 to 6 weeks in a cool, dark location.
- Siphon the finished wine into sterilized bottles, leaving about 1 inch of headspace, then seal with corks or caps to prevent oxidation.