
Imagine standing at your kitchen counter, blender whirring to life, as creamy vanilla and chocolate swirl together into something that tastes like dessert but drinks like magic.
The Ninja milkshake has become a go-to for anyone who wants a thick, frosty drink that feels indulgent without the fuss. What makes it special is the balance of texture and flavor, combined with how quick it comes together.
Whether you are chasing a quick breakfast, treating yourself after a long day, or impressing guests with a homemade frozen treat, this recipe delivers every single time. The best part?
You probably have most of the ingredients sitting in your fridge right now.
Why You’ll Love This Recipe
This Ninja milkshake hits all the marks: fast, customizable, and genuinely delicious. You will have a restaurant-quality drink ready in under five minutes.
- Thick and creamy texture that feels indulgent and satisfying
- Requires only basic pantry staples and no special equipment beyond a blender
- Endlessly adaptable to your flavor preferences and dietary needs
- Perfect for meal prep, quick breakfasts, or afternoon pick-me-ups
- Kids and adults alike ask for seconds
My Experience Making This Recipe
I first tried blending ice cream with milk when my daughter asked for something cold and sweet on a sweltering summer afternoon. What struck me immediately was how the frozen base transformed into something silky rather than icy.
The key moment came when I realized adding a splash of vanilla extract and a pinch of salt made the whole thing taste brighter, more sophisticated than the sum of its parts. My husband, who normally skips desserts, started asking me to make them weekly.
Since then, I have played with chocolate, peanut butter, caramel, and fruit variations, and honestly, they all work beautifully. The Ninja blender became my secret weapon for achieving that perfect thick consistency without a lot of stress.
Recipe Overview
- Recipe Name: Ninja Milkshake
- Servings: 2
- Prep Time: 5 minutes
- Cook Time: 0 minutes
- Total Time: 5 minutes
- Course: Beverage
- Cuisine: American
- Calories per Serving: 285
Equipment You Will Need
- High-powered blender (Ninja or similar)
- Measuring cups
- Measuring spoons
- Two tall glasses
- Long spoon or milkshake straw
Ingredients for Ninja Milkshake
- 2 cups vanilla ice cream
- 1 cup whole milk
- 1/2 cup heavy cream
- 1 tablespoon vanilla extract
- 1 tablespoon honey or agave syrup
- 1/4 teaspoon sea salt
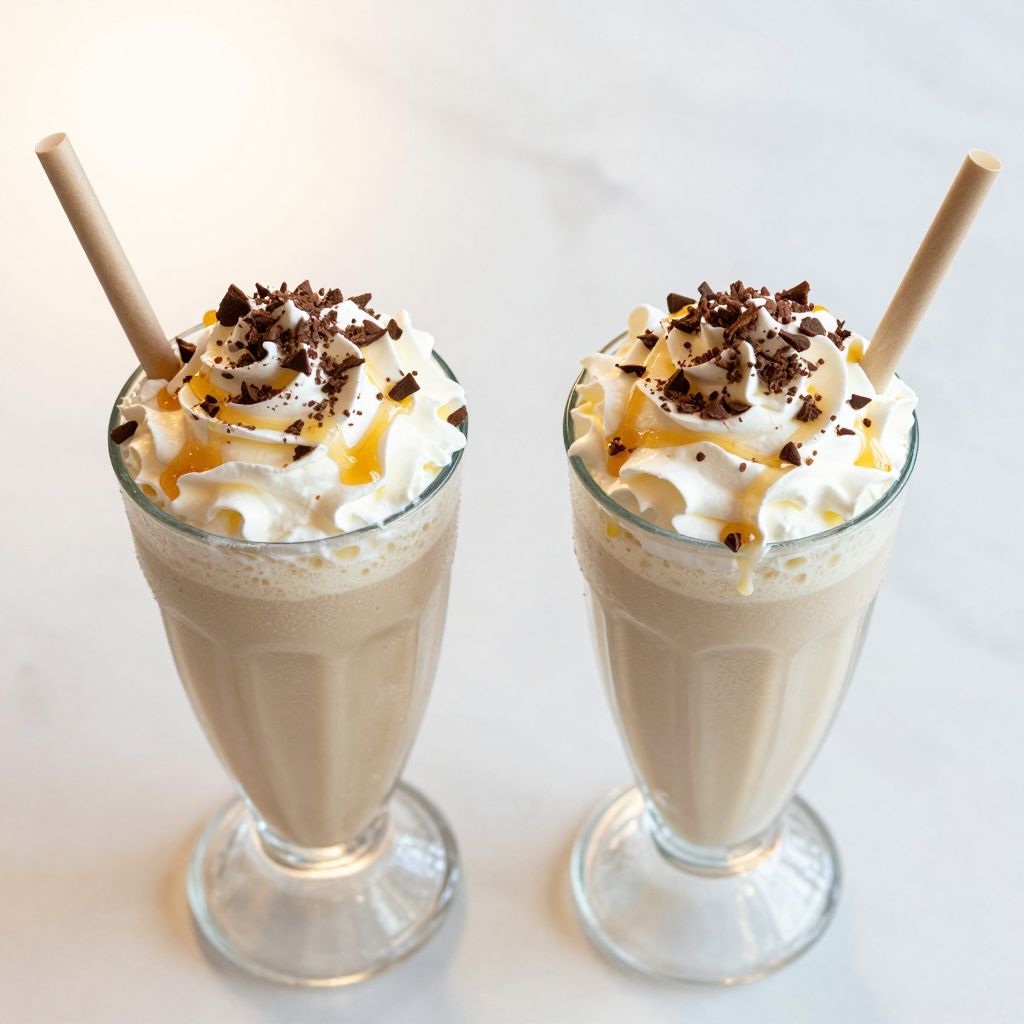
- Optional toppings: whipped cream, chocolate shavings, sprinkles
Ingredient Notes and Substitutions
- Vanilla ice cream: This is the foundation of the shake, providing creaminess and sweetness naturally. If you prefer less sugar, swap for Greek yogurt mixed with a bit of honey, though the texture will be slightly less rich.
- Whole milk: Whole milk creates that classic thick shake texture due to its fat content. Use 2% milk if you want fewer calories, but the shake will be slightly thinner.
- Heavy cream: This elevates the richness and mouthfeel, making the shake feel indulgent. You can skip it entirely and use an extra half cup of milk instead, though you will lose some of that luxury factor.
- Vanilla extract: Pure vanilla deepens the flavor and adds sophistication without being obvious. Skip it if you prefer a more neutral base, or swap for almond extract for a different angle.
- Honey or agave: This adds subtle sweetness and helps the shake blend smoothly. Any liquid sweetener works, or skip it if your ice cream is already sweet enough for your taste.
- Sea salt: A tiny pinch enhances all the other flavors and balances sweetness beautifully. Never skip this, even if it seems odd.
How to Make Ninja Milkshake
Pull your ice cream from the freezer and let it sit at room temperature for just one minute. This softens it slightly so your blender does not work too hard and overheat the mixture.
Place your two serving glasses in the freezer for a minute or two, cold glasses keep the shake colder longer and the cold surface prevents the ice cream from melting too fast once you pour.
Step 1: Gather Your Ingredients and Chill Your Glasses
Measure out two cups of vanilla ice cream and add it to your Ninja blender jar. Pack the ice cream loosely, do not compress it down.
The slightly aerated ice cream blends more smoothly and creates better texture than tightly packed ice cream.
Step 2: Scoop the Ice Cream Into the Blender
Pour in one cup of whole milk and half a cup of heavy cream. The milk thins the ice cream enough for blending, while the cream adds body and richness.
These two ingredients together create the perfect liquid-to-solid ratio for a shake that drinks like silk, not a slurpee.
Step 3: Add the Milk and Heavy Cream
Measure one tablespoon of vanilla extract and one tablespoon of honey into the blender. Vanilla deepens the ice cream flavor so it tastes more refined than plain, while honey adds subtle sweetness and helps everything blend smoothly.
If you are using a different sweetener like agave or maple syrup, use the same amount.
Step 4: Add Vanilla Extract and Honey
Add one quarter teaspoon of sea salt to the blender. This small amount does not make the shake taste salty, instead it amplifies all the other flavors and balances the sweetness beautifully.
Salt in sweet drinks is a classic pastry trick that most home cooks overlook, but it makes a real difference in how sophisticated the final drink tastes.
Step 5: Secure the Lid and Blend on Medium Speed
Secure the blender lid firmly, then select medium speed on your Ninja blender. Blend for about 30 to 45 seconds, pulsing gently at first.
Medium speed prevents the blender from overworking the ice cream and creating an airy, foamy texture, you want thick and creamy instead.
Step 6: Check Consistency and Blend Again if Needed
Stop the blender and peek at the mixture. It should look smooth and pour easily but not liquidy, like soft serve ice cream consistency.
If it is still too thick, blend for another 15 seconds, if it seems too thin, you added too much liquid, remember this for next time.
Step 7: Pour Into Chilled Glasses
Remove your glasses from the freezer and pour the shake evenly into both. Shake should fill each glass most of the way, leaving room for toppings.
Pouring quickly into cold glasses helps the shake stay cold and keeps the texture thick rather than melting into liquid.
Step 8: Add Optional Toppings and Serve Immediately
Top with whipped cream, chocolate shavings, sprinkles, or a drizzle of chocolate syrup if you like. Serve right away with a long spoon or thick milkshake straw.
The shake is best enjoyed within five minutes of blending, the longer it sits, the more it melts and separates.
Pro Tip: Use ice cream that is still slightly frozen but not rock hard. If your ice cream is too hard, it will stress your blender and create an uneven texture. If it is too soft, your shake will become thin and soupy.
Tips for the Best Ninja Milkshake
- Chill your serving glasses before pouring to keep the shake cold longer and maintain that perfect thick texture throughout drinking.
- Use a high-powered blender like a Ninja, Vitamix, or Ninja blender to achieve the smoothest, creamiest results without overworking the ice cream.
- Do not skip the salt, it sounds odd but one quarter teaspoon transforms the flavor by making everything taste richer and more balanced.
- Blend on medium speed rather than high speed to avoid creating too much air and foam, which makes the shake feel light instead of luxurious.
- Keep all your ingredients cold before blending, warm milk or cream will make the shake melt quickly and lose its body.
- Serve immediately after blending, waiting even ten minutes allows the shake to separate and become thin as it sits.
Common Mistakes to Avoid
- Using ice instead of ice cream: Ice creates a thin, watery slushy texture rather than a thick creamy shake, ice cream is essential for that luxurious consistency.
- Blending too long: Over-blending whips air into the mixture and breaks down the ice cream too much, resulting in a foamy, thin shake rather than a smooth, thick one.
- Skipping the salt: Even a pinch of salt magnifies all the other flavors and prevents the shake from tasting one-dimensional or overly sweet.
- Using low-fat or skim milk: These versions have too little fat to create that signature thick, creamy texture, stick with whole or 2% milk minimum.
- Not chilling your glasses: Warm glasses melt the shake quickly and ruin the texture you worked to create, a 30 second chill makes all the difference.
Serving Suggestions
Serve your Ninja milkshake on a hot afternoon, after a meal, or as a special treat with someone you love. Pair it with light snacks to let the shake shine, or enjoy it on its own as a simple dessert.
- Alongside warm chocolate chip cookies for a hot and cold contrast
- With fresh berries on the side for a lighter, brighter pairing
- As a dessert after a grilled dinner on warm summer nights
- With a simple shortbread biscuit for dunking or crumbling on top
- Solo as an afternoon pick-me-up with a good book
Variations to Try
- Chocolate Ninja Milkshake: Swap vanilla ice cream for chocolate ice cream and reduce vanilla extract to one teaspoon, the richness deepens and you get that decadent chocolate flavor.
- Strawberry Ninja Milkshake: Blend in one half cup of fresh or frozen strawberries along with the ice cream, the fruit adds brightness and natural color while keeping creaminess intact.
- Peanut Butter Ninja Milkshake: Add two tablespoons of smooth or crunchy peanut butter to the blender, it creates a rich, nutty depth that pairs beautifully with vanilla.
- Caramel Ninja Milkshake: Drizzle two tablespoons of caramel sauce into the blender before blending, it adds sweetness and a complex, buttery note that feels gourmet.
- Coffee Ninja Milkshake: Replace one half cup of milk with cooled brewed coffee or espresso, this gives you that coffee shop energy drink feel with a smooth, creamy base.
Dietary Adaptations
- Gluten-free: This recipe is naturally gluten-free, just verify your ice cream and honey brands do not contain hidden gluten or additives that concern you.
- Dairy-free: Use coconut ice cream or cashew ice cream, and swap heavy cream for full-fat coconut milk, the texture will be slightly less rich but still creamy and satisfying.
- Vegan: Choose a vegan ice cream made from oat or coconut base, use unsweetened plant milk and skip the heavy cream or use full-fat coconut milk instead, agave works as your sweetener.
- Low-carb or keto: Use a keto-friendly ice cream sweetened with erythritol or monk fruit, and swap heavy cream for the same amount of whole milk, the shake will be lower in sugar but slightly less rich.
Storage and Reheating
Refrigerator
Ninja milkshakes do not store well because they separate and melt, drink them within five minutes of blending for best results. If you must store one, cover it tightly and refrigerate for up to two hours, though texture will degrade.
- Always shake or stir before drinking if stored, the components will have separated
- The shake will be thinner and less creamy than when freshly made
Freezer
You can freeze the shake in an airtight container for up to two weeks, but it will become more like ice cream than a drinkable shake. Thaw in the refrigerator and re-blend before serving.
- Freezing changes the texture from smooth to icy
- Better to remake fresh than to try unfreezing
Reheating
Do not reheat a milkshake, it defeats the purpose. If your shake has melted or separated, blend it again with a small handful of fresh ice to restore thickness and creaminess.
- Re-blending is always better than trying to rescue a separated shake
- Add a splash of cold milk if needed to help the blender work
Nutrition Information
| Nutrient | Amount |
|---|---|
| Calories | 285 |
| Total Fat | 18g |
| Saturated Fat | 11g |
| Carbohydrates | 28g |
| Fiber | 0g |
| Sugar | 26g |
| Protein | 4g |
| Sodium | 95mg |
| Cholesterol | 68mg |
These values are approximate and based on standard ingredient brands, homemade versions may vary based on specific products used and portion size.
Frequently Asked Questions
Can I make this shake without a Ninja blender?
Yes, any high-powered blender works well for this recipe, Vitamix, Instant Pot, or standard kitchen blenders all work. The key is blending on medium speed for smooth results.
How far ahead can I prepare the ingredients?
You can scoop your ice cream into the freezer in advance and measure your liquids and vanilla ahead of time. Blend everything together right before serving for the best texture.
Why does my shake come out too thin?
You are likely using too much milk or letting the ice cream sit too long before blending. Start with the measurements given, and blend immediately after adding ingredients.
Can I use soft serve ice cream instead?
Soft serve is already partially melted and will create a thin, watery shake. Stick with hard ice cream from a tub or container for the right consistency.
What if my blender is not powerful enough?
Let your ice cream sit at room temperature for two or three minutes before blending to soften it slightly, this reduces the strain on a weaker blender. If results are still too thin, you may need a more powerful blender.
Can I add protein powder to this shake?
Yes, add one scoop of vanilla or unflavored protein powder when you add the vanilla extract. Blend a few extra seconds to ensure the powder mixes smoothly.
Final Thoughts
The Ninja milkshake is proof that simple ingredients, when handled thoughtfully, create something genuinely special. There is no fussing around, no complicated techniques, just a few minutes and you have a drink that tastes like you spent hours perfecting it.
Next time you want something cold and creamy, skip the drive-thru and blend this instead, your taste buds and your wallet will thank you. Give this recipe a try and see why so many people come back to it again and again.
Explore More Frozen Treat Recipes
If you enjoyed this classic milkshake, explore more delicious frozen beverages and treats to expand your blender repertoire.
Check out our Ninja Creami milkshake recipe for a slushy frozen twist, or try our peanut butter milkshake recipe for a nutty variation that feels rich and satisfying.
Ninja Milkshake
Ingredients
Equipment
Method
- Let ice cream sit at room temperature for one minute to soften slightly.
- Place two serving glasses in the freezer for two minutes to chill.
- Scoop two cups of vanilla ice cream into the blender without compressing.
- Pour in one cup of whole milk and half a cup of heavy cream.
- Add one tablespoon of vanilla extract and one tablespoon of honey or agave syrup.
- Sprinkle in one quarter teaspoon of sea salt.
- Secure the blender lid and blend on medium speed for 30 to 45 seconds.
- Check consistency; if too thick, blend an additional 15 seconds, if too thin, note for next time.
- Pour the shake evenly into chilled glasses, leaving room for toppings.
- Top with whipped cream, chocolate shavings, and sprinkles, then serve immediately.