
There’s something magical about watching a Ninja Creami transform a simple frozen mixture into a silky, spoonable masterpiece in seconds flat. This Ninja Creami milkshake recipe gives you that restaurant-quality experience at home without the complicated steps or mystery ingredients.
What makes this recipe special is how it balances thick, creamy richness with that signature slushy texture that makes every spoonful feel indulgent. You’ll spend less than five minutes actually making it, yet it tastes like you’ve been working all morning.
Why You’ll Love This Recipe
This Ninja Creami milkshake delivers creamy, frozen perfection in under five minutes with minimal hands-on effort. It’s versatile enough for any flavor craving and impressive enough to serve guests.
- Requires just a few pantry staples and a Ninja Creami machine
- Freezes in under four hours, making it perfect for last-minute desserts
- Endlessly customizable with different milkshake flavors and toppings
- Naturally creamy texture without harsh ice crystals
- Single-serving portions mean no shared germs at dessert time
My Experience Making This Recipe
I first made this when my kids refused regular frozen yogurt because it wasn’t “special enough.” One trip to the Creami later, they were convinced I’d unlocked some culinary superpower.
The real win came when I realized I could batch-freeze these on Sunday and have grab-and-go desserts all week. The texture stays fluffy and scoopable, never turning into a brick-hard popsicle.
Watching the machine work its magic never gets old, honestly. There’s something oddly satisfying about pressing a button and watching liquid turn into frozen gold in real time.
Recipe Overview
- Recipe Name: Ninja Creami Milkshake
- Servings: 1
- Prep Time: 5 minutes
- Freeze Time: 3-4 hours
- Total Time: 3 hours 5 minutes
- Course: Dessert
- Cuisine: American
- Calories per Serving: 285
Equipment You Will Need
- Ninja Creami machine
- Creami-compatible pint container with lid
- Blender or food processor
- Measuring cups and spoons
- Spoon for serving
- Freezer
Ingredients for Ninja Creami Milkshake
- Heavy cream: 1/2 cup
- Whole milk: 1 cup
- Sweetened condensed milk: 1/4 cup
- Vanilla extract: 1 teaspoon
- Chocolate syrup (or flavor syrup of choice): 2 tablespoons
- Pinch of salt: 1/8 teaspoon
Ingredient Notes and Substitutions
- Heavy cream: Creates the rich, creamy mouthfeel that makes this taste like an actual milkshake rather than frozen milk. Swap with half-and-half for a lighter version, though the texture will be thinner.
- Sweetened condensed milk: Adds richness and prevents the mixture from freezing too hard. Use regular sugar dissolved in a bit of water if you don’t have it on hand, but the texture may be icier.
- Chocolate syrup: Provides flavor and helps keep the mixture scoopable. Any flavored syrup works here, from strawberry to caramel to coffee.
- Vanilla extract: Enhances the overall flavor depth. Omit it if making a chocolate-only shake, or use almond extract for variety.
How to Make Ninja Creami Milkshake
Pour the heavy cream, whole milk, and sweetened condensed milk into a blender. The condensed milk adds richness and acts as a natural emulsifier, keeping the texture creamy rather than icy when frozen.
Step 1: Combine Your Base Ingredients
Blend in the vanilla extract, chocolate syrup, and salt. The salt enhances the flavor and prevents the mixture from tasting flat once frozen.
Step 2: Add Your Flavor Components
Blend on high speed for 30 seconds until everything is fully combined and smooth. You shouldn’t see any streaks of syrup or separation in the mixture.
Step 3: Blend Until Smooth
Pour the blended mixture into your Creami-compatible pint container, filling it just below the rim line marked on the container. Leaving a tiny bit of headspace prevents overflow during freezing as the mixture expands.
Step 4: Pour Into Creami Container
Screw the lid on tightly and place the sealed container in your freezer. Mark the time so you know when it’s ready, though three to four hours is standard.
Step 5: Seal and Freeze
After three hours, gently tilt the container to see if the mixture has started to solidify. It should feel mostly frozen but still slightly soft in the center, not rock-hard throughout.
Step 6: Check for Complete Freezing
Remove the container from the freezer and insert it into your Ninja Creami, following the machine’s instructions for your container type. The machine will guide the frozen mixture through its processing cycle.
Step 7: Insert Into the Creami Machine
Select the sorbet or slushi setting on your machine and press start. Watch as the machine shaves and churns the frozen mixture into a smooth, spoonable consistency that looks like soft-serve ice cream.
Step 8: Press Start and Process
Once processing is complete, the machine will signal you to remove the cup. Serve immediately in a chilled glass or bowl for the best texture.
Pro Tip: Let your Creami container sit at room temperature for two to three minutes before processing if it feels too hard to insert smoothly into the machine, but don’t let it thaw too much.
Tips for the Best Ninja Creami Milkshake
- Use full-fat dairy products rather than reduced-fat versions, as the fat is what creates that creamy texture and rich mouthfeel you want in a milkshake.
- Chill your blender container before mixing if you have time, as a cold base will freeze more evenly and quickly in the freezer.
- Freeze the Creami container in the coldest part of your freezer, typically the back of the bottom shelf, for the most consistent results.
- Process your shake within a few minutes of removing it from the freezer for optimal texture and consistency before it starts to thaw.
- Keep your Creami machine in the freezer between uses if you make these frequently, as a cold machine processes better than a warm one.
- Make multiple containers at once and freeze them so you have ready-to-go milkshakes throughout the week.
Common Mistakes to Avoid
- Overfilling the container causes the mixture to push up through the lid and create a mess in your freezer during the freeze cycle.
- Freezing the mixture too hard makes it impossible to insert into the machine smoothly, and it may freeze faster than the Creami can process it evenly.
- Using skim milk creates a thin, watery texture that won’t feel like a proper milkshake no matter how good your machine is.
- Forgetting to chill the insert cup before inserting causes the Creami machine to work harder and can slow processing speed.
- Adding mix-ins like candy or cookie pieces without chopping them fine may cause them to jam the machine’s blade during processing.
Serving Suggestions
Serve this frozen treat as an elegant dessert after dinner or as a fun afternoon pick-me-up. The creamy texture and rich flavor pair beautifully with simple toppings and complementary flavors.
- Top with whipped cream and a sprinkle of chocolate shavings for extra indulgence
- Drizzle with caramel sauce and a pinch of sea salt for sweet and salty contrast
- Add a scoop of fresh berries or a small pile of crushed cookies for texture
- Serve alongside fresh fruit or a small slice of pound cake for a complete dessert plate
- Enjoy straight from the cup with a spoon for a casual, no-mess treat
Variations to Try
- Strawberry Creami Shake: Replace chocolate syrup with strawberry syrup and add a handful of fresh strawberries to the blender for bright, fruity flavor that tastes summery year-round.
- Coffee Creami Shake: Brew strong cold brew coffee and use it instead of one-quarter cup of the milk, then add two tablespoons of coffee syrup for rich caffeine-forward flavor.
- Cookies and Cream Creami Shake: Use vanilla as your base flavor and fold in finely crushed vanilla wafers or Oreo pieces right before freezing for crunchy texture throughout.
- Salted Caramel Creami Shake: Replace chocolate syrup with caramel syrup and sprinkle in a tiny pinch of sea salt before blending for sophisticated sweet and salty depth.
- Peanut Butter Creami Shake: Blend in two tablespoons of creamy peanut butter with your base ingredients for nutty richness that pairs beautifully with chocolate.
Dietary Adaptations
- Dairy-Free: Use full-fat coconut milk, oat milk, or cashew cream instead of regular milk and heavy cream, keeping sweetened condensed coconut milk for richness, though the texture will be slightly less creamy.
- Vegan: Combine dairy-free milk and cream options with vegan sweetened condensed milk or homemade aquafaba-based sweetened cream for an animal-free version.
- Lower Sugar: Replace sweetened condensed milk with a sugar-free sweetened condensed milk alternative and use sugar-free flavored syrups to reduce overall sugar content significantly.
- Keto: Use heavy cream as your primary base, add monk fruit sweetener, skip the sweetened condensed milk, and use sugar-free syrup to keep carbs under five grams per serving.
Storage and Reheating
Refrigerator
Store sealed Creami containers in the freezer for up to two weeks before the mixture develops ice crystals or flavor degradation. Thawed milkshake can be refrozen, though the texture may be slightly grainier.
- Keep containers in the coldest part of your freezer away from the door
- Label containers with the date and flavor for easy identification
Freezer
Frozen Creami containers stay fresh and scoopable for up to fourteen days in a standard freezer. Longer storage times may result in ice crystal formation that affects texture.
- Store in airtight containers with tight-fitting lids to prevent freezer burn
- Keep away from items with strong odors to prevent flavor transfer
Reheating
There’s no reheating needed since this is a frozen dessert. Simply remove from the freezer and process through your Creami machine when you’re ready to serve.
- Let sit at room temperature for two to three minutes if the container feels too frozen to insert
- Process immediately after removing from freezer for best texture and consistency
Nutrition Information
| Nutrient | Amount |
|---|---|
| Calories | 285 |
| Total Fat | 18g |
| Saturated Fat | 11g |
| Carbohydrates | 28g |
| Fiber | 0g |
| Sugar | 26g |
| Protein | 3g |
| Sodium | 85mg |
| Cholesterol | 65mg |
Nutritional values are approximate and may vary based on specific brands and ingredient choices used in preparation.
Frequently Asked Questions
Can I Make This Recipe Without a Ninja Creami Machine?
You can freeze the mixture and blend it in a food processor every thirty minutes during the freeze cycle, but you won’t get the same smooth, scoopable texture that the Creami produces. The machine’s specialized blade design creates a texture that’s impossible to replicate without it.
How Long Does It Take to Freeze This Milkshake?
Most mixtures freeze solid in three to four hours depending on your freezer temperature and how full the container is. You can check readiness by tilting the container gently and feeling for complete solidification.
Can I Use This Recipe With Other Flavored Syrups?
Absolutely, this recipe works beautifully with any flavored syrup you love, from raspberry to caramel to birthday cake flavoring. Just swap the chocolate syrup one-to-one with your preferred flavor for instant variation.
What If My Mixture Freezes Too Hard to Process?
Let the sealed container sit at room temperature for two to three minutes to soften the outer edges slightly, then try inserting it again. If it’s still too hard, your freezer may be running colder than average, so try moving it to a slightly warmer spot next time.
Can I Add Protein Powder to This Recipe?
Yes, you can blend in up to two tablespoons of protein powder without affecting the freeze time or texture significantly. Use vanilla or chocolate protein powder that pairs with your chosen flavor to avoid any off-tastes.
Is This Recipe Safe for Kids?
This recipe is completely safe for kids and requires no cooking, making it a fun hands-on dessert project. Just ensure any mix-ins like nuts are chopped finely to prevent choking hazards.
Final Thoughts
Making Ninja Creami milkshakes at home proves that restaurant-quality desserts don’t require fancy skills or endless ingredients. You’ll have creamy, delicious frozen treats ready whenever a craving strikes, and your guests will wonder how you make them taste so incredibly smooth.
Grab your ingredients, blend them together, and let your freezer and machine do the heavy lifting. Trust me, once you nail this recipe, you’ll be making variations all season long.
Explore More Frozen Treats
Love frozen milkshake recipes? Check out our collection of refreshing beverage ideas that pair perfectly with this Creami creation.
Try our peanut butter milkshake recipe for a nutty twist on the classic frozen treat. For something fruity and light, our strawberry cold foam recipe offers elegant sophistication without the heavy richness of this chocolate version.
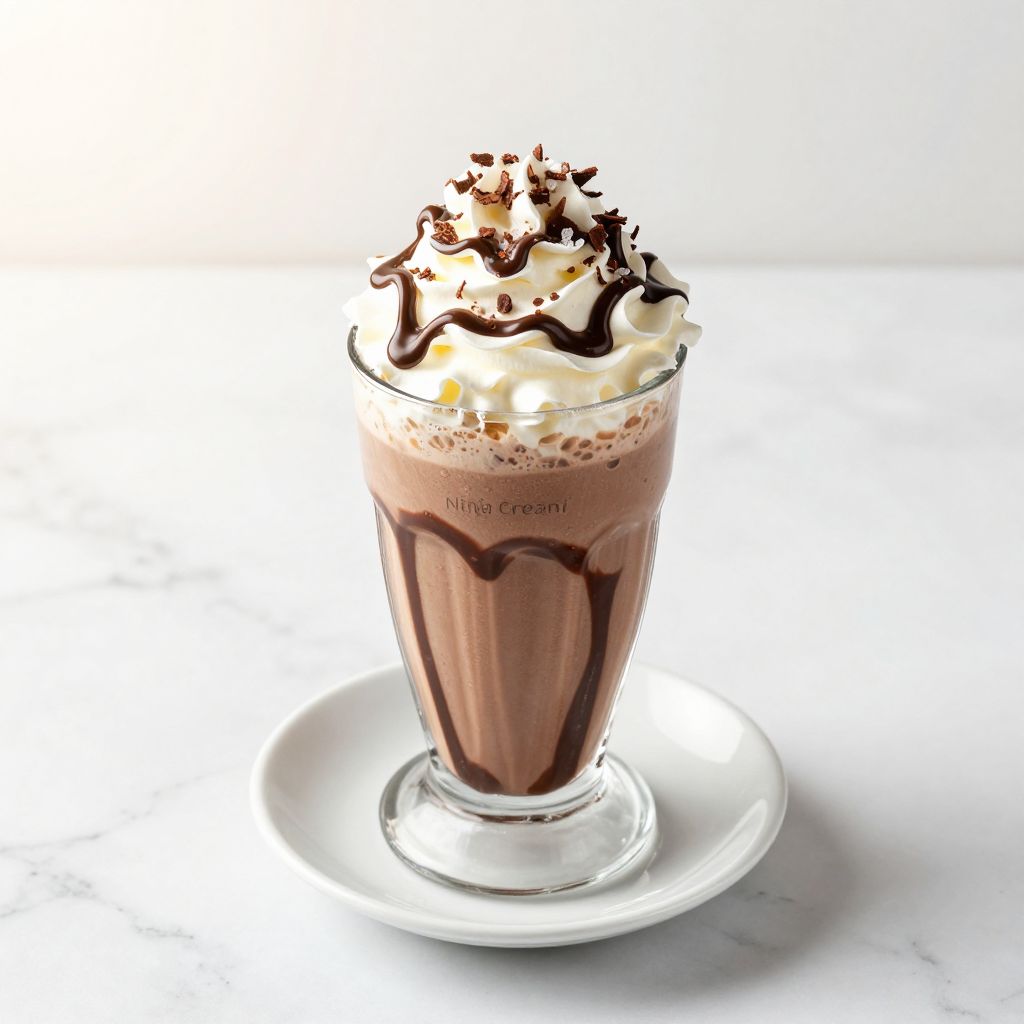
Ninja Creami Milkshake
Ingredients
Equipment
Method
- Pour the heavy cream, whole milk, and sweetened condensed milk into a blender, adding richness and emulsification for a creamy texture.
- Add the vanilla extract, chocolate syrup, and salt to the blender, blending flavor and enhancing depth.
- Blend on high speed for 30 seconds until fully combined and smooth, with no visible streaks.
- Pour the mixture into a Creami-compatible pint container, filling just below the marked rim to allow for expansion.
- Seal the container tightly with its lid and freeze for 3 to 4 hours until mostly solid but still slightly soft in the center.
- After about 3 hours, tilt the container gently to check that it is mostly frozen with a softer center, not rock-hard.
- Remove the container from the freezer and insert it into the Ninja Creami machine according to manufacturer instructions.
- Select the sorbet or slushy setting and press start to process the mixture into a smooth, spoonable consistency.
- Once processing is complete, remove and serve immediately in a chilled glass or bowl for optimal texture.