
Picture yourself on a lazy afternoon, watching sunlight pour through deep purple grapes as you crush them into juice, knowing that patience and a few simple ingredients will transform them into something magical.
Homemade grape wine is one of the most rewarding projects a home fermentation enthusiast can tackle. This recipe guides you through the entire winemaking process, from selecting the right grapes to bottling your finished product.
What makes this recipe special is how approachable it is for beginners, yet flexible enough for experienced winemakers to experiment. You’ll love the deep, complex flavors that develop over time and the satisfaction of sharing a bottle you made yourself.
Why You’ll Love This Recipe
Making grape wine at home is incredibly rewarding and yields results that rival store-bought bottles at a fraction of the cost.
- Complete control over ingredients, sweetness level, and flavor profile
- Far more affordable than purchasing premium wines regularly
- A fascinating fermentation process that teaches you real chemistry
- Creates impressive gifts and conversation starters for dinner parties
- Can be customized with different grape varieties for unique results
My Experience Making This Recipe
I started winemaking by accident when a farmer gave me more grapes than I could eat fresh. I researched for days, gathered equipment I mostly already had, and committed to the long fermentation process.
The first time I opened a bottle after six months, the aroma alone transported me back to that harvest day. The wine was dry, slightly fruity, and honestly better than many bottles I’d bought at wine shops.
Now I make several batches each year, and friends actually request bottles instead of bringing store-bought wine to gatherings. The patience required teaches you something about good things taking time.
Recipe Overview
- Recipe Name: Homemade Grape Wine
- Servings: Approximately 5 bottles (750ml each)
- Prep Time: 30 minutes
- Fermentation Time: 3 to 6 months
- Total Time: 4 to 7 months
- Course: Beverage
- Cuisine: International
- Calories per Serving: Approximately 120 calories per 5oz glass
Equipment You Will Need
- Large fermentation vessel or glass carboy (at least 6 gallons)
- Airlock and rubber stopper that fit your vessel
- Hydrometer (to measure sugar content and alcohol levels)
- Sanitizing solution or food-grade sterilizer
- Long wooden spoon or stirring rod
- Cheesecloth or fine mesh strainer
- Siphon and tubing for racking
- Bottles and corks or screw caps
- Corker or capping machine
- Large pot for heating water
- Measuring cup and scale
- Funnel
Ingredients for Homemade Grape Wine
- Fresh grapes: 10 to 15 pounds (about 40 pounds total with stems and skins)
- Granulated sugar: 2 to 3 pounds (depending on grape sugar content)
- Wine yeast: One packet of Saccharomyces cerevisiae or similar wine yeast
- Yeast nutrient: 1 teaspoon
- Acid blend: 1 to 2 teaspoons (or fresh lemon juice as substitute)
- Tannin powder: 1/4 teaspoon (optional but recommended for structure)
- Potassium sorbate: 1/2 teaspoon (for stabilization before bottling)
- Water: 1 gallon (filtered or distilled preferred)
Ingredient Notes and Substitutions
- Fresh grapes: The foundation of your wine, grapes provide sugars, acids, and tannins needed for fermentation. If fresh grapes aren’t available, use frozen grapes (thaw first) or high-quality grape juice as a backup, though the flavor will be less complex.
- Wine yeast: This strain ferments reliably and produces clean flavors compared to baker’s yeast. If unavailable, champagne yeast works well but ferments faster and produces drier results.
- Sugar: Increases alcohol content and provides food for yeast during fermentation. Honey can replace up to half the sugar for a different flavor profile, though it will ferment slightly differently.
- Acid blend: Balances sweetness and preserves the wine naturally. Fresh lemon juice works in a pinch, using about 2 tablespoons per gallon as a substitute.
- Tannin powder: Adds structure and aging potential to the finished wine. You can skip this if unavailable, though the wine may taste lighter and flabbier.
How to Make Homemade Grape Wine
Step 1: Sanitize All Equipment
Before starting, sanitize every piece of equipment that will touch your wine with a food-grade sterilizer or sanitizing solution. Even tiny amounts of bacteria or wild yeast can ruin an entire batch, so don’t skip this critical step.
Step 2: Prepare and Crush the Grapes
Rinse your grapes thoroughly and remove any stems or leaves. Crush the grapes by hand into your fermentation vessel, or use a grape crusher if you have one, breaking the skins to release juice and sugars.
Step 3: Test the Sugar Content
Use your hydrometer to check the sugar level (expressed as specific gravity or Brix) of your crushed grapes. This reading tells you how much additional sugar to add for proper fermentation and helps predict final alcohol content.
Step 4: Adjust Sugar and Acidity
Add your measured sugar, acid blend, tannin powder, and yeast nutrient directly to the crushed grapes. Stir vigorously for several minutes to dissolve the sugar and distribute nutrients evenly throughout the mixture.
Step 5: Rehydrate and Pitch the Yeast
Sprinkle your wine yeast over warm (not hot) water according to package directions and let it sit for 10 minutes to rehydrate. Pour this activated yeast mixture into your grape must and stir gently but thoroughly to ensure even distribution.
Step 6: Begin the Primary Fermentation
Cover your vessel loosely with a clean cloth or fit an airlock into the rubber stopper to allow carbon dioxide to escape while preventing outside air from entering. Place the vessel in a cool, dark location between 60 and 75 degrees Fahrenheit where it can ferment undisturbed.
Step 7: Rack the Wine to Secondary Fermentation
After one to three weeks when fermentation slows visibly and sediment settles to the bottom, use your siphon to carefully transfer the clear wine to a clean secondary vessel, leaving the sediment (called “lees”) behind. Attach an airlock to the secondary vessel and let fermentation continue for another two to four months.
Step 8: Test for Completion and Stabilize
When fermentation appears complete (no visible bubbles through the airlock for several weeks), use your hydrometer to confirm the wine is dry or at your desired sweetness level. Dissolve potassium sorbate in a small amount of wine and stir it gently into the batch to stop fermentation and prepare for bottling.
Step 9: Bottle Your Wine
Siphon the finished wine into clean, sanitized bottles, leaving about half an inch of space at the top. Cork or cap each bottle and store upright in a cool, dark place for at least two weeks before opening to allow flavors to settle.
Pro Tip: Keep detailed notes on your specific gravity readings, fermentation temperatures, and adjustments you made, so you can replicate successful batches and learn from any that didn’t turn out as hoped.
Tips for the Best Homemade Grape Wine
- Use grapes that are ripe but not overripe, as overripe fruit can ferment too quickly and produce off-flavors. Aim for grapes that taste sweet with just a slight tartness when you taste one raw.
- Keep your fermentation temperature steady between 60 and 75 degrees Fahrenheit, as temperature swings cause sluggish fermentation or unwanted flavors. A basement or interior closet usually maintains consistent temperature better than a kitchen.
- Don’t rush the fermentation process by using too much yeast or pushing higher temperatures, as slower fermentation produces cleaner, more complex flavors. The saying “slow and low” applies perfectly to winemaking.
- Sample the wine after each racking to track flavor development and catch any problems early. This also teaches you how wine changes over time.
- Invest in a good hydrometer and learn to use it properly, as it removes guesswork from deciding when fermentation is complete. Guessing costs you batches.
- Store finished wine in a cool location away from direct sunlight, as light degrades flavor and color over time. A basement or wine fridge is ideal.
Common Mistakes to Avoid
- Skipping sanitization allows wild yeast and bacteria to compete with your wine yeast, creating vinegar or other off-flavors that ruin the entire batch. This is the single most common cause of failed homebrew wine.
- Adding too much sugar causes fermentation to stall partway through, leaving you with overly sweet wine that won’t finish properly. Measure carefully and trust your hydrometer readings.
- Disturbing the wine during fermentation by opening the vessel frequently introduces oxygen and disrupts the delicate fermentation process. Patience means leaving it alone except during scheduled rackings.
- Bottling too early before fermentation truly completes leads to exploding bottles as remaining yeast continues fermenting inside sealed containers. Always confirm dryness with a hydrometer before bottling.
- Using table grapes instead of wine grapes produces thinner, less complex wine lacking the proper balance of sugars, acids, and tannins. Concord or other juice grape varieties work better than eating grapes.
Serving Suggestions
Your homemade grape wine pairs beautifully with countless foods and occasions, from casual dinners to special celebrations. Serve it chilled if you prefer lighter, fruitier flavors, or at room temperature to experience its full body and complexity.
- With aged cheeses and cured meats like prosciutto or salami
- Alongside roasted chicken or duck with herb seasonings
- With Italian pasta dishes featuring tomato or cream-based sauces
- As an aperitif before dinner, especially if made on the drier side
- With berry desserts or chocolate, if you prefer a slightly sweeter homemade wine
Variations to Try
- Red wine style: Use darker grape varieties like Concord or Cabernet grapes and allow the skins to remain in contact with the juice longer for deeper color and bolder tannins. This creates a wine with more structure and aging potential.
- White wine style: Separate the juice from skins immediately after crushing and ferment the clear juice alone for a lighter, crisper finished wine. White wine ferments faster and develops peachy or floral notes.
- Fruit blend: Add one to two pounds of raisins or dried fruit during fermentation to increase complexity and create a richer mouthfeel. This works especially well if your fresh grapes are light on natural sugars.
- Sparkling wine: Bottle your wine before fermentation completes, allowing carbonation to build naturally in sealed bottles. This requires careful monitoring to prevent explosions and should only be attempted after you’ve made still wine successfully.
- Fortified wine: After fermentation completes, add 1 to 2 cups of brandy or high-proof spirits to increase alcohol content and create a wine that ages beautifully for years. This transforms your wine into something closer to port or sherry.
Dietary Adaptations
- Gluten-free: Wine naturally contains no gluten, though cross-contamination during equipment sharing is possible if you also bake. Always sanitize equipment thoroughly or dedicate tools solely to winemaking.
- Dairy-free: Traditional winemaking uses no dairy products, so your wine is naturally dairy-free. Some commercial wines use milk-based fining agents, but home winemaking avoids this entirely.
- Vegan: Homemade wine using just grapes, yeast, and basic additives is completely vegan-friendly. Avoid any fining agents derived from animal products if you use them.
- Low-carb/keto: Once fermentation completes fully to dryness, wine contains minimal carbohydrates and fits well into low-carb plans. One 5-ounce glass of dry wine contains roughly 3 to 4 grams of carbs.
Storage and Reheating
Refrigerator
Store opened bottles upright in the refrigerator with corks replaced loosely for up to two weeks. The cold slows oxidation and preserves remaining freshness.
- Leftover wine slowly oxidizes even in the cold, so finish opened bottles within two weeks
- Recork bottles between pours to minimize air exposure
Freezer
Wine doesn’t freeze solid easily due to its alcohol content, but you can freeze it in ice cube trays for later use in cooking. Thaw frozen wine cubes at room temperature before using.
- Frozen wine works perfectly for cooking sauces or deglazing pans
- Label your frozen wine cubes by date so you know freshness
Reheating
Homemade wine should never be heated aggressively, as this drives off delicate flavors and aromas. If using wine in hot dishes, add it near the end of cooking just to warm through.
- For cooking, add wine to hot pans and let it simmer briefly to burn off harsh alcohol notes
- Never let wine boil vigorously for extended periods, as this damages flavor compounds
Nutrition Information
| Nutrient | Amount |
|---|---|
| Calories | 120 |
| Total Fat | 0g |
| Saturated Fat | 0g |
| Carbohydrates | 4g |
| Fiber | 0g |
| Sugar | 1g |
| Protein | 0g |
| Sodium | 5mg |
| Cholesterol | 0mg |
Nutrition values assume a 5-ounce serving of finished dry wine with minimal residual sugar. Values vary based on your specific grapes, added sugars, and how dry you ferment the final product.
Frequently Asked Questions
Can I use bottled grape juice instead of fresh grapes?
You can, but the flavor will be less complex and interesting than wine made from fresh grapes. Fresh grapes provide tannins and subtle flavor compounds that bottled juice lacks, so the result tastes more like fermented juice than true wine.
How long does homemade grape wine last after bottling?
A properly made dry wine lasts five to ten years in a cool, dark location, with flavors often improving during the first three years. Sweeter wines age faster and should be consumed within three to five years.
What’s the difference between primary and secondary fermentation?
Primary fermentation is the vigorous phase when yeast actively eats sugar and produces alcohol, usually lasting one to three weeks. Secondary fermentation is the slower maturation phase where remaining yeast settles and flavors continue developing over months.
Why is my wine cloudy even after sitting for months?
Cloudiness usually indicates yeast or sediment still suspended in the wine, which clears through racking or time. If it remains cloudy after multiple rackings, you may have a protein haze that requires special fining agents.
Can I make wine with frozen grapes?
Yes, frozen grapes work well because freezing breaks down cell walls and releases juice more easily. Thaw them first at room temperature, then proceed with the recipe as normal.
What does my wine smell like vinegar?
Vinegar smell means acetic acid bacteria contaminated your wine, likely from dirty equipment or too much oxygen exposure. Unfortunately, this batch is unsalvageable, but you’ll know to sanitize more thoroughly next time.
Should I rack my wine multiple times?
Racking two to three times total produces the clearest, cleanest wine by separating it from accumulated sediment. Each racking also exposes the wine to some oxygen, which can be beneficial in small amounts but harmful in excess.
Final Thoughts
Making grape wine teaches patience, attention to detail, and respect for the winemaking craft. The process reveals how simple ingredients transform into something extraordinary through time and care.
Start your first batch today and join thousands of home winemakers who’ve discovered this rewarding hobby. By next season, you’ll have beautiful bottles to share and memories of the journey from grape to glass.
Ready to explore more fermentation projects and beverage recipes? Check out our guide to muscadine wine recipe for a regional twist on winemaking, or discover the unique flavors in our blueberry wine recipe to expand your fermentation skills beyond traditional grapes.
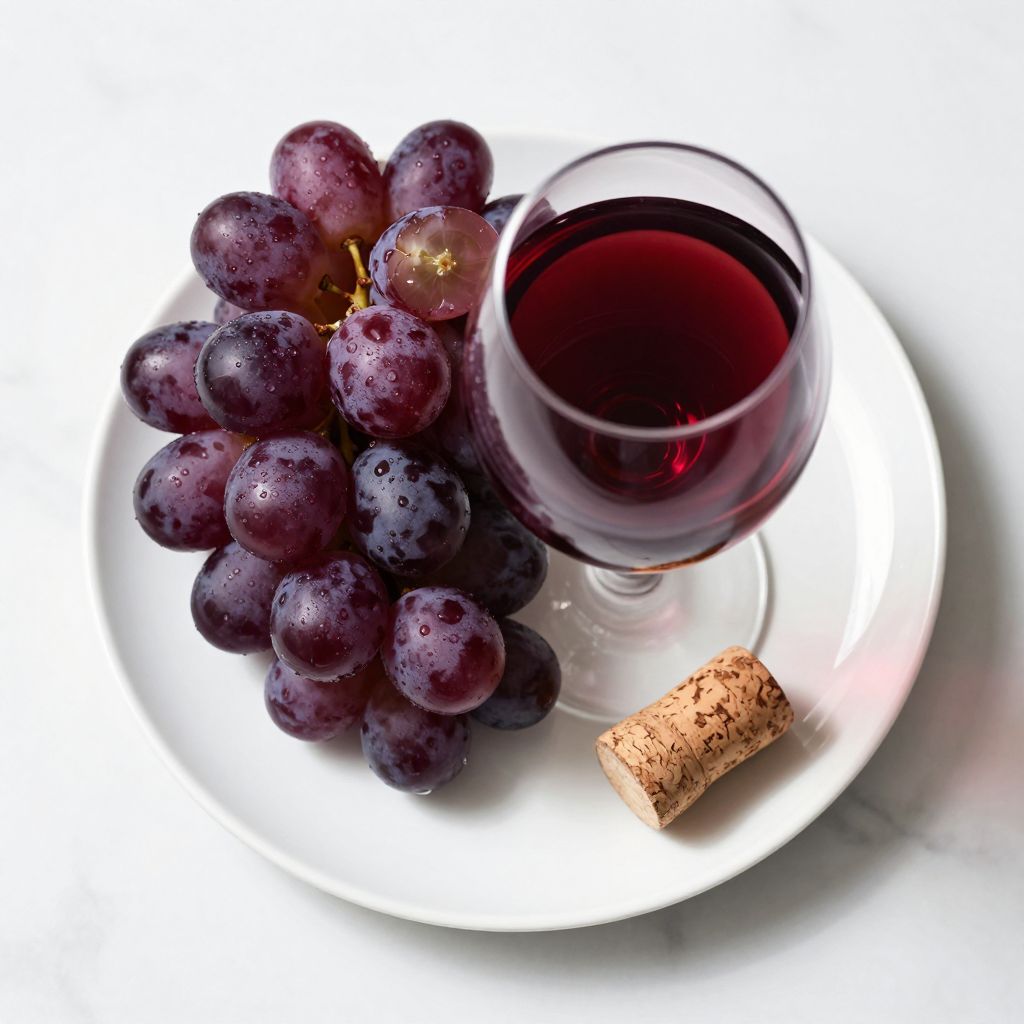
Homemade Grape Wine
Ingredients
Equipment
Method
- Sanitize every piece of equipment with a food-grade sterilizer or sanitizing solution before starting.
- Rinse your grapes thoroughly, remove stems and leaves, and crush them by hand into the fermentation vessel, breaking the skins to release juice.
- Use a hydrometer to measure the specific gravity or Brix of the crushed grapes to determine sugar content.
- Add granulated sugar, acid blend, tannin powder, and yeast nutrient to the must and stir vigorously until fully dissolved.
- Rehydrate wine yeast in warm (not hot) water according to package directions, let sit for 10 minutes, then pour into the must and stir gently to combine.
- Cover the vessel with an airlock and ferment in a cool, dark location at 60–75°F (15–24°C) for 1 to 3 weeks during primary fermentation.
- After fermentation slows and sediment settles (1 to 3 weeks), siphon the wine into a clean secondary vessel leaving lees behind, attach an airlock, and continue fermenting for 2 to 4 months.
- When bubbles cease for several weeks, confirm dryness with a hydrometer, then dissolve potassium sorbate in a small amount of wine and stir gently to stabilize.
- Siphon the finished wine into sanitized bottles leaving about 1/2 inch of headspace, cork or cap each bottle, and store upright in a cool, dark place for at least two weeks before opening.