
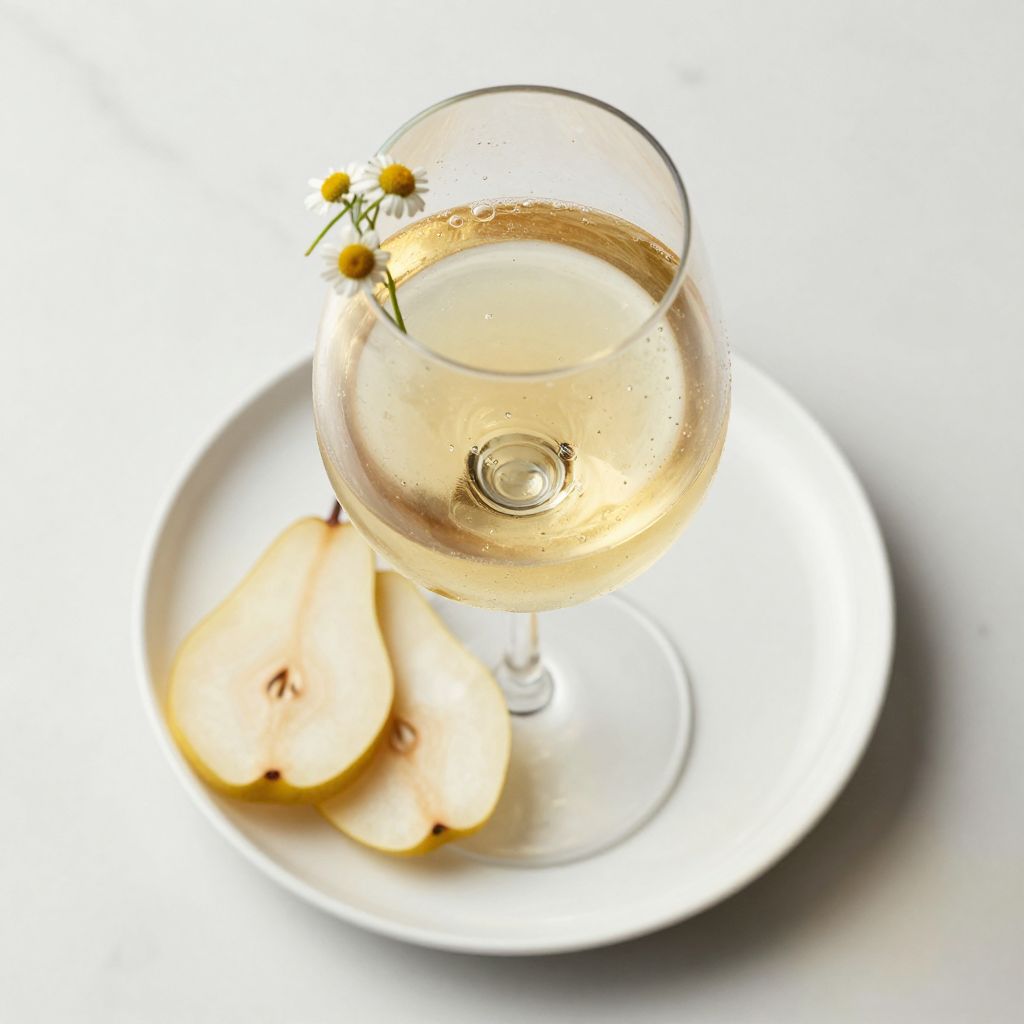
There’s something magical about the moment you first taste homemade pear wine, golden and slightly sweet, with a delicate floral note that supermarket bottles can’t quite capture. Pear wine is one of those rewarding projects that feels fancy but asks very little of you in return.
This recipe walks you through fermenting fresh pears into a smooth, elegant wine that friends will genuinely be impressed by. What makes this special is the balance: pears give you natural sweetness and a subtle complexity that pairs beautifully with a crisp finish.
Whether you’re a seasoned home winemaker looking for something lighter than grape wine or a curious beginner ready to try your hand at fermentation, this pear wine delivers clean, approachable results every time. Ready to fill your bottles with liquid gold?
Why You’ll Love This Recipe
Pear wine sits in that perfect sweet spot between simple and sophisticated. You need just a handful of ingredients and basic equipment, yet the finished product tastes like you spent weeks perfecting your craft.
- Naturally sweet pears create a wine that’s smooth and drinkable without heavy processing
- The entire fermentation takes 3 to 4 months, so you’re not waiting years for results
- Works beautifully as a gift, at dinner parties, or as a personal project you can be proud of
- Forgiving enough for beginners but rewarding enough to make again and again
- Pairs with desserts, light meals, and quiet evenings equally well
My Experience Making This Recipe
I made my first batch of pear wine on a crisp autumn morning when the farmers market had overflowing crates of Bartlett and Bosc pears at half price. I was honestly nervous, worried I’d mess up something basic and end up with a gallon of expensive fruit vinegar.
Three months later, I bottled a beautiful pale gold wine that tasted nothing like my fears. The first sip was revelatory: clean, slightly floral, with just enough sweetness to make it interesting but not cloying.
My friends have since begged for more, and I’ve made six batches now, experimenting with different pear varieties and adding honey or spices to some batches. Every single one has been a success, which tells you everything you need to know about how forgiving this process really is.
Recipe Overview
- Recipe Name: Homemade Pear Wine
- Servings: Approximately 24 servings (one 5-gallon batch yields about 24 standard wine bottles)
- Prep Time: 45 minutes
- Fermentation Time: 12 to 16 weeks
- Total Time: 13 to 17 weeks
- Course: Beverage
- Cuisine: European, Home Winemaking
- Alcohol Content: Approximately 10 to 12% ABV
- Calories per Serving: Approximately 120 calories
Equipment You Will Need
- 5-gallon glass carboy or food-grade plastic fermenter
- Airlock and bung to fit your carboy
- Long-handled wooden spoon for stirring
- Hydrometer to measure sugar content and fermentation progress
- Wine bottles and corks or caps for bottling
- Siphon with tubing for racking (transferring wine between containers)
- Large stainless steel pot for crushing pears
- Cheesecloth or mesh strainer
- Thermometer to monitor fermentation temperature
- Sanitizing solution (such as potassium metabisulfite)
- Wine thief or turkey baster for sampling
Ingredients for Pear Wine
- 15 pounds fresh pears (a mix of Bartlett, Bosc, and Anjou varieties works beautifully)
- 1 teaspoon pectic enzyme
- 1 teaspoon yeast nutrient
- 1/4 teaspoon potassium metabisulfite (or one crushed Campden tablet)
- 1 packet wine yeast (Lalvin EC-1118 or similar white wine yeast)
- 1 gallon filtered water
- 2 pounds sugar (if pears are not very ripe or sweet)
- 1/2 teaspoon tannin (optional, adds complexity and body)
Ingredient Notes and Substitutions
- Fresh pears: These provide natural sugars, pectin, and flavor complexity that define your finished wine. If fresh pears aren’t available, you can use 12 to 14 pounds of bottled pear juice (unsweetened, no additives), though the flavor will be slightly less nuanced.
- Pectic enzyme: This breaks down pectins in fruit and helps clarify your wine faster. Skip it if necessary, but your wine will take longer to clear and may have a hazy appearance even when finished.
- Wine yeast: White wine yeast strains like EC-1118 ferment cleanly and don’t add unwanted flavors. Bread yeast or baker’s yeast will ferment but produces off-flavors and creates more sediment, so it’s worth getting proper wine yeast.
- Potassium metabisulfite: This prevents oxidation and wild fermentation. If you can’t source it, use one Campden tablet crushed and dissolved in water before adding to your batch.
- Sugar: Only add sugar if your pears are underripe or not very sweet; ripe, flavorful pears may need less or none. You can measure using a hydrometer to check your starting gravity and adjust accordingly.
How to Make Pear Wine
Step 1: Sanitize Your Equipment
Before you touch a single pear, sanitize everything that will contact your wine using a proper sanitizing solution mixed to the manufacturer’s instructions. Wild yeast and bacteria live on surfaces and can spoil your batch, so this step genuinely matters even though it feels boring.
Step 2: Prepare Your Pears
Wash your pears under cold running water, then cut them into quarters, removing stems and any bruised sections. You don’t need to peel them; the skins add color, tannins, and flavor that contribute to a more complex finished wine.
Step 3: Crush the Pears
Crush your pear quarters by hand or with a potato masher in a large stainless steel pot until you have a rough pulp. Crushing releases juice and increases the surface area of fruit that comes into contact with your wine must, speeding up fermentation.
Step 4: Add Pectic Enzyme and Metabisulfite
Stir the pectic enzyme and potassium metabisulfite (or one crushed Campden tablet) into your crushed pears. Wait 12 to 24 hours before proceeding; this waiting period allows the metabisulfite to kill any wild yeast and bacteria while the pectic enzyme starts breaking down pectins.
Step 5: Strain and Mix Your Must
Pour the pear pulp through cheesecloth or a fine mesh strainer into your carboy, pressing gently to extract as much liquid as possible without crushing seeds (which add bitter tannins). Add your filtered water and any sugar you’re using, then stir well to dissolve the sugar completely.
Step 6: Check Your Starting Gravity and Add Nutrients
Use your hydrometer to measure the specific gravity of your must; you’re aiming for a starting gravity between 1.080 and 1.100, which will produce a finished wine around 10 to 12% alcohol. Stir in your yeast nutrient and tannin (if using), then measure your liquid temperature.
Step 7: Hydrate and Pitch Your Yeast
In a small bowl, mix your wine yeast with a little warm (not hot) filtered water and let it sit for 15 minutes to hydrate. Pour your hydrated yeast into the carboy, stir gently for about a minute, then fit your airlock securely into the carboy’s opening.
Hydrating yeast before adding it helps it acclimate to your wine and results in a faster, more vigorous fermentation. A good fermentation should show visible bubbling through the airlock within 24 to 48 hours.
Step 8: Monitor Fermentation
Keep your carboy in a cool location (60 to 70 degrees Fahrenheit is ideal) away from direct sunlight, and watch your airlock bubble regularly for 2 to 3 weeks. After the vigorous fermentation slows, you can use your hydrometer to check progress; when gravity stabilizes at around 0.995 to 1.000, primary fermentation is complete.
Step 9: Rack Your Wine
Using your siphon, carefully transfer your wine from the carboy into a clean, sanitized secondary fermenter, leaving behind as much of the settled sediment (called “lees”) as possible. Racking separates the wine from dead yeast and other solids, improving clarity and flavor.
Fit your secondary carboy with an airlock again; secondary fermentation typically takes another 2 to 3 months. During this time, your wine will continue to clear and develop complexity.
Step 10: Check for Clarity and Bottle
After 3 to 4 months total, your wine should be clear or nearly clear and gravity should be stable at around 0.990 or lower. Rack one final time into clean bottles, leaving behind any remaining sediment, then cork or cap securely.
Pro Tip: Temperature control is the single most important factor in clean fermentation; keeping your carboy between 60 and 70 degrees Fahrenheit prevents stuck fermentation and off-flavors, so invest in a cool, dark corner of your home or a temperature-controlled space.
Tips for the Best Pear Wine
- Choose ripe, fragrant pears; they ferment faster and produce more complex flavor than underripe ones. A pear that smells distinctly pear-like at purchase will make noticeably better wine.
- Use a hydrometer consistently throughout fermentation to understand your progress and know when you’re done. Guessing based on taste or bubbling can lead to either stuck fermentation or residual sweetness you didn’t intend.
- Keep detailed notes on dates, temperatures, gravity readings, and any adjustments you make. This record helps you replicate successes and troubleshoot problems in future batches.
- Avoid splashing or shaking your carboy during fermentation; agitation can introduce oxidation and spoilage organisms. Handle your carboy gently and only when necessary.
- Be patient with clarity; pear wine can take longer to clear than grape wine because pears contain more pectin. Adding pectic enzyme helps, but sometimes you simply need to wait a few extra weeks.
- Store your finished wine in a cool, dark place at around 50 to 55 degrees Fahrenheit; this slows any remaining yeast activity and oxidation, keeping your wine fresh and stable for years.
Common Mistakes to Avoid
- Skipping sanitation: Even one contaminated surface ruins your entire batch, so clean thoroughly with a proper sanitizing solution, not just soap and water.
- Using underripe or low-quality pears: Pear wine is only as good as your starting fruit; bargain basement pears produce thin, flavorless wine no amount of technique can fix.
- Fermenting too warm: Temperatures above 75 degrees speed fermentation but produce off-flavors and can kill your yeast; aim for a steady 60 to 70 degrees.
- Topping off with water instead of wine during storage: Water introduces oxygen and dilutes your final product; use extra wine you’ve held back or a similar wine for topping off.
- Bottling before fermentation is truly complete: Residual sugar and yeast in the bottle can cause carbonation or exploding corks; wait until gravity is stable for at least a week before bottling.
Serving Suggestions
Pear wine is wonderfully versatile and works in settings where you might otherwise uncork a dry white or light dessert wine. Serve it chilled but not ice cold, around 45 to 50 degrees, to let the delicate pear character shine through.
- Pair with soft cheeses like Brie or fresh goat cheese and a selection of crackers
- Serve alongside light desserts like panna cotta, lemon cake, or almond biscotti
- Enjoy as an aperitif on a summer afternoon, perhaps with a splash of sparkling water
- Complement grilled chicken, roasted pork, or light fish dishes
- Sip on its own as a contemplative evening wine with good conversation
Variations to Try
- Honey pear wine: Replace half of your water with honey for a richer, rounder mouthfeel and slightly higher alcohol content; the honey doesn’t overpower the pear but adds subtle depth and complexity.
- Spiced pear wine: Add one cinnamon stick, three whole cloves, and two star anise to your must during fermentation; remove them after 2 weeks so the spice doesn’t become overwhelming. This variation works beautifully during fall and winter.
- Pear and ginger wine: Add two ounces of fresh ginger sliced thin during primary fermentation; the ginger adds warmth and subtle heat that complements pear’s delicate nature without dominating it.
- Dry pear wine: Reduce your starting sugar and add extra yeast nutrient to encourage the yeast to ferment completely dry; the result is crisper and more food-friendly, less like dessert wine.
- Pear and herb wine: Add fresh lemon balm or chamomile flowers during the last week of primary fermentation for a subtle herbal note that makes your wine feel almost medicinal and special.
Dietary Adaptations
- Gluten-free: Pear wine is naturally gluten-free; just verify your yeast and any additives carry gluten-free certification, which most commercial wine yeasts do.
- Vegan: Some winemakers use animal-derived fining agents to clarify wine; use plant-based alternatives like pea protein or bentonite clay, or simply wait longer for natural clarification.
- Lower sugar/dry wine: Follow the dry pear wine variation instructions and let fermentation complete fully; you’ll lose sweetness but gain food-pairing versatility.
- Lower alcohol: Add less sugar or use less fruit juice to start; aim for a gravity around 1.060 to 1.070 instead of 1.080 to 1.100, which produces around 8% alcohol instead of 12%.
Storage and Reheating
Refrigerator
Store sealed wine bottles upright in a cool, dark cupboard or wine fridge at around 50 to 55 degrees Fahrenheit rather than in your regular refrigerator. Wine stored this way stays fresh and stable for 1 to 2 years, developing more complexity over time.
- Keep bottles away from light, heat, and vibration
- Store in darkness; light degrades wine quality noticeably
- Avoid temperature fluctuations; consistency matters more than absolute cold
Freezer
Don’t freeze wine in bottles; the liquid expands and can pop the cork or crack glass. You can freeze leftover wine in ice cube trays for cooking purposes.
- Frozen wine cubes work beautifully in sauces, reductions, and cooking
- Store frozen wine cubes in a freezer bag for up to 6 months
Reheating
Wine is not typically reheated since fermentation is complete and the product is shelf-stable. Open a bottle, chill to 45 to 50 degrees, and enjoy at your leisure.
- If using wine in cooking, add it cold to your pot and let it warm naturally with your food
- Never boil wine vigorously; slow simmering preserves better flavor than rapid boiling
Nutrition Information
| Nutrient | Amount |
|---|---|
| Calories | 120 |
| Total Fat | 0 grams |
| Saturated Fat | 0 grams |
| Carbohydrates | 4 grams |
| Fiber | 0 grams |
| Sugar | 2 grams |
| Protein | 0 grams |
| Sodium | 10 milligrams |
| Cholesterol | 0 milligrams |
These values are approximate and based on a 5-ounce serving of finished pear wine with approximately 11% alcohol content. Actual nutrition varies slightly based on residual sugar and fermentation completion.
Frequently Asked Questions
Can I make pear wine with bottled pear juice instead of fresh pears?
Yes, bottled unsweetened pear juice works when fresh pears aren’t available, though the flavor will be less vibrant and complex. Use 12 to 14 pounds of juice and skip the crushing and straining steps.
How do I know when my pear wine is finished fermenting?
Use your hydrometer to check gravity; fermentation is complete when gravity stabilizes around 0.990 to 1.000 and shows no change over at least one week. You can also taste for continued sweetness; dry wine tastes almost bone-dry without residual sugar.
Why is my pear wine cloudy even after months of sitting?
Pear wine can take longer to clear than grape wine because pears contain substantial pectin; make sure you used pectic enzyme and gave it time to work. If still cloudy after 4 months, use a fining agent like bentonite clay to speed clarification.
Can I add more sugar to my finished wine to make it sweeter?
You can, but only after fermentation is completely finished and your yeast is dead or dormant. Add sugar slowly, taste frequently, and store in a cool place; any residual yeast activity could restart fermentation and create unwanted carbonation.
What should my pear wine smell like during fermentation?
A healthy fermentation smells fruity and slightly yeasty, almost like bread rising. Off odors like vinegar, rotten fruit, or sulfur indicate a problem; if you notice these, rack immediately into a clean carboy and add a crushed Campden tablet to halt spoilage.
How long can I age pear wine before it goes bad?
Properly stored pear wine stays fresh and drinkable for 2 to 3 years, though it peaks in flavor around 6 to 12 months after bottling. After 3 years, quality begins declining slowly due to oxidation and yeast settling.
Final Thoughts
Making pear wine feels like a minor miracle the first time you taste something you created from scratch, something that tastes clean and complex and genuinely delicious. The process itself is forgiving enough to build your confidence as a home winemaker while rewarding enough to make you want to keep experimenting.
Start your first batch this week, be patient through the quiet months of fermentation, and enjoy the satisfaction of bottling something special. Your friends will thank you, and you’ll never look at a crate of pears the same way again.
Explore More Homemade Wine Recipes
Once you’ve mastered pear wine, consider expanding your home fermentation hobby with other fruit wines and beverages that offer similarly rewarding experiences.
- Try making muscadine wine recipe for a deeper, more robust flavor profile
- Experiment with peach wine recipe for a stone fruit alternative
Homemade Pear Wine
Ingredients
Equipment
Method
- Sanitize all equipment using sanitizing solution according to manufacturer’s instructions.
- Wash and quarter 15 pounds fresh pears under cold water, removing stems and any bruised sections.
- Crush pear quarters in a large stainless steel pot using a potato masher until you have a rough pulp.
- Stir in 1 teaspoon pectic enzyme and 1/4 teaspoon potassium metabisulfite, cover and wait 12 to 24 hours.
- After 12–24 hours, strain the pear pulp through cheesecloth or a fine mesh strainer into the fermenter, pressing gently to extract as much juice as possible.
- Add 1 gallon filtered water and 2 pounds sugar (if needed), stir until sugar is fully dissolved.
- Measure starting gravity with a hydrometer aiming for 1.080–1.100, then stir in 1 teaspoon yeast nutrient and 1/2 teaspoon tannin.
- Hydrate 1 packet wine yeast in warm (not hot) filtered water for 15 minutes, then pitch into the must and fit the airlock.
- Ferment at 60–70°F for 12 to 16 weeks, monitoring the airlock for bubbling; primary fermentation slows when gravity reaches 0.995–1.000.
- Rack the wine into a sanitized secondary fermenter using a siphon, leaving behind sediment (lees).
- Secondary ferment for another 8 to 12 weeks until clear and gravity stabilizes around 0.990.
- Rack one final time into clean, sanitized bottles, leaving sediment behind, then cork or cap securely.
- Age bottles in a cool, dark place (50–55°F) for at least 6 to 12 months before serving.