
There’s something magical about the first sip of homemade hard cider on a crisp fall afternoon, when the apples are at their sweetest and fermentation has worked its quiet magic.
Hard apple cider is one of the easiest fermented drinks you can make at home, requiring just apples, yeast, and patience. Unlike beer or wine, cider needs no special equipment or technical expertise, making it perfect for curious home cooks who want to explore fermentation without the intimidation.
What makes this recipe special is its simplicity paired with endless customization options. You control the sweetness, alcohol content, and flavor profile by choosing your apple varieties and fermentation duration.
Why You’ll Love This Recipe
Making hard apple cider at home delivers a rewarding, hands-off process that yields professional-quality results in just a few weeks.
- Minimal ingredients and equipment needed to get started
- Fermentation does the heavy lifting while you wait
- Customizable sweetness and flavor based on apple choice
- Significantly cheaper than buying craft ciders year-round
- Impressive to serve at gatherings and genuinely delicious
My Experience Making This Recipe
I made my first batch of cider on a whim after picking apples at a local orchard, skeptical I could actually pull it off. Within three weeks, I had converted a gallon of fresh apple juice into something surprisingly sophisticated that tasted nothing like the syrupy stuff from the store.
The smell during active fermentation is distinctive and vinegary, which initially alarmed me, but that’s exactly what you want. Once I bottled it and let it carbonate for two weeks, the transformation was undeniable.
My friends were genuinely shocked when I told them it was homemade, and now I make multiple batches each autumn. The pride in serving something you fermented yourself is worth far more than the modest effort required.
Recipe Overview
- Recipe Name: Homemade Hard Apple Cider
- Servings: 8 servings (one gallon yield)
- Prep Time: 15 minutes
- Fermentation Time: 21 to 30 days
- Total Time: 3 to 4 weeks plus bottling
- Course: Beverage
- Cuisine: American
- Alcohol Content: 5 to 7 percent ABV
- Calories per Serving: 95 to 120
Equipment You Will Need
- One-gallon glass carboy or fermentation jar
- Airlock and rubber stopper or carboy cap
- Auto-siphon or bottling wand
- Sanitizing solution (Star San or bleach)
- Hydrometer for measuring specific gravity
- Large pot or pitcher for mixing
- Strainer or cheesecloth
- Bottles with caps or cork bottles for storage
- Bottle capper if using bottle caps
- Thermometer for checking temperature
Ingredients for Hard Apple Cider
- One gallon of fresh apple cider or apple juice (unpasteurized preferred, but pasteurized works)
- One packet of champagne yeast or ale yeast (such as Lalvin EC-1118)
- One quarter teaspoon of yeast nutrient (optional but helpful)
- Water for sanitizing equipment
Ingredient Notes and Substitutions
- Apple cider or juice: This is your base, and its quality directly impacts your final product. Fresh, unpasteurized cider creates the most authentic flavor, but pasteurized juice works fine and is safer. You can mix cider with juice concentrate if you want to adjust sweetness or use multiple apple varieties for complexity.
- Champagne yeast: This strain ferments cleanly and completely, leaving minimal residual sweetness. If you prefer a sweeter cider, substitute with ale yeast or wine yeast, which ferment more slowly and leave more residual sugar.
- Yeast nutrient: This feeds the yeast and ensures robust fermentation, preventing off-flavors. You can skip it if you’re only making one batch, but it’s inexpensive insurance for success.
How to Make Hard Apple Cider
Step 1: Sanitize All Equipment
Before fermentation begins, every piece of equipment that touches your cider must be sanitized to prevent contamination from wild yeasts and bacteria. Mix your sanitizing solution according to package directions, then soak or spray all equipment including the carboy, airlock, siphon, and any utensils.
Thorough sanitization is the difference between beautiful cider and a spoiled batch, so don’t skip or rush this step.
Step 2: Pour Cider into the Carboy
Once all equipment is sanitized and air-dried, carefully pour your gallon of apple cider into the cleaned carboy. Fill it to about an inch below the mouth to leave headspace for foam and bubbles that form during fermentation.
If you’re using cold juice straight from the refrigerator, let it sit at room temperature for a couple of hours so the yeast can work efficiently.
Step 3: Take an Initial Gravity Reading
Before adding yeast, use your hydrometer to measure the specific gravity of your cider by floating it in a sample. Record this number because you’ll use it later to calculate alcohol content and determine when fermentation is complete.
Most apple ciders start between 1.040 and 1.060 gravity, depending on sugar content and juice type.
Step 4: Prepare the Yeast
Sprinkle the champagne yeast packet directly onto the surface of the cider without stirring, a process called “dry pitching.” If you’re using the yeast nutrient, stir it in first, then add the yeast.
Let the yeast sit undisturbed for about 10 minutes to begin hydrating before you stir.
Step 5: Aerate and Pitch the Yeast
After 10 minutes, gently stir the cider with a sanitized spoon for about one minute to aerate it and fully incorporate the yeast. Aeration gives yeast the oxygen it needs during the early fermentation stage, producing cleaner flavors.
Don’t stir vigorously or you’ll introduce too much air later in fermentation, which can create unwanted oxidation.
Step 6: Install the Airlock and Let Fermentation Begin
Quickly fit the rubber stopper with the airlock into the carboy mouth to seal it while allowing carbon dioxide to escape. Place your carboy in a cool location between 65 and 72 degrees Fahrenheit, away from direct sunlight.
Within 24 to 48 hours, you should see bubbles rising through the airlock, a sign that fermentation is actively happening.
Step 7: Monitor Fermentation Progress
Check your cider every few days by observing the bubble rate in the airlock and the clarity of the liquid. During the first week, fermentation is vigorous, and you’ll see steady bubbling.
By week two, the bubble rate slows significantly as the yeast begins to settle, which is completely normal and expected.
Step 8: Check Final Gravity and Confirm Fermentation Complete
After two to three weeks, use your hydrometer to take another gravity reading from a sample valve at the bottom of the carboy. When the gravity stops dropping and stabilizes over a few days, fermentation is finished.
The specific gravity should drop to around 0.990 to 1.010 depending on your starting gravity and yeast choice.
Step 9: Rack the Cider (Optional but Recommended)
Using an auto-siphon or bottling wand, carefully siphon the clear cider off the layer of dead yeast and sediment at the bottom into a sanitized secondary carboy. This improves clarity and removes flavors from spent yeast that can taste bitter.
If you skip this step, your cider will still be fine, just slightly cloudier.
Step 10: Bottle and Carbonate
Siphon your finished cider into clean bottles with caps or corks, leaving a half-inch of headspace from the top. If you want still cider, cap it now and refrigerate.
For carbonation, add one quarter teaspoon of sugar dissolved in a teaspoon of water to each 12-ounce bottle, cap it, and let it sit at room temperature for two weeks until carbonation develops.
Pro Tip: Temperature control is your single most important variable during fermentation; keep your cider between 65 and 72 degrees for the cleanest results and fastest fermentation.
Tips for the Best Hard Apple Cider
- Use a blend of apple juice varieties like a mix of sweet and tart apples for complexity. Straight sweet apple juice makes cider that lacks depth, while tart varieties alone create something too sour.
- Check your airlock water level every few days to ensure it never runs dry. A dry airlock lets oxygen back into the carboy, which causes oxidation and off-flavors.
- Keep fermentation temperatures consistent to prevent stressing the yeast. Fluctuations between 50 and 75 degrees won’t ruin a batch, but 65 to 72 degrees is the sweet spot.
- Taste your cider at bottling to gauge sweetness and plan your sugar additions accordingly. Some people prefer bone-dry cider with no carbonation, while others want something sweet and bubbly.
- Bottle your cider within four to six weeks of starting fermentation for best results. Extended aging in a carboy can introduce off-flavors and oxidation.
- Store finished bottles upright at room temperature during carbonation, then refrigerate finished bottles to slow any further fermentation. Cold storage preserves carbonation and prevents over-carbonation from continuing yeast activity.
Common Mistakes to Avoid
- Using pasteurized juice without adding yeast is the number one failure. Store-bought juice has no wild yeast, so it won’t ferment unless you pitch commercial yeast.
- Adding too much sugar during carbonation causes bottle explosions from excessive pressure. Stick to one quarter teaspoon per 12 ounces unless you have experience with priming calculations.
- Opening the carboy repeatedly to check on fermentation introduces contamination risk and lets volatile aromas escape. Trust the process and use your hydrometer sparingly through the sample valve.
- Fermenting at warm temperatures above 75 degrees stresses yeast and creates hot, fusel-alcohol flavors. Keep your cider in a cool closet, basement, or temperature-controlled area.
- Skipping sanitization and believing “it will probably be fine” leads to vinegar instead of cider. One batch ruined teaches this lesson permanently.
Serving Suggestions
Hard cider shines when served ice-cold in a chilled glass, whether still or carbonated. The refreshing acidity and subtle apple sweetness pair beautifully with casual gatherings, dinner parties, or quiet evenings on the porch.
- Serve alongside roasted pork or duck for a complementary pairing that enhances both
- Pair with sharp cheddar and charcuterie for a seasonal cheese board
- Mix with a splash of bourbon for a homemade cider cocktail experience
- Serve still and warm with cinnamon sticks for a cozy autumn drink
- Offer as a unique gift to friends and family impressed by homemade beverages
Variations to Try
- Spiced Cider: Add cinnamon sticks, whole cloves, and star anise to the primary fermentation for warm, holiday-inspired flavors. Strain out solids before bottling and enjoy the aromatic complexity.
- Honey Cider: Replace one quarter of the apple cider with honey to create a sweeter, slightly stronger batch with floral notes. This variation takes slightly longer to ferment due to increased sugar content.
- Dry Hopped Cider: Add half an ounce of dried hops during the secondary fermentation for subtle bitterness and herbal character. This hybrid approach bridges cider and craft beer enthusiasts.
- Fruit Cider: Add one pound of fresh or frozen fruit like raspberries, peaches, or pears during secondary fermentation for fruity complexity. The additional sugars and tannins from fruit create interesting flavor interactions.
- Ginger Cider: Infuse two tablespoons of fresh ginger juice or one tablespoon of powdered ginger into the cider before bottling for sharp, peppery notes. This variation pairs beautifully with spicy food.
Dietary Adaptations
- Gluten-Free: All cider is naturally gluten-free if you use gluten-free yeast and equipment not previously used with grain products. This makes it a safe option for those with celiac disease or gluten sensitivity.
- Vegan: Hard cider is already vegan since it contains no animal products. Confirm your yeast brand uses no animal-derived processing aids if you want to be thorough.
- Low-Sugar: Use champagne yeast, which ferments completely dry, leaving minimal residual sugar. Skip added sugars during carbonation to keep the final product dry and less sweet.
- Lower Alcohol: Stop fermentation early by cold-crashing the carboy in a freezer for 24 hours to drop alcohol content to 3 to 4 percent ABV. This preserves residual sweetness while reducing alcohol content.
Storage and Reheating
Refrigerator
Store sealed bottles of finished hard cider in the refrigerator for up to one year, where cold temperatures slow oxidation and preserve carbonation. The colder the storage, the longer your cider maintains its fresh apple character and fizz.
- Keep bottles upright to minimize contact between cider and caps
- Store away from light exposure to prevent degradation
- Consume within three to six months for peak carbonation and flavor
Freezer
Freezing cider is not recommended for carbonated bottles, as expanding liquid can burst the bottles. Still cider can be frozen for extended storage, though flavor can become muted.
- Leave two inches of headspace if freezing still cider in bottles
- Thaw in the refrigerator overnight before consuming
Reheating
Hard cider is best served chilled and not heated, as warming damages delicate flavors. If you want warm cider, heat still cider gently in a pot without boiling, which drives off carbonation anyway.
- Warm still cider with cinnamon sticks and cloves to about 140 degrees for a cozy drink
- Never boil cider, which reduces its alcohol content and concentrates harsh flavors
Nutrition Information
| Nutrient | Amount |
|---|---|
| Calories | 95 to 120 |
| Total Fat | 0 grams |
| Saturated Fat | 0 grams |
| Carbohydrates | 4 to 8 grams |
| Fiber | 0 grams |
| Sugar | 2 to 6 grams |
| Protein | 0 grams |
| Sodium | 5 to 15 milligrams |
| Cholesterol | 0 milligrams |
Nutritional values vary based on fermentation completion level, residual sugar, and your specific apple juice brand. The values above represent a typical dry cider with 5 to 6 percent alcohol by volume.
Frequently Asked Questions
Can I use store-bought pasteurized apple juice instead of fresh cider?
Yes, pasteurized juice works perfectly fine for fermentation if you pitch commercial yeast. The only downside is that pasteurized juice may have less complex apple flavor compared to fresh cider, resulting in a simpler finished product.
How do I know when fermentation is completely finished?
Take gravity readings three to four days apart using your hydrometer. When the specific gravity reading hasn’t changed between two consecutive readings, fermentation is complete and bottling is safe.
What does it mean if my airlock stops bubbling after one week?
Slow or stopped bubbling after one week is normal and doesn’t mean fermentation failed. The yeast is still working; it’s just in a slower phase where less carbon dioxide is produced, so fewer bubbles appear.
Can I use bread yeast instead of champagne yeast?
Bread yeast will ferment cider but produces more off-flavors and stops at lower alcohol levels than champagne yeast. For your first batch, stick with champagne or wine yeast for cleaner, more professional results.
Why does my cider smell like vinegar during fermentation?
Vinegar smell during active fermentation is completely normal and comes from acetic acid produced during yeast metabolism. This smell dissipates once fermentation finishes and the cider ages; your final product will smell and taste like cider, not vinegar.
How much alcohol is in my finished cider?
Subtract your final gravity from your initial gravity, multiply by 131, and you have the approximate alcohol by volume percentage. For example, if you started at 1.055 and finished at 1.000, your cider is about 7.2 percent alcohol.
Can I recarbonate a bottle that went flat?
Yes, you can add a small amount of sugar solution to flat cider and reseal it to restart carbonation. Check the cap seal carefully and ensure the bottle is in good condition before recarbonating to avoid explosions from trapped pressure.
Final Thoughts
Making hard apple cider at home transforms a simple gallon of apple juice into something genuinely special that showcases your effort and care. The process teaches patience while rewarding you with a beverage that tastes far better than anything you can buy for the same price.
Grab some apple cider, pitch your yeast, and let fermentation work its quiet magic over the next few weeks. You’ll be amazed at what you’ve created, and your friends will be even more amazed when you tell them you made it yourself.
Want to explore more beverage recipes and mixology inspiration? Check out Mostly Cocktails for more drink ideas, or try making a Honey Deuce recipe to pair with your homemade cider at your next gathering.
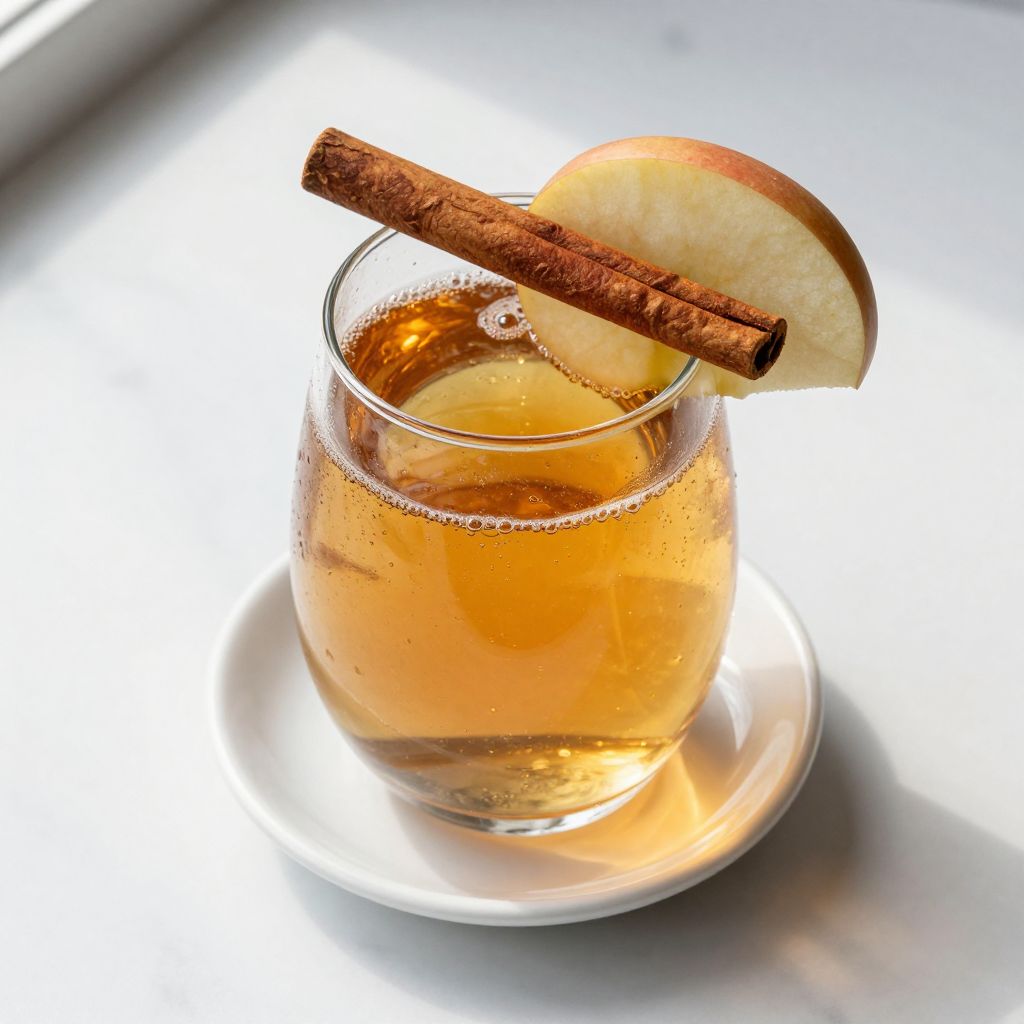
Homemade Hard Apple Cider
Ingredients
Equipment
Method
- Sanitize all equipment using sanitizing solution according to package instructions.
- Pour one gallon of apple cider into the carboy, leaving about one inch of headspace.
- Take an initial gravity reading with a hydrometer and record the value.
- Sprinkle the yeast (and yeast nutrient if using) onto the surface of the cider and let it hydrate for 10 minutes.
- Gently stir the cider for one minute to aerate and incorporate the yeast.
- Fit the rubber stopper and airlock, then ferment at 65 to 72°F for 21 to 30 days.
- Monitor fermentation by observing airlock bubbling and cider clarity over the fermentation period.
- After 2 to 3 weeks, check the final gravity with a hydrometer to ensure fermentation is complete.
- Optional: Rack the cider off the sediment into a secondary carboy to improve clarity.
- To bottle still cider, siphon into bottles leaving a half-inch headspace, cap, and refrigerate.
- To carbonate, add one quarter teaspoon of sugar solution to each 12-ounce bottle, cap, and condition at room temperature for two weeks.