
The sharp, spicy bite of homemade ginger beer hits different when you’ve crafted it yourself from a living ginger bug starter. Making ginger beer with a ginger bug teaches you real fermentation science while rewarding you with a fizzy, complex beverage that tastes nothing like the flat, overly sweet store-bought versions.
This recipe is special because it combines old-school fermentation technique with modern convenience. You’ll create a ginger bug (a simple fermented starter) over five days, then use it to carbonate fresh ginger beer in just 48 hours, giving you control over sweetness, spice level, and fizz intensity.
Why You’ll Love This Recipe
Homemade ginger beer tastes brighter, spicier, and more alive than anything you can buy. The fermentation process develops complex flavors that store-bought versions simply cannot match.
- You control the spice level and sweetness from start to finish
- A living ginger bug can be maintained indefinitely, making endless batches
- The fermentation process is low-maintenance and nearly foolproof once you understand the basics
- You’ll impress friends and family with a genuinely craft beverage
- Far cheaper per batch than premium commercial ginger beer
My Experience Making This Recipe
I was skeptical about fermenting ginger bug at first, worried I’d create a science experiment instead of something drinkable. After that first batch, when carbonated ginger beer poured into a glass with actual natural fizz and genuine ginger fire, I was hooked.
The smell that develops in your ginger bug over five days is unmistakable: funky, yeasty, alive, and oddly appetizing once you understand what’s happening. My kitchen smelled like a working brewery, and I found myself checking on the jar obsessively, watching the bubbles multiply each day.
Friends who tasted the final product immediately wanted the recipe, and I loved explaining that this wasn’t some complicated process but rather a simple partnership with wild yeast and bacteria doing what they’ve done for centuries. The best part? Knowing exactly what went into my drink.
Recipe Overview
- Recipe Name: Ginger Beer with Ginger Bug
- Servings: Makes approximately 2 liters
- Prep Time: 20 minutes
- Ginger Bug Fermentation Time: 5 days
- Ginger Beer Carbonation Time: 2 days
- Course: Beverage
- Cuisine: International
- Calories per Serving: Approximately 45 calories per 8 oz serving
Equipment You Will Need
- Two clean glass jars (1-quart and 2-quart sizes work best)
- Fine mesh strainer or cheesecloth
- Large saucepan or pot
- Measuring cups and spoons
- Wooden spoon or stirrer
- Thermometer (optional but helpful)
- Funnel (optional)
- Bottles with tight-sealing caps (for carbonation)
- Coffee filters or fine cloth for covering the jar during fermentation
Ingredients for Ginger Beer with Ginger Bug
For the Ginger Bug Starter
- Fresh ginger root: 2 tablespoons, grated or minced (total over 5 days)
- Organic cane sugar: 2 tablespoons (total over 5 days)
- Filtered water: 1 cup
For the Ginger Beer
- Fresh ginger root: 3 tablespoons, chopped
- Organic cane sugar: 1/2 cup
- Filtered water: 1 liter
- Fresh lemon juice: 2 tablespoons
- Cream of tartar: 1/4 teaspoon
- Ginger bug starter: 1/2 cup (strained)
- Optional: whole cloves (4 to 5), whole allspice berries (3 to 4), or fresh turmeric (1 teaspoon) for extra depth
Ingredient Notes and Substitutions
- Fresh ginger root: Ginger provides the characteristic spice and fermentation food for wild yeast. Powdered ginger won’t ferment properly and lacks the living enzymes needed for carbonation.
- Organic cane sugar: Sugar feeds the beneficial bacteria and yeast in your ginger bug, creating carbonation. Regular white sugar works but may produce slightly different fermentation profiles due to processing.
- Filtered water: Chlorinated tap water can inhibit fermentation by killing beneficial microbes. If you don’t have filtered water, let tap water sit uncovered for 24 hours to allow chlorine to evaporate.
- Cream of tartar: This stabilizes carbonation and adds slight tartness. You can omit it, but your ginger beer may go flat faster after bottling.
- Lemon juice: Fresh lemon adds brightness and provides acid that preserves the final product. Bottled lemon juice contains preservatives that can slow fermentation, so use fresh when possible.
How to Make Ginger Beer with Ginger Bug
Step 1: Start Your Ginger Bug Starter
Pour 1 cup of filtered water into a clean glass jar and add 1/2 tablespoon of grated fresh ginger and 1/2 tablespoon of organic cane sugar. Stir well and cover the jar loosely with a coffee filter or cloth, securing it with a rubber band so air can circulate but dust and insects cannot enter.
You’re creating an environment where wild yeast and beneficial bacteria present on ginger skin can wake up and multiply. Loose coverage is critical because these microbes need oxygen to thrive in the early stages.
Step 2: Feed Your Ginger Bug Daily for Five Days
Each morning for days two through five, add another 1/2 tablespoon each of grated ginger and sugar directly to your jar, stirring well. You’ll notice fizzing, cloudiness, and an increasingly funky aroma developing as the microbes multiply.
This daily feeding mimics the natural conditions that encourage fermentation, ensuring a strong population of beneficial microbes. By day five, your ginger bug should smell yeasty and show steady bubbling when stirred.
Step 3: Prepare Your Ginger Tea Base
Bring 1 liter of filtered water to a boil in a large saucepan. Add 3 tablespoons of chopped fresh ginger, allowing it to steep for 15 to 20 minutes off the heat (the longer steeping creates stronger ginger flavor).
Hot water extracts the oils and compounds from ginger more effectively than cold water, creating a more flavorful and potent base. The longer steeping time lets you customize the intensity to your preference.
Step 4: Add Sugar and Flavorings
While the ginger water is still warm, stir in 1/2 cup of organic cane sugar until fully dissolved. If using optional spices like cloves, allspice, or turmeric, add them now and let them steep for another 5 minutes, then strain them out.
Dissolving sugar in warm liquid ensures it integrates smoothly without grittiness. The warm water also gently releases flavors from whole spices without requiring additional cooking.
Step 5: Strain and Cool the Mixture
Pour the ginger mixture through a fine mesh strainer into a clean 2-quart glass jar, pressing gently on the ginger solids to extract maximum flavor. Allow the liquid to cool completely to room temperature (this takes about 30 to 45 minutes and is important so you don’t kill the beneficial microbes in your ginger bug).
Cooling is non-negotiable because heat will destroy the living cultures you’re about to add. Patience here directly affects your final carbonation level.
Step 6: Combine Ginger Beer Mixture and Ginger Bug
Once your ginger mixture is cool, stir in 2 tablespoons of fresh lemon juice and 1/4 teaspoon of cream of tartar. Strain your mature ginger bug through cheesecloth or a fine strainer, collecting the liquid (about 1/2 cup) and discarding the ginger solids.
The lemon juice adds complexity and acts as a preservative, while the cream of tartar stabilizes carbonation. Straining removes solids but keeps the active microbes in the liquid.
Step 7: Add Ginger Bug and Begin Carbonation
Pour the strained ginger bug into your cooled ginger beer mixture and stir thoroughly for about 30 seconds. This inoculation step introduces active fermentation cultures throughout the entire batch.
Thorough stirring ensures the beneficial microbes distribute evenly, promoting consistent carbonation across all your bottles. Poor mixing can result in some bottles carbonating while others remain flat.
Step 8: Bottle and Carbonate
Pour your ginger beer mixture into clean bottles with tight-sealing caps, filling them about three-quarters full (leave headspace for carbonation pressure). Cap tightly and allow to sit at room temperature, out of direct sunlight, for 48 hours.
The sealed bottles trap carbon dioxide produced by fermentation, creating natural carbonation. Room temperature accelerates fermentation, while direct sunlight can degrade flavors and encourage unwanted organisms.
Step 9: Check Carbonation and Refrigerate
After 48 hours, carefully open one bottle over a sink (pressure may have built up) to test the carbonation level. If you want more fizz, cap it again and wait another 12 to 24 hours; if it’s perfect, move all bottles to the refrigerator to halt fermentation and preserve carbonation.
Refrigeration essentially pauses the fermentation process by slowing microbial activity, locking in your desired carbonation level. Once cold, your ginger beer stays fresh for up to two weeks.
Pro Tip: Maintain your ginger bug indefinitely by feeding it weekly with 1/2 tablespoon each of ginger and sugar, keeping it at room temperature and loosely covered; this living starter becomes a reliable source for future batches.
Tips for the Best Ginger Beer with Ginger Bug
- Use organic ginger whenever possible because the skin harbors the wild yeast and bacteria you need; non-organic ginger is often treated with fungicides that can inhibit fermentation.
- Keep your ginger bug and ginger beer away from direct sunlight and drafts, which can introduce unwanted microbes or dry out your cultures.
- Taste your ginger bug on day five before using it; it should smell pleasantly yeasty and fizz when stirred, not moldy or vinegary.
- If your ginger beer tastes too sweet after carbonation, you can thin it with sparkling water, or next batch use slightly less sugar.
- Bottle choice matters: glass bottles with swing-top or screw-on caps work best, as plastic can leach flavors and fail under pressure.
- The longer you let your ginger beer carbonate (up to 72 hours), the fizzier it becomes, but avoid going longer than 72 hours to prevent over-carbonation and potential bottle bursting.
Common Mistakes to Avoid
- Using chlorinated water: Chlorine kills the beneficial microbes needed for fermentation, so always use filtered or dechlorinated water from day one.
- Adding ginger bug to warm ginger beer: Introducing active cultures to hot liquid kills them instantly, ruining your chance for carbonation.
- Skipping the daily feeding of your ginger bug: Missing feedings can starve the cultures, resulting in a weak starter that produces flat ginger beer.
- Not leaving enough headspace in bottles: Sealed bottles with no air space can explode from pressure buildup, so always leave at least one-quarter of the bottle empty.
- Storing carbonated ginger beer at room temperature: Heat accelerates fermentation even after bottling, potentially over-carbonating and pressurizing bottles to unsafe levels.
Serving Suggestions
Serve your homemade ginger beer ice-cold, straight from the bottle for maximum fizz and refreshment. The natural carbonation and complex spice make it incredible on its own or as a mixer for cocktails and mocktails.
- Pour over crushed ice and serve with fresh lime wedges for a simple, spicy refresher
- Mix with rum and fresh lime juice to create an authentic Dark and Stormy cocktail
- Combine with whiskey, bitters, and a touch of honey for a sophisticated ginger beer cocktail
- Blend with sparkling water and fresh mint for a lighter, less intense sipper
- Use as a marinade base for glazing grilled chicken or pork for a tangy, spicy finish
Variations to Try
- Spicy Fire Ginger Beer: Double the ginger in both the bug and the main batch, then add 1/8 teaspoon of cayenne pepper to create an intense, heat-forward version that lingers on the palate.
- Turmeric Wellness Ginger Beer: Add 1 teaspoon of fresh turmeric root and a pinch of black pepper to the ginger tea base, creating an earthy, anti-inflammatory twist perfect for sipping warm.
- Citrus Blend Ginger Beer: Include zest from one lemon and one orange during the steep, then use both lemon and orange juice instead of lemon alone for a brighter, more complex citrus profile.
- Hibiscus Ginger Beer: Steep 2 tablespoons of dried hibiscus flowers in your ginger water for a tart, floral version with natural red color and additional antioxidants.
- Brown Sugar Depth Ginger Beer: Replace half the cane sugar with organic brown sugar to add molasses notes and deeper complexity that pairs beautifully with rum-based cocktails.
Dietary Adaptations
- Gluten-free: This recipe is naturally gluten-free; just verify that any optional spices you purchase are certified gluten-free to avoid cross-contamination.
- Dairy-free: Ginger beer contains no dairy by default, making it suitable for anyone avoiding animal products.
- Vegan: All ingredients in this recipe are plant-based; no animal products are used in the fermentation process.
- Low-sugar: Reduce sugar to 1/4 cup in the main batch and use a stevia-based sweetener for the ginger bug daily feedings, accepting that carbonation may be slightly less robust.
Storage and Reheating
Refrigerator
Store finished ginger beer in sealed glass bottles on a refrigerator shelf away from the door, where temperature fluctuations are minimal. Properly stored ginger beer keeps for up to two weeks and maintains carbonation during this entire window.
- Keep bottles upright and tightly capped
- Do not store near foods with strong odors that might transfer
- Check the seal weekly to ensure carbonation hasn’t escaped
Freezer
Freezing carbonated ginger beer in sealed bottles is risky because expanding liquid can shatter glass. Instead, freeze the ginger beer mixture before carbonation, or freeze in ice cube trays for later use in cocktails.
- Freeze ginger beer mixture in an airtight container up to three months
- Thaw completely before re-carbonating with fresh ginger bug
- Never freeze in sealed bottles with carbonation
Reheating
Ginger beer is consumed chilled and should not be heated, as heat destroys carbonation and degrades flavors. If you prefer it warm, gentle warming (not boiling) can be done before carbonation is added.
- Warm the ginger tea base to 110 degrees Fahrenheit if desired before adding ginger bug
- Never reheat carbonated ginger beer
- Serve all carbonated batches directly from the refrigerator
Nutrition Information
| Nutrient | Amount |
|---|---|
| Calories | 45 |
| Total Fat | 0 g |
| Saturated Fat | 0 g |
| Carbohydrates | 11 g |
| Fiber | 0 g |
| Sugar | 10 g |
| Protein | 0 g |
| Sodium | 25 mg |
| Cholesterol | 0 mg |
Nutrition information is calculated for an 8 oz serving and assumes 1/4 cup ginger bug was used to carbonate the full batch. Actual values vary based on ginger size, sugar dissolution, and fermentation length.
Frequently Asked Questions
Can I use ground ginger instead of fresh ginger root?
Ground ginger lacks the live enzymes and wild yeasts present on fresh ginger skin, so it won’t ferment properly or create carbonation. Always use fresh ginger root for both the ginger bug and the main batch.
What if my ginger bug doesn’t fizz or smell yeasty by day five?
Your water may be too chlorinated, or the ginger wasn’t organic. Start over with filtered water and certified organic ginger, and ensure your jar is kept at room temperature away from drafts.
Can I make ginger beer without a ginger bug?
You can use commercial yeast or probiotic powder as an alternative, but you’ll lose the complexity and living cultures that make ginger bug fermentation special. A ginger bug is truly the superior method for genuine homemade ginger beer.
How do I know if my ginger beer is over-carbonated or unsafe?
If a bottle feels rock-hard when squeezed gently or hisses loudly when opened, stop fermentation immediately by moving it to the refrigerator. Over-carbonation rarely causes dangerous bottle bursting if you use quality glass bottles and never exceed 72 hours of carbonation.
Can I add my ginger bug to the ginger beer while it’s still warm?
No, you must wait until the ginger mixture cools completely to room temperature. Adding ginger bug to warm or hot liquid kills the beneficial microbes instantly, leaving you with flat, unfermented ginger juice instead of carbonated ginger beer.
How long does a ginger bug starter last if I maintain it?
A well-maintained ginger bug can last indefinitely, potentially for years or decades if fed weekly with ginger and sugar. Many people pass their ginger bug cultures to friends and family, creating a living heirloom starter.
Final Thoughts
Making ginger beer with a ginger bug shifts you from passive consumer to active creator, giving you control over one of the most refreshing beverages possible. The process feels like magic until you understand the simple science underneath, then it becomes even more satisfying.
Your first batch might not be perfect, and that’s perfectly fine. Each attempt teaches you something about fermentation timing, carbonation levels, and your own taste preferences, making the next batch even better.
If you enjoy fermentation and craft beverages, explore our ginger bug recipe for deeper starter techniques and troubleshooting tips. You might also love our ginger ale recipe for a lighter, non-fermented alternative when you want quick results without waiting for carbonation.
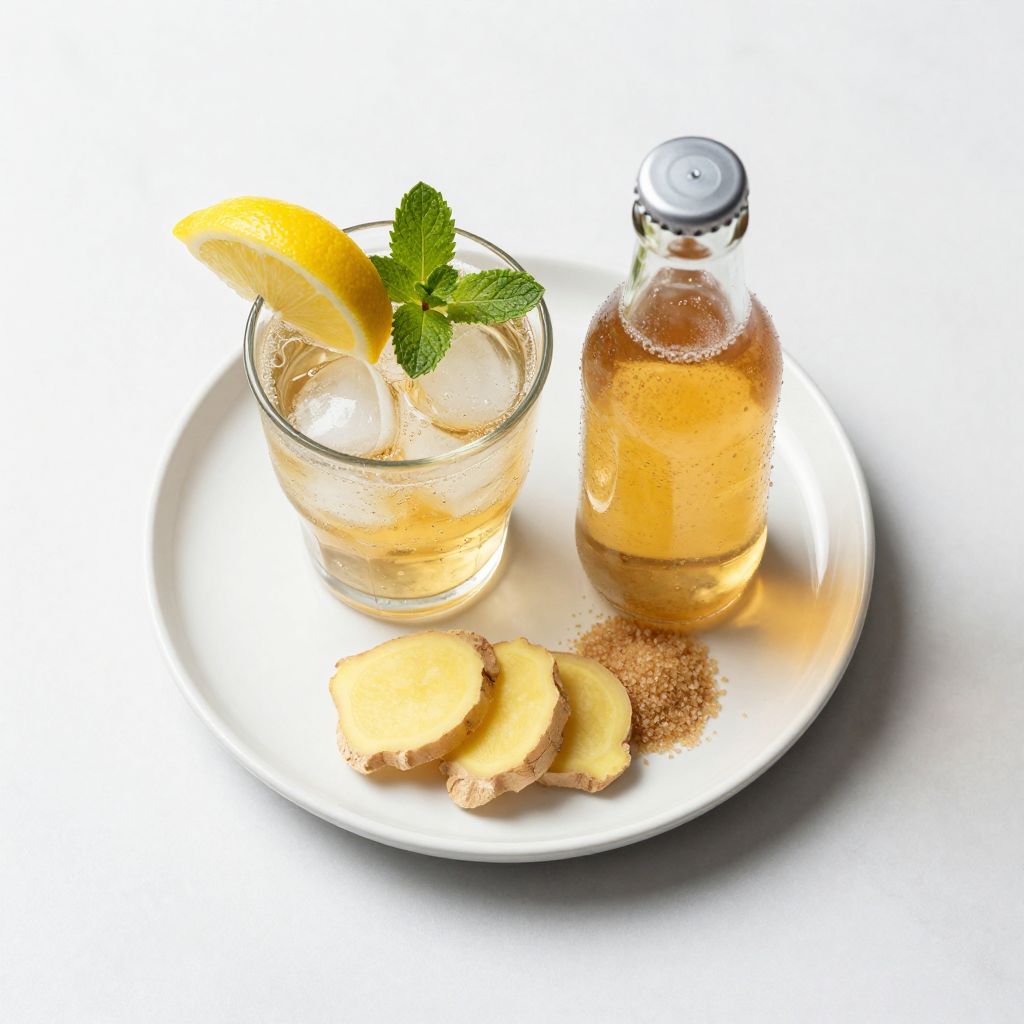
Ginger Beer with Ginger Bug
Ingredients
Equipment
Method
- Combine 1 cup filtered water, 1/2 tablespoon grated ginger and 1/2 tablespoon sugar in a clean 1-quart jar; stir and loosely cover with a coffee filter or cloth.
- For days 2–5 each morning, add 1/2 tablespoon ginger and 1/2 tablespoon sugar to the jar, stir, and cover; by day 5 the bug should be bubbly and yeasty.
- Bring 1 liter filtered water to a boil in a large saucepan; remove from heat and add 3 tablespoons chopped ginger, steeping 15–20 minutes off the heat.
- While still warm, stir in 1/2 cup sugar until dissolved; add optional spices, steep 5 more minutes, then strain out all solids.
- Strain the ginger tea through a fine mesh into a 2-quart jar, pressing solids to extract flavor; allow to cool to room temperature (30–45 minutes).
- Stir in 2 tablespoons fresh lemon juice and 1/4 teaspoon cream of tartar into the cooled ginger tea.
- Strain 1/2 cup ginger bug liquid through cheesecloth, discard solids, add liquid to the ginger tea and stir for 30 seconds.
- Funnel the mixture into bottles, filling each 3/4 full; seal tightly and ferment at room temperature out of sunlight for 48 hours.
- After 48 hours, carefully open one bottle to test carbonation; if needed, recork and ferment up to an additional 24 hours, then refrigerate all bottles.