There’s something almost magical about watching deep purple elderberries transform into a rich, fruity wine that tastes like autumn in a glass. If you’ve ever walked past an elderberry bush heavy with dark berries, you’ve probably wondered if you could actually turn them into something worth sipping.
Making elderberry wine at home is easier than you’d think, and the result is a smooth, slightly sweet wine with real depth that beats anything you’ll find at a regular store. This recipe captures the natural tartness and floral notes of elderberries without requiring fancy equipment or years of winemaking experience.
Why You’ll Love This Recipe
Homemade elderberry wine rewards you with a unique flavor profile that commercial wines simply can’t match. You control the sweetness, the fermentation length, and the final character of your wine.
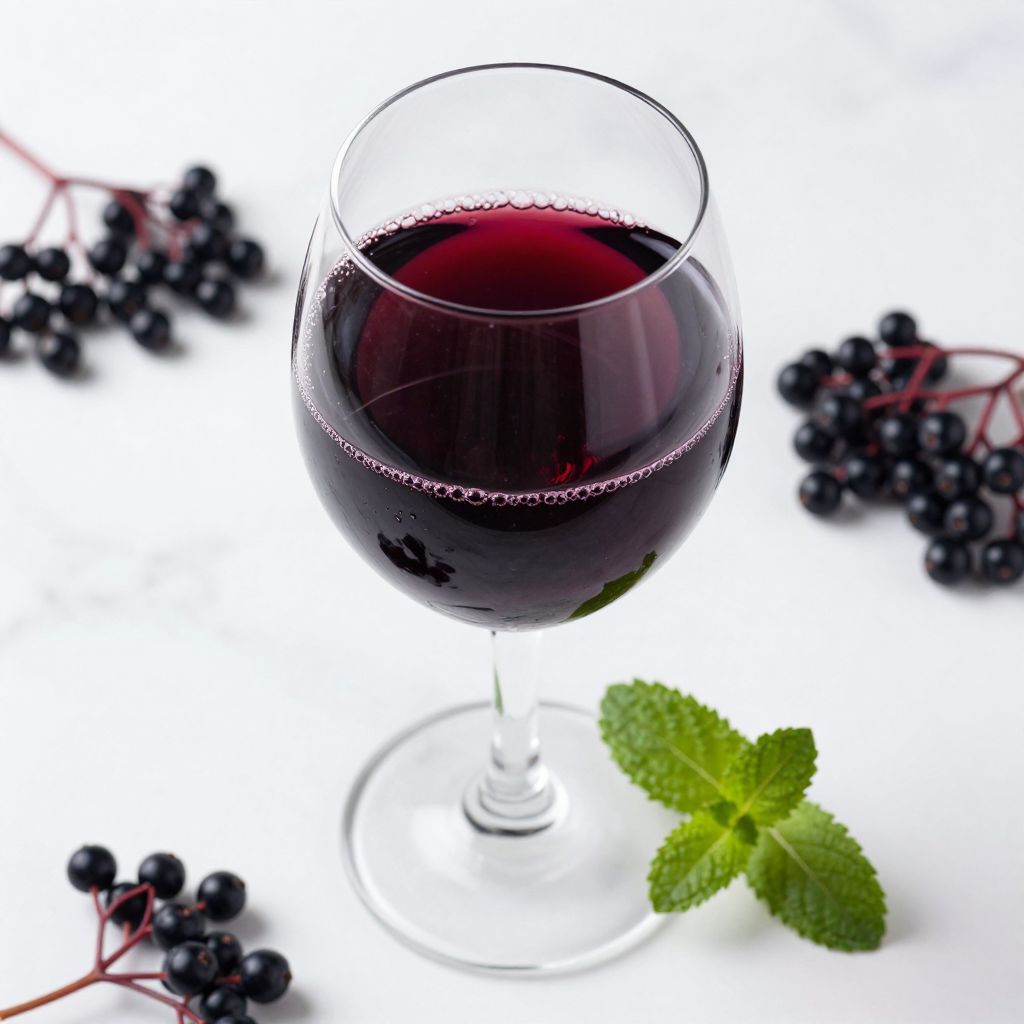
- Creates a gorgeous deep ruby color that’s visually stunning
- Naturally lower alcohol content than store-bought wines, around 10-12 percent
- Costs far less than quality wine if you have access to fresh elderberries
- Makes an impressive homemade gift that tastes sophisticated and thoughtful
- Takes advantage of seasonal berries that would otherwise go to waste
My Experience Making This Recipe
The first time I made elderberry wine, I nearly gave up at the fermentation stage when my kitchen smelled like a gym locker. Within two weeks, that funk completely disappeared, replaced by this incredible fruity aroma that made me actually excited to check on my carboy.
I bottled my first batch on a cold October afternoon, and honestly, the anticipation of waiting those extra months for it to mature was harder than the actual making. When I finally cracked open the first bottle at a dinner party, my guests were shocked it came from my kitchen.
The wine had developed this beautiful balance between tart elderberry and smooth, slightly honeyed undertones. One friend asked what winery it came from, and I loved being able to say I’d made it myself from berries I’d foraged just months earlier.
Recipe Overview
- Recipe Name: Elderberry Wine
- Servings: Makes approximately 5 liters (about 25 five-ounce glasses)
- Prep Time: 30 minutes
- Fermentation Time: 4 to 6 months
- Total Time: 4 to 6 months plus bottling
- Course: Beverage
- Cuisine: European
- Calories per Serving: 120 calories
Equipment You Will Need
- One 5-liter glass carboy or large glass jar
- Rubber bung or airlock stopper that fits your carboy
- Large stainless steel pot for heating water
- Wooden spoon for stirring
- Strainer or cheesecloth
- Funnel
- Siphon or auto-siphon for racking
- Glass bottles for bottling
- Corks or screw caps
- Hydrometer to measure sugar content (optional but helpful)
- Sanitizing solution (sodium metabisulfite or similar)
Ingredients for Elderberry Wine
- Fresh elderberries: 2 kilograms (about 4.5 pounds), stems removed and rinsed
- Granulated sugar: 1.5 kilograms (about 3.3 pounds)
- Water: 3.5 liters (about 1 gallon), filtered or bottled
- Champagne yeast or white wine yeast: 5 grams (one packet)
- Yeast nutrient: 1 teaspoon
- Acid blend or fresh lemon juice: 2 tablespoons
- Tannin powder: 1 teaspoon (optional, adds structure)
- Pectic enzyme: 1 teaspoon (helps break down fruit solids)
- Potassium metabisulfite: 1/4 teaspoon (for preservation)
Ingredient Notes and Substitutions
- Elderberries: These berries provide the distinctive tart, floral flavor that makes this wine special. If you can’t find fresh ones, frozen elderberries work nearly as well and are often easier to source year-round.
- Champagne yeast: This yeast strain ferments cleanly and handles higher alcohol content well. If you only have regular wine yeast on hand, it will work, but the results may be slightly less refined.
- Sugar: The amount determines your wine’s final sweetness and alcohol content. If you prefer drier wine, reduce sugar to 1.2 kilograms, which lowers both sweetness and alcohol to around 9 percent.
- Acid blend: Fresh lemon juice adds the acidity that elderberries need to taste bright and balanced. If you skip this, your wine may taste flat and dull.
- Pectic enzyme: This breaks down the pectin in berries so your wine clears faster. Without it, you’ll have a cloudier final product, though the taste remains identical.
How to Make Elderberry Wine
Step 1: Sanitize Your Equipment
Before you start, clean your carboy, bung, airlock, and all equipment with hot water and your sanitizing solution. Residual bacteria or wild yeasts can ruin your entire batch, so this step isn’t optional.
Step 2: Prepare the Elderberries
Remove all stems from your elderberries and rinse them under cold water to remove any dirt or debris. Crush the berries lightly with a wooden spoon or your hands to break their skins, which helps release the juice and flavor into your must.
Step 3: Heat Water and Dissolve Sugar
Pour your filtered water into a large pot and heat it to about 70 degrees Celsius (160 degrees Fahrenheit), hot enough to dissolve the sugar but not so hot that you’ll kill the beneficial yeast later. Stir in all your sugar until it’s completely dissolved, then remove the pot from heat and let it cool to room temperature.
Step 4: Create Your Must
Place the crushed elderberries into your sanitized carboy, then carefully pour the cooled sugar water over them using a funnel. Add the pectic enzyme, acid blend, tannin powder if using, and yeast nutrient, stirring gently with a sanitized spoon to combine everything evenly.
Step 5: Add Yeast and Begin Fermentation
Sprinkle the champagne yeast over the surface of your must and gently stir it in without introducing too much air. Cover the carboy loosely with a cloth for 24 hours to allow the yeast to start waking up and beginning fermentation.
Step 6: Install Your Airlock
After 24 hours, fit your rubber bung and airlock stopper into the mouth of the carboy, making sure it seals properly. The airlock allows carbon dioxide gas from fermentation to escape while preventing outside air and bacteria from entering your wine.
Step 7: Monitor Fermentation
Move your carboy to a cool, dark place with a steady temperature between 12 and 18 degrees Celsius (54 to 64 degrees Fahrenheit). You’ll see vigorous bubbling in the airlock within a few days, and this activity will gradually slow over 3 to 6 weeks as the yeast finishes converting sugar to alcohol.
Step 8: Rack Your Wine
Once fermentation has completely stopped and no bubbles pass through the airlock for several days, use a siphon to transfer your wine to a clean carboy, leaving behind the sediment and dead yeast cells at the bottom. This process, called racking, clarifies your wine and improves its flavor by removing bitter compounds.
Step 9: Age and Clarify
Refit your airlock and let the wine age for another 2 to 4 months in that cool, dark location. During this time, it will continue to clarify as tiny particles settle to the bottom, and the flavors will meld and develop complexity.
Step 10: Final Racking and Bottling
After aging, rack your wine one final time into clean bottles, leaving behind any remaining sediment. Add 1/4 teaspoon of potassium metabisulfite dissolved in a small amount of wine to preserve your finished product, then cork or cap the bottles and store them upright in a cool location.
Pro Tip: Keep your fermentation temperature as stable as possible; wild temperature swings stress the yeast and can create unpleasant flavors in your final wine.
Tips for the Best Elderberry Wine
- Use berries at peak ripeness for the deepest color and flavor. If you’re picking from wild elderberries, wait until they’re completely dark purple and soft to the touch.
- Keep detailed notes on your fermentation dates, temperature, and any observations so you can replicate success or adjust future batches.
- Invest in a basic hydrometer to track your wine’s specific gravity and confirm fermentation is actually complete, not just slowed.
- Taste your wine as it ages and bottle it when it reaches the flavor profile you prefer, rather than waiting for some arbitrary deadline.
- Store finished bottles on their side if they have cork closures to keep the cork moist and prevent it from drying and shrinking.
- Buy your yeast and nutrients from a homebrew supplier rather than online retailers; fresher yeast produces better results and ferments more reliably.
Common Mistakes to Avoid
- Using unsanitized equipment introduces wild yeast and bacteria that will create vinegar instead of wine. This is the number one reason homemade wine fails.
- Fermenting at temperatures that are too warm accelerates yeast activity but creates harsh, unpleasant flavors and can kill your yeast entirely if it gets above 30 degrees Celsius.
- Skipping the acid blend because you think elderberries are tart enough results in flat, one-dimensional wine that lacks the brightness that makes wine refreshing.
- Bottling before fermentation is completely finished traps remaining carbon dioxide in the bottle, which can cause bottles to explode or create unintentionally fizzy wine.
- Failing to rack your wine at the right time leaves it sitting on dead yeast cells for too long, creating meaty or sulfurous off-flavors.
Serving Suggestions
Elderberry wine pairs beautifully with autumn desserts and charcuterie, and its moderate alcohol content makes it perfect for leisurely afternoon sipping. Serve it slightly chilled, around 12 to 14 degrees Celsius, to bring out its fruity character without dulling the more delicate floral notes.
- Pair with sharp cheeses and cured meats on a cheese board for an elegant appetizer
- Serve alongside apple tart or berry-based desserts that echo the wine’s fruity profile
- Enjoy with roasted duck or game bird, where the wine’s tannins complement rich, savory flavors
- Sip on its own as an aperitif before dinner or as a meditative evening drink
- Use in a wine punch with sparkling water, fresh fruit, and herbs for entertaining
Variations to Try
- Spiced Elderberry Wine: Add 2 cinnamon sticks, 4 whole cloves, and 1 star anise during fermentation for warm spice notes that enhance the wine’s complexity.
- Honey-Sweetened Version: Replace half the sugar with raw honey to create a more delicate, floral sweetness that elderberries naturally complement.
- Oak-Aged Elderberry Wine: Add a small oak spiral or oak chips during aging to introduce subtle vanilla and wood notes that add sophistication.
- Lighter, Drier Style: Reduce sugar to 1 kilogram and use a drier yeast strain to create a wine with brighter acidity and less residual sweetness, ideal for pairing with main courses.
- Blended Wine: Combine your finished elderberry wine with homemade blackberry or currant wine in equal parts for deeper color and more complex flavor layers.
Dietary Adaptations
- Vegan: This recipe is naturally vegan as written; simply confirm your yeast and nutrient sources are vegan-certified if that matters to you.
- Lower Alcohol: Reduce sugar to 1.2 kilograms to create a wine with approximately 9 percent alcohol instead of 12 percent, though this also reduces your wine’s preservative capacity.
- Sugar-Free: Replace sugar with a fermentable sweetener like maltose, though the final alcohol content will be lower and the wine may taste slightly different.
- Sulfite-Free: Skip the potassium metabisulfite and drink your wine within 6 months, as it will oxidize faster without this preservative.
Storage and Reheating
Refrigerator
Opened bottles should be recorked immediately and stored upright in the refrigerator, where they’ll keep for 2 to 3 weeks before oxidizing.
- Recork bottles as soon as you pour a glass to minimize oxygen exposure
- Store away from bright light, which can fade the wine’s color
- Keep temperature steady to prevent cork movement
Freezer
Freezing wine is generally not recommended because the water expands and can push out the cork, but frozen wine works fine for cooking purposes.
- Leave 2 centimeters of headspace in bottles before freezing to account for expansion
- Thaw slowly in the refrigerator before using
- Expect texture changes; the wine will separate slightly when thawed
Reheating
Wine is never truly reheated since you serve it chilled, but you can warm it gently for mulled wine by placing the bottle in a warm water bath.
- Never heat wine directly over a flame, which concentrates alcohol and creates harsh flavors
- Bring mulled wine to a gentle simmer, then remove from heat immediately
- Serve warmed wine in heat-resistant glasses
Nutrition Information
| Nutrient | Amount |
|---|---|
| Calories | 120 |
| Total Fat | 0 grams |
| Saturated Fat | 0 grams |
| Carbohydrates | 5 grams |
| Fiber | 0 grams |
| Sugar | 2 grams |
| Protein | 0 grams |
| Sodium | 8 milligrams |
| Cholesterol | 0 milligrams |
These values are approximations based on standard fermentation that converts most sugars to alcohol. Your actual nutrition will vary slightly based on how long you ferment and your final residual sugar content.
Frequently Asked Questions
Can I use frozen elderberries instead of fresh ones?
Absolutely. Frozen berries work wonderfully and often produce even clearer wine because the freezing breaks down cell walls, releasing more juice. Thaw them completely before using and follow the recipe exactly as written.
How do I know when fermentation is actually finished?
Use a hydrometer to check the specific gravity of your wine; when it reaches 0.990 or lower and stays steady for several days, fermentation is complete. If you don’t have a hydrometer, wait for the airlock to stop bubbling for at least a week.
My wine looks cloudy. Is it ruined?
Cloudiness is usually just tiny particles that will settle over time with proper aging and racking. This is completely normal and doesn’t affect flavor; the wine will clear naturally within a few months.
Why does my wine smell funky during fermentation?
Those sulfurous or meaty smells are byproducts of yeast fermentation and will disappear completely as fermentation finishes and your wine matures. This is normal and not a sign of failure.
Can I speed up the fermentation process?
Faster fermentation usually means lower quality wine because the yeast doesn’t have time to develop complex flavors. Keeping fermentation at a steady cool temperature produces superior results, even if it takes longer.
What should I do with the sediment from racking?
The sediment tastes bitter and should be discarded, though you can compost it. Never pour it back into your wine, as this ruins the flavor and creates cloudiness.
How long will my finished wine last?
A properly made and sealed bottle will keep for 5 to 10 years in a cool, dark location. Most homemade wine tastes best within 2 to 3 years of bottling, when the fruit flavors are still vibrant.
Final Thoughts
Making your own elderberry wine is one of those rewarding projects that seems mysterious until you actually try it. Once you realize how straightforward the process really is, you’ll wonder why you didn’t start sooner.
The combination of waiting, tasting, and finally sharing a bottle you created yourself builds something special that you simply can’t buy. Start with this recipe, take good notes, and adjust it next year based on what you learned; that’s how great wine
Elderberry Wine
Ingredients
Equipment
Method
- Clean your carboy, bung, airlock, and all equipment with hot water and sanitizing solution to remove bacteria and wild yeasts.
- Remove all stems from elderberries and rinse under cold water. Crush the berries lightly with a wooden spoon or your hands to break their skins.
- Pour filtered water into a large pot and heat to about 70 degrees Celsius (160 degrees Fahrenheit). Stir in all sugar until completely dissolved, then remove from heat and let cool to room temperature.
- Place the crushed elderberries into your sanitized carboy, then carefully pour the cooled sugar water over them using a funnel. Add the pectic enzyme, acid blend, tannin powder if using, and yeast nutrient, stirring gently with a sanitized spoon to combine.
- Sprinkle the champagne yeast over the surface of your must and gently stir it in. Cover the carboy loosely with a cloth for 24 hours.
- After 24 hours, fit your rubber bung and airlock stopper into the mouth of the carboy, making sure it seals properly.
- Move your carboy to a cool, dark place with a steady temperature between 12 and 18 degrees Celsius (54 to 64 degrees Fahrenheit). Monitor for 3 to 6 weeks as fermentation slows and bubbling stops.
- Once fermentation has completely stopped and no bubbles pass through the airlock for several days, use a siphon to transfer your wine to a clean carboy, leaving behind the sediment and dead yeast cells at the bottom.
- Refit your airlock and let the wine age for another 2 to 4 months in that cool, dark location to clarify and develop complexity.
- After aging, rack your wine one final time into clean bottles, leaving behind any remaining sediment. Add 1/4 teaspoon of potassium metabisulfite dissolved in a small amount of wine, then cork or cap the bottles and store them upright in a cool location.