
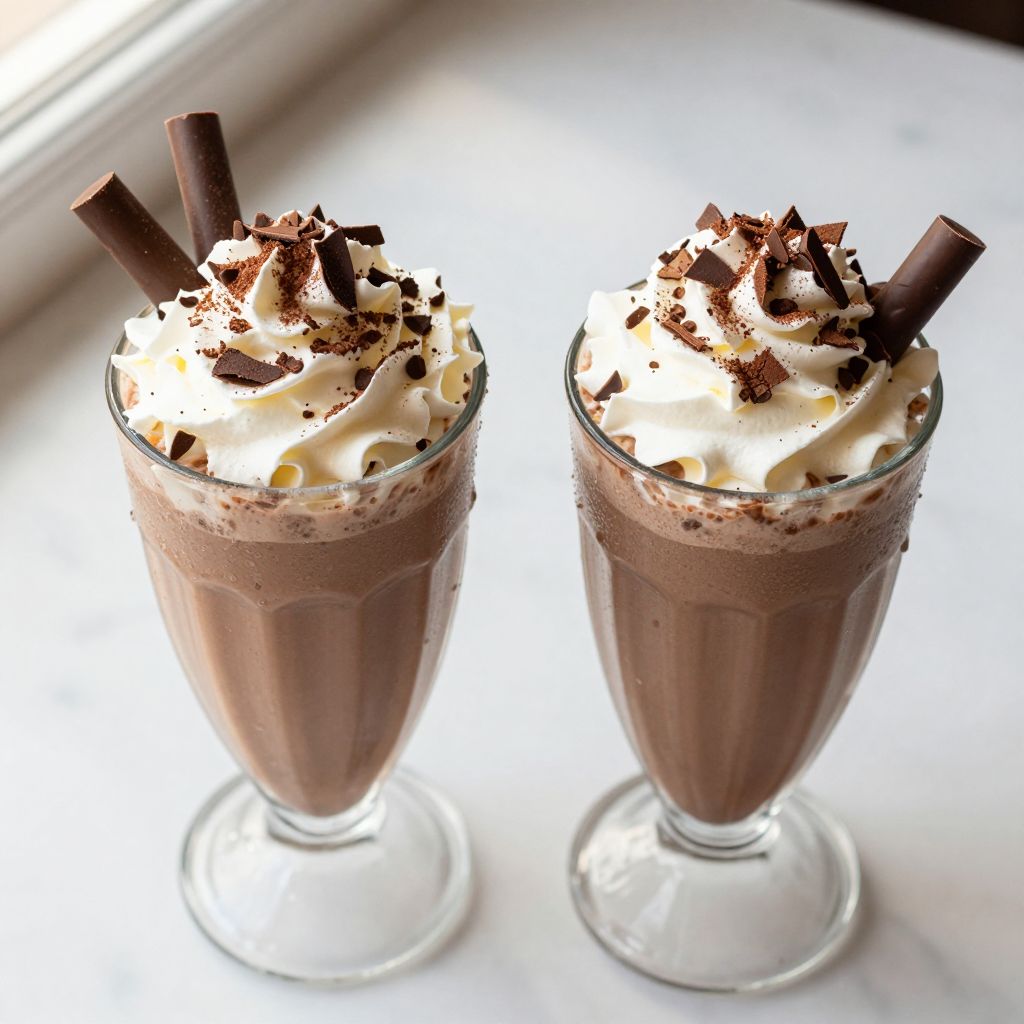
Picture yourself holding a tall, frosty glass filled with thick, creamy chocolate goodness on a hot summer afternoon, and you’ll understand why the best chocolate milkshake recipe deserves a permanent spot in your kitchen rotation.
This isn’t just any milkshake; it’s a balance of rich chocolate flavor, silky texture, and pure indulgence that tastes like a professional ice cream parlor made it in your blender.
What makes this recipe stand out is the combination of quality cocoa powder, real chocolate, and the right ratio of ice cream to milk, which creates that perfect thickness without being overwhelming.
Why You’ll Love This Recipe
This chocolate milkshake comes together in under five minutes and requires just a handful of pantry staples you likely already have on hand.
- Thick, creamy texture that tastes homemade, not thin or watery
- Works perfectly for quick breakfasts, afternoon snacks, or desserts
- Easily customizable with toppings, mix-ins, or flavor variations
- Costs far less than buying shakes from a cafe or ice cream shop
- Appeals to kids and adults alike, making it a family favorite
My Experience Making This Recipe
I’ve been making chocolate milkshakes for years, and this recipe emerged from countless tweaks and taste tests in my own kitchen. The turning point came when I realized that using both cocoa powder and melted chocolate created depth that single-ingredient approaches couldn’t match.
The first time I served this to my teenager and their friends, they drank it so fast I thought something was wrong, until one of them asked if I’d somehow gotten ice cream from the shop next door. That moment convinced me this recipe was worth perfecting and sharing.
Now I make it at least twice a week, sometimes straight, sometimes with peanut butter swirled in or espresso powder for an afternoon pick-me-up. The sipping experience is always consistent, always satisfying, and always a little bit of a treat.
Recipe Overview
- Recipe Name: Best Chocolate Milkshake
- Servings: 2
- Prep Time: 5 minutes
- Cook Time: 0 minutes
- Total Time: 5 minutes
- Course: Beverage or Dessert
- Cuisine: American
- Calories per Serving: 340
Equipment You Will Need
- Blender (high-powered preferred for smooth texture)
- Measuring cups and spoons
- Tall glasses for serving
- Spoon or spatula for scooping ice cream
- Small microwave-safe bowl (if melting chocolate)
- Microwave or stovetop for melting chocolate
Ingredients for Best Chocolate Milkshake
- 2 cups vanilla ice cream, scooped into chunks
- 1 cup whole milk
- 3 tablespoons unsweetened cocoa powder
- 2 ounces semi-sweet or dark chocolate, melted and cooled slightly
- 2 tablespoons granulated sugar
- 1/2 teaspoon vanilla extract
- Pinch of salt
- Whipped cream for topping (optional)
- Chocolate shavings for garnish (optional)
Ingredient Notes and Substitutions
- Vanilla ice cream: Forms the creamy base and provides richness. Substitute with chocolate ice cream if you want extra chocolate intensity, though it will reduce the cocoa powder’s brightness.
- Whole milk: Creates a smooth consistency without being too heavy. Use 2% milk for a slightly lighter shake, or add an extra half cup of milk if you prefer a thinner drink.
- Unsweetened cocoa powder: Delivers true chocolate flavor and prevents over-sweetness. Dutch-process cocoa adds deeper notes but regular cocoa powder works perfectly fine.
- Semi-sweet chocolate: Adds richness and silky texture that cocoa powder alone cannot achieve. Dark chocolate (70% cacao) creates a more sophisticated, less sweet shake.
- Granulated sugar: Balances cocoa’s natural bitterness. Reduce to 1 tablespoon if using chocolate ice cream instead of vanilla.
- Vanilla extract: Brightens and rounds out chocolate flavor. Omit if you prefer pure chocolate taste without floral notes.
How to Make Best Chocolate Milkshake
Step 1: Scoop and Prepare Your Ice Cream
Scoop the vanilla ice cream directly into your blender, breaking it into roughly two-inch chunks rather than tossing in one large mass. Chunked ice cream blends faster and more evenly than a solid block, preventing you from over-blending and creating a soupy texture.
Step 2: Melt the Chocolate
Chop the semi-sweet chocolate into small pieces and melt it in the microwave in 30-second intervals, stirring between each burst until completely smooth and glossy. Cooling it slightly before blending prevents the chocolate from becoming too warm and separating from the other ingredients.
Step 3: Combine Dry Ingredients in the Blender
Pour the cocoa powder, sugar, and salt into your blender with the chunked ice cream. Mixing the dry ingredients with the ice cream first helps them distribute evenly and prevents them from clumping up when you add the wet ingredients.
Step 4: Add the Liquid Components
Pour the whole milk and melted chocolate into the blender, along with the vanilla extract. Adding liquids after the solids helps prevent splashing and ensures the dry ingredients don’t float on top before blending begins.
Step 5: Blend Until Smooth and Creamy
Blend on high speed for 60 to 90 seconds, stopping to check the consistency halfway through. The shake should flow freely but still coat the back of a spoon; if it’s too thick, add a splash more milk in 2-tablespoon increments.
Step 6: Assess the Texture and Adjust
If your shake feels too thin, add a small scoop of ice cream and blend again for 20 seconds. If it’s too thick to drink through a straw, add a tablespoon of milk and blend briefly until it reaches your desired consistency.
Step 7: Strain for Extra Smoothness (Optional)
For a completely silky shake without any cocoa powder grittiness, pour the blended shake through a fine-mesh strainer into a bowl, pressing gently with the back of a spoon. This step takes an extra minute but creates a professional texture perfect for special occasions.
Step 8: Pour and Serve Immediately
Divide the shake between two tall glasses and serve right away while it’s cold and thick. Milkshakes sit longer than smoothies without separating, but drinking within five minutes guarantees the best temperature and texture.
Step 9: Top with Whipped Cream and Chocolate
Add a generous dollop of whipped cream to each glass and garnish with chocolate shavings, cocoa powder, or chocolate chips if desired. These toppings add visual appeal and an extra hit of chocolate flavor.
Pro Tip: Freeze your blender pitcher for 15 minutes before making the shake if you want an extra-cold, thicker result without adding more ice cream.
Tips for the Best Chocolate Milkshake
- Use cold milk straight from the refrigerator, not room temperature, since it keeps the shake colder longer and prevents melting.
- Don’t skip the melted chocolate even though cocoa powder is already in the recipe; the combination creates complexity that single ingredients cannot deliver.
- Scoop ice cream a few minutes before blending so it’s just soft enough to break apart easily but still frozen solid.
- Taste the shake before serving and adjust sweetness with an extra teaspoon of sugar if the cocoa powder’s bitterness overwhelms you.
- Use a high-powered blender rather than a standard one; it incorporates air better and creates a naturally thicker, creamier shake.
- Make the shake right before serving rather than blending ahead, since the texture separates and becomes watery within 10 minutes.
Common Mistakes to Avoid
- Adding too much milk in hopes of making the shake easier to drink actually destroys the texture and creates something closer to chocolate milk than a proper milkshake.
- Using chocolate syrup instead of real melted chocolate results in an overly sweet, thin shake that tastes artificial rather than rich.
- Forgetting to cool the melted chocolate slightly before blending causes separation and a grainy texture that feels unpleasant on the tongue.
- Blending for too long incorporates excess air and causes the shake to become foamy and warm rather than thick and creamy.
- Using ice cream straight from the freezer without softening it slightly forces the blender to work too hard and may result in lumps that never fully incorporate.
Serving Suggestions
Serve this shake on its own as a simple dessert, or pair it with additional treats to create a full experience. The rich chocolate flavor complements both light and indulgent sides.
- Alongside fresh-baked chocolate chip cookies or brownies for chocolate lovers
- With a simple salad for a balanced lunch that feels like a treat
- As a post-workout recovery drink with a protein-packed snack like Greek yogurt
- After dinner as an elegant dessert alternative to cake or pie
- Served in small portions as a rich ending to a brunch celebration
Variations to Try
- Peanut Butter Chocolate: Blend in 2 tablespoons of creamy peanut butter with the ice cream for a classic flavor combination that feels indulgent and satisfying.
- Espresso Chocolate: Add 1 teaspoon of instant espresso powder dissolved in the milk to deepen chocolate notes and add subtle coffee complexity.
- Strawberry Chocolate: Include 1/2 cup of fresh or frozen strawberries blended with the other ingredients for a fruity contrast to rich chocolate.
- Mint Chocolate: Use mint extract or a handful of fresh mint leaves instead of vanilla, creating a cool, refreshing shake with chocolate depth.
- Banana Chocolate: Slice a frozen banana and add it to the blender for natural sweetness, creaminess, and a subtle fruit note that balances the cocoa.
Dietary Adaptations
- Dairy-Free: Substitute ice cream with coconut, oat, or cashew-based frozen dessert and use unsweetened almond or oat milk instead of whole milk; the shake will be thinner but still flavorful.
- Vegan: Use plant-based ice cream, non-dairy milk, and ensure cocoa powder and chocolate are certified vegan; swap honey-sweetened products for granulated sugar.
- Gluten-Free: All ingredients in this recipe are naturally gluten-free, but verify your cocoa powder and chocolate don’t contain cross-contamination from shared facilities.
- Low-Carb/Keto: Replace ice cream with heavy cream blended with keto ice cream, use unsweetened cocoa powder, and swap sugar for monk fruit or erythritol sweetener.
- Protein-Boosted: Stir in 1 scoop of chocolate or vanilla protein powder to increase protein content and make the shake more filling as a meal replacement.
Storage and Reheating
Refrigerator
Milkshakes don’t store well in the refrigerator since separation occurs rapidly, but you can refrigerate the individual components separately and blend them fresh when ready to serve.
- Store melted chocolate in an airtight container for up to one week
- Keep cocoa powder in an airtight canister away from moisture
- Scoop ice cream into portions and freeze in individual containers for quick blending
Freezer
Frozen milkshake components remain viable for months, allowing you to assemble shakes at a moment’s notice without shopping each time.
- Freeze extra scoops of ice cream in airtight containers for up to three months
- Store pre-portioned milk in ice cube trays, then transfer cubes to freezer bags
- Keep chocolate tightly wrapped to prevent freezer burn
Reheating
Reheating isn’t applicable to milkshakes, but you can refresh separated or slightly warm shakes by adding fresh ice cream and blending again.
- If a shake separates after sitting, simply add more cold milk and blend for 10 seconds
- If the shake becomes too warm, add a small scoop of ice cream and blend quickly
Nutrition Information
| Nutrient | Amount |
|---|---|
| Calories | 340 |
| Total Fat | 16g |
| Saturated Fat | 10g |
| Carbohydrates | 45g |
| Fiber | 2g |
| Sugar | 38g |
| Protein | 7g |
| Sodium | 120mg |
| Cholesterol | 35mg |
These values are approximate and vary based on specific brands and portion sizes used in preparation.
Frequently Asked Questions
Can I make this milkshake ahead of time?
Milkshakes taste best when consumed immediately after blending, but you can prep components separately and blend them fresh within minutes. If you must make it ahead, store it in the refrigerator for up to two hours, though the texture will become thinner and less creamy.
What’s the difference between this recipe and a chocolate malt?
A malt shake includes malted milk powder, which adds a slightly salty, toasty grain flavor and creates a less smooth texture. You can transform this recipe into a malt by reducing cocoa powder to 2 tablespoons and adding 2 tablespoons of malted milk powder.
Why is my shake too thick to drink through a straw?
Too much ice cream relative to milk creates excessive thickness, so add milk in 2-tablespoon increments and blend briefly. Professional shakes should flow slowly but steadily when tilted; if it barely moves, add more liquid.
Can I use chocolate ice cream instead of vanilla?
Yes, chocolate ice cream works perfectly, though you should reduce the cocoa powder to 2 tablespoons and sugar to 1 tablespoon to avoid overwhelming bitterness. The shake will be darker and richer but less bright.
What’s the best type of chocolate to use?
Semi-sweet chocolate offers the best balance of flavor and sweetness, while dark chocolate (70% cacao or higher) creates a more sophisticated shake for chocolate purists. Milk chocolate makes the shake overly sweet and loses complexity.
How can I make this shake healthier?
Replace half the ice cream with frozen yogurt or Greek yogurt, reduce sugar to 1 tablespoon, and add a handful of spinach or kale for nutrients without altering taste. You can also add 1 tablespoon of almond or peanut butter for protein and healthy fats.
Final Thoughts
This chocolate milkshake recipe delivers the exact balance of flavor, texture, and indulgence that makes you feel like you’re treating yourself every single time. Once you’ve mastered the basic formula, you have endless opportunities to customize it with variations and flavors that match your mood.
Make this shake this week and discover why homemade versions beat store-bought every time. Your blender and a handful of simple ingredients stand between you and pure chocolate bliss.
Explore More Milkshake Recipes
Now that you’ve mastered the chocolate version, expand your milkshake repertoire with other delicious flavors and combinations.
If you’re a peanut butter fan, try making a peanut butter milkshake recipe that combines creamy nut butter with rich chocolate for an irresistible combination.
For those hot summer days when you want something extra special, experiment with a Ninja Creami milkshake recipe to create restaurant-quality frozen treats at home with innovative techniques.
Best Chocolate Milkshake
Ingredients
Equipment
Method
- Scoop the vanilla ice cream into 2-inch chunks directly into the blender to ensure even blending.
- Chop the semi-sweet chocolate and melt in a microwave-safe bowl in 30-second intervals, stirring between each until smooth; let it cool slightly.
- Add the cocoa powder, granulated sugar, and salt to the blender with the ice cream so the dry ingredients distribute evenly.
- Pour in the whole milk, melted chocolate, and vanilla extract into the blender after the solids to prevent clumping.
- Blend on high speed for 60 to 90 seconds, checking halfway for a smooth, creamy texture; add milk in 2-tablespoon increments if too thick.
- If the shake is too thin, add a small scoop of ice cream and blend for 20 seconds; if too thick, add a tablespoon of milk and blend briefly.
- Optional: Strain the shake through a fine-mesh strainer for extra smoothness, pressing gently with the back of a spoon.
- Divide the milkshake between two tall glasses and serve immediately while it is cold and thick.
- Top each glass with whipped cream and garnish with chocolate shavings before serving.