
Picture yourself in a cozy kitchen on a quiet evening, with the gentle aroma of honey and spices filling the air as fermentation begins its slow magic. Making 1 gallon of mead is one of the most rewarding fermentation projects you can undertake at home, requiring minimal equipment but delivering maximum satisfaction.
This ancient honey wine has made a serious comeback with home fermenters, and for good reason: it’s forgiving, customizable, and costs far less than you’d pay for craft bottles. The best part is that you’ll have a delicious, complex beverage ready in just a few months, and the process teaches you the fundamentals of fermentation that apply to beer, cider, and wine alike.
Why You’ll Love This Recipe
Making mead at home offers simplicity, affordability, and complete creative control over your final product. You’ll join a tradition that stretches back thousands of years while producing something genuinely special.
- Requires minimal equipment and ingredients you can source locally or online
- Ready to drink in 2 to 4 months, much faster than most wines
- Highly customizable with fruit, spices, and different honey varieties
- Costs significantly less than purchasing craft mead
- Perfect introduction to fermentation for beginners
My Experience Making This Recipe
My first batch of mead was a revelation. I was skeptical that something so simple could taste so good, but three months later I had a smooth, slightly sweet beverage that friends were genuinely impressed by.
The process itself is meditative. You mix honey and water, pitch your yeast, and then largely let time do the work for you. Unlike beer or wine, mead doesn’t demand constant attention or complex temperature control.
What surprised me most was the complexity that developed over time. The initial batch tasted decent at two months, but by month four, the flavors had mellowed and integrated beautifully. I’ve since made multiple batches with different honey varieties and spice additions, and each one has its own character.
Recipe Overview
- Recipe Name: 1 Gallon Mead
- Servings: Approximately 25 servings (1.2 oz each)
- Prep Time: 30 minutes
- Fermentation Time: 60 to 120 days
- Total Time: 2 to 4 months
- Course: Beverage
- Cuisine: Historical/Fermentation
- Alcohol Content: Approximately 12 to 14 percent ABV
Equipment You Will Need
- 1-gallon glass carboy or fermentation vessel
- Airlock and stopper (or cheesecloth for open fermentation)
- Large stainless steel pot or heat-safe container for mixing
- Brewing thermometer (accurate to 60 to 120 degrees Fahrenheit)
- Hydrometer (optional but helpful for tracking fermentation)
- Auto-siphon or tubing for racking
- Sanitizer (Star San or similar brewing-grade product)
- Funnel
- Bottles for storage (wine bottles or similar)
Ingredients for 1 Gallon Mead
- 3 pounds honey (wildflower, clover, or your preferred variety)
- 1 gallon filtered or dechlorinated water
- 1 packet dry wine yeast (Lalvin D-47 or D-20 recommended for meads)
- 1/4 teaspoon yeast nutrient (diammonium phosphate)
- 1/4 teaspoon yeast energizer (optional but recommended)
Ingredient Notes and Substitutions
- Honey: Honey is the foundation of mead and provides both fermentable sugars and flavor character. Different varieties produce different results; wildflower creates complexity, orange blossom adds floral notes, and buckwheat produces deeper, earthier tones. You can use any culinary-grade honey, but avoid honey labeled “for baking” as it may contain additives. If you want a different flavor profile, try raw honey from local beekeepers for unique terroir.
- Water: Filtered or dechlorinated water prevents chlorine from interfering with yeast fermentation. Tap water that’s been left uncovered for 24 hours allows chlorine to evaporate naturally, or you can use bottled water. Spring water works well; distilled water is too pure and lacks minerals yeast needs for proper fermentation.
- Wine Yeast: Wine yeast strains handle the high sugar content and alcohol production better than bread yeast. Lalvin D-47 creates dry mead with fruity notes, while Lalvin D-20 produces slightly sweeter results with lower alcohol. Bread yeast produces off-flavors and won’t ferment cleanly at the alcohol levels mead develops.
- Yeast Nutrient: Honey lacks the nitrogen compounds yeast needs for vigorous fermentation, so nutrient addition prevents sluggish fermentation and stuck batches. If unavailable, you can substitute with a small pinch of bakers yeast, though commercial nutrient works better. Skipping nutrient entirely risks a weak fermentation that never completes.
How to Make 1 Gallon Mead
Step 1: Sanitize All Equipment
Before you begin, sanitize every piece of equipment that will touch your mead using a brewing-grade sanitizer like Star San. This prevents wild yeast and bacteria from contaminating your batch and ruining weeks of fermentation work.
Mix sanitizer according to package directions and soak or spray all surfaces of your carboy, airlock, stopper, funnel, and any utensils you’ll use. Rinse with sanitized water or allow to air dry completely.
Step 2: Heat the Water
Pour your gallon of filtered or dechlorinated water into a large pot and heat it to 160 degrees Fahrenheit. This temperature is hot enough to kill most wild microorganisms without scorching the honey’s delicate flavors if you add it while heated.
Use your brewing thermometer to monitor the temperature carefully. You don’t need a rolling boil; maintaining 160 degrees for about 20 minutes is sufficient for sanitation purposes.
Step 3: Dissolve the Honey
Once your water reaches 160 degrees, slowly pour your honey into the hot water while stirring gently to dissolve it completely. The hot water helps the honey integrate smoothly without creating lumps or settling at the bottom.
Stir slowly and consistently for about 5 minutes until all honey is fully dissolved and the mixture appears clear or slightly cloudy. Avoid vigorous stirring, which incorporates excess oxygen and can lead to oxidation flavors later.
Step 4: Cool the Must to Room Temperature
Remove your honey-water mixture, called “must,” from heat and allow it to cool to room temperature, ideally between 65 and 75 degrees Fahrenheit. This cooling step is critical because hot liquid kills yeast on contact, wasting your fermentation starter.
The cooling process typically takes 1 to 2 hours depending on your kitchen temperature. You can speed cooling slightly by placing the pot in a cold water bath, but avoid ice baths as they cool too quickly and can crack glass vessels. A brewing thermometer confirms when the must is ready.
Step 5: Transfer Must to Carboy
Once cooled, carefully pour or siphon your must into your sanitized 1-gallon carboy using a funnel to prevent splashing and oxidation. Fill the carboy until it’s about 3/4 full, leaving headspace for fermentation activity.
You should have roughly 1 gallon of must in the carboy at this point. If you’ve lost liquid to evaporation during cooling, top it off with additional filtered water to reach the appropriate level.
Step 6: Rehydrate and Pitch the Yeast
While the must cools, rehydrate your packet of wine yeast by sprinkling it into 1/4 cup of water warmed to 110 degrees Fahrenheit. Let it sit for 15 to 20 minutes, then swirl gently to mix; this activates the yeast and improves fermentation vigor.
Once your must has cooled completely, pour the rehydrated yeast into the carboy along with your yeast nutrient and yeast energizer if using. Stir gently but thoroughly to distribute the yeast evenly throughout the must.
Step 7: Add Airlock and Begin Fermentation
Insert your sanitized airlock and stopper into the mouth of the carboy, sealing it completely. The airlock allows carbon dioxide produced by fermentation to escape while preventing oxygen and contaminants from entering.
Place the carboy in a location with consistent room temperature, ideally 65 to 75 degrees Fahrenheit, away from direct sunlight. Within 24 to 48 hours, you should see bubbling through the airlock, indicating active fermentation.
Step 8: Monitor Fermentation Progress
Over the next few weeks, check your carboy every few days to ensure the airlock is bubbling and the fermentation appears active. Bubbling typically slows dramatically after 3 to 4 weeks as the yeast exhausts most of the available sugars.
If you have a hydrometer, take gravity readings every week or two to track fermentation progress. When readings stabilize and stop changing over several days, fermentation is complete; this usually takes 60 to 120 days depending on yeast strain and temperature.
Pro Tip: Resist the urge to open the carboy constantly; every time you unseal it, you risk infection and lose dissolved carbon dioxide that protects the developing mead.
Tips for the Best 1 Gallon Mead
- Use quality honey from a source you trust; the honey’s character will shine through in your finished mead. Local beekeepers often offer interesting varietal honeys that mass-market brands don’t carry.
- Temperature consistency matters more than exact temperature; pick a spot in your home that stays between 65 and 75 degrees and keep your carboy there throughout fermentation. Fluctuating temperatures stress yeast and produce off-flavors.
- Don’t rush the process; many people bottle mead too early and end up with residual sweetness and carbonation pressure. Patience rewards you with clearer, more stable results.
- Rack your mead off the sediment when fermentation slows, typically after 3 to 4 weeks; this removes dead yeast cells that can impart unpleasant flavors. Use an auto-siphon to transfer to a clean carboy.
- Add any spices or fruit additions during secondary fermentation, not the primary; this prevents them from interfering with yeast performance during the critical early stages.
Common Mistakes to Avoid
- Pitching yeast into hot must kills the yeast and forces you to start over; always cool to room temperature before adding yeast. Use a thermometer to verify temperature, not guesswork.
- Skipping yeast nutrient leads to sluggish or stuck fermentation that never completes; honey lacks nitrogen compounds yeast needs, so nutrient is truly essential for meads. Bread yeast nutrient works in a pinch but brewing nutrient is better.
- Using table sugar instead of honey produces something that tastes like alcohol with no character or depth. Mead’s identity comes from honey’s subtle flavors, so don’t shortcut this ingredient.
- Bottling too early causes over-carbonation and potentially burst bottles as residual fermentation continues; let fermentation complete fully and clarify before bottling.
- Storing in warm sunlight fades color and develops oxidized flavors; keep bottles in a cool, dark place to preserve quality over time.
Serving Suggestions
Mead is wonderfully versatile and pairs beautifully with many occasions and foods. Serve it chilled as an aperitif or at room temperature to appreciate its full flavor complexity.
- Pair with aged cheeses like cheddar or gouda for a classic combination
- Serve alongside honey-glazed ham or roasted pork at dinner
- Enjoy warm on cold evenings, similar to mulled wine
- Mix with sparkling water for a lighter, refreshing spritzer
- Offer as a distinctive gift to friends who appreciate craft beverages
Variations to Try
- Fruit Mead (Melomel): Add 1 to 2 pounds of fresh or frozen fruit during secondary fermentation for a sweeter, more complex batch. Berries, stone fruits, and citrus all work beautifully.
- Spiced Mead: During secondary fermentation, add whole spices like cinnamon sticks, cloves, or star anise to create warming flavors reminiscent of mulled wine. Strain spices after 2 to 3 weeks to prevent over-extraction of bitter tannins.
- Metheglin with Ginger and Herbs: Combine fresh ginger slices, dried chamomile, and honey to produce a lighter, more aromatic mead with subtle floral notes. Herb meads age beautifully and develop complexity over 6 months or longer.
- High-Alcohol Mead: Use 4 to 5 pounds of honey instead of 3 to create a higher alcohol content around 15 to 18 percent ABV. These sweet, fortified-style meads require a yeast strain tolerant of high alcohol like EC-1118.
- Session Mead: Use only 2 pounds of honey for a lighter, lower-alcohol mead around 8 to 10 percent ABV that’s refreshing and approachable for extended drinking sessions.
Dietary Adaptations
- Gluten-Free: All fermented meads are naturally gluten-free since honey and yeast contain no gluten. This makes mead an excellent choice for those managing celiac disease or gluten sensitivity.
- Vegan: Standard mead is already vegan, though some recipes use isinglass or egg white for clarification. Use plant-based clarifiers like pea protein if you want to ensure strict vegan compatibility.
- Low-Sugar: The fermentation process converts most honey sugars into alcohol and carbon dioxide, leaving minimal residual sugar in dry meads. Expect only 1 to 3 grams of sugar per serving in a fully fermented batch.
- Lower Alcohol: Use 2 pounds of honey instead of 3 to produce a session mead around 8 to 10 percent ABV that’s lighter and more approachable. Lower alcohol meads tend to retain more residual sweetness.
Storage and Reheating
Refrigerator
Store finished mead in sealed wine bottles in the refrigerator for up to 1 year with minimal flavor degradation. Cold storage slows oxidation and keeps the mead fresh longer than room temperature.
- Keep bottles upright in the coldest part of your fridge
- Avoid frequent temperature fluctuations
- Check bottles occasionally for signs of leakage or contamination
Freezer
Mead can be frozen in sealed bottles for 2 to 3 years with proper storage. The alcohol content prevents complete freezing at standard freezer temperatures.
- Leave 1 to 2 inches of headspace in bottles to prevent cracking from expansion
- Thaw in the refrigerator overnight before opening
- Quality remains excellent when thawed properly
Reheating
Warm mead gently in a saucepan over low heat if you prefer it served warm; never boil as this drives off delicate aromas and can alter flavor. Warming to 120 to 130 degrees Fahrenheit is ideal for serving as a hot beverage.
- Use a thermometer to avoid overheating
- Stir occasionally for even warming
- Add spices or citrus if serving warm
Nutrition Information
| Nutrient | Amount |
|---|---|
| Calories | 120 |
| Total Fat | 0g |
| Saturated Fat | 0g |
| Carbohydrates | 3g |
| Fiber | 0g |
| Sugar | 2g |
| Protein | 0g |
| Sodium | 5mg |
| Cholesterol | 0mg |
Nutritional values are approximate and based on a 1.2 ounce serving of finished dry mead with 12 to 14 percent ABV. Values vary depending on honey variety, fermentation completion, and any additions like fruit or spices.
Frequently Asked Questions
Can I use table sugar or honey blends instead of pure honey?
Pure honey is essential for proper mead fermentation and authentic flavor; table sugar produces a thin, characterless result that tastes more like alcohol than mead. Honey blends and pasteurized honey work, but raw honey from quality sources produces superior complexity and depth.
How long does mead take to be drinkable?
Most meads are drinkable after 2 to 3 months of fermentation, though they improve significantly with aging. Many mead makers find that waiting 6 to 12 months produces a smoother, more integrated final product with better mouthfeel.
What happens if fermentation stops before my hydrometer reaches its final gravity?
Stuck fermentation usually results from temperature drops or nutrient depletion; try gently warming the carboy to 70 degrees and adding more yeast nutrient. If the mead remains stuck for 2 weeks after these steps, cold-crash the carboy to 40 degrees for 48 hours, then rack to a clean vessel.
Should I use an airlock or cheesecloth for fermentation?
An airlock is strongly recommended because it allows carbon dioxide to escape while preventing oxygen from entering and protecting against contamination. Cheesecloth is acceptable for experienced fermenters in very clean environments, but airlocks provide better protection for beginners.
Can I reuse the yeast cake from my first batch for a second batch?
You can reuse yeast if it’s clean and healthy, but it’s not recommended for beginners; fresh yeast produces more reliable, consistent results. After multiple reuses, yeast strains mutate and ferment less predictably, so fresh packets remain the safer choice.
Why is my mead cloudy after bottling?
Cloudiness usually indicates suspended yeast or protein particles that haven’t fully settled; this clears naturally over 1 to 2 months of cold storage. If cloudiness persists beyond 3 months, the mead has likely developed an infection and should not be consumed.
Final Thoughts
Making your own 1 gallon of mead is one of the most rewarding fermentation projects you can undertake at home. The process teaches you patience, attention to detail, and the magic of yeast transformation while rewarding you with a genuinely delicious beverage that costs a fraction of craft mead prices.
Whether you’re experimenting with your first batch or planning your fifth variation, remember that mead making is as much about enjoying the journey as celebrating the finished product. Start simple with this basic recipe, learn the fundamentals, and then explore the incredible variety of flavors waiting in your kitchen.
Explore More Fermentation Recipes
If you’ve enjoyed making mead and want to explore other traditional fermented beverages, consider trying different fruit-based wines in your home fermentation adventures.
Learn how to create a rich and complex elderberry wine recipe for deeper fruity flavors, or explore the unique qualities of muscadine wine recipe for a taste of Southern fermentation traditions. Both recipes use similar techniques to the mead method you’ve just mastered, making them natural next steps in your fermentation journey.
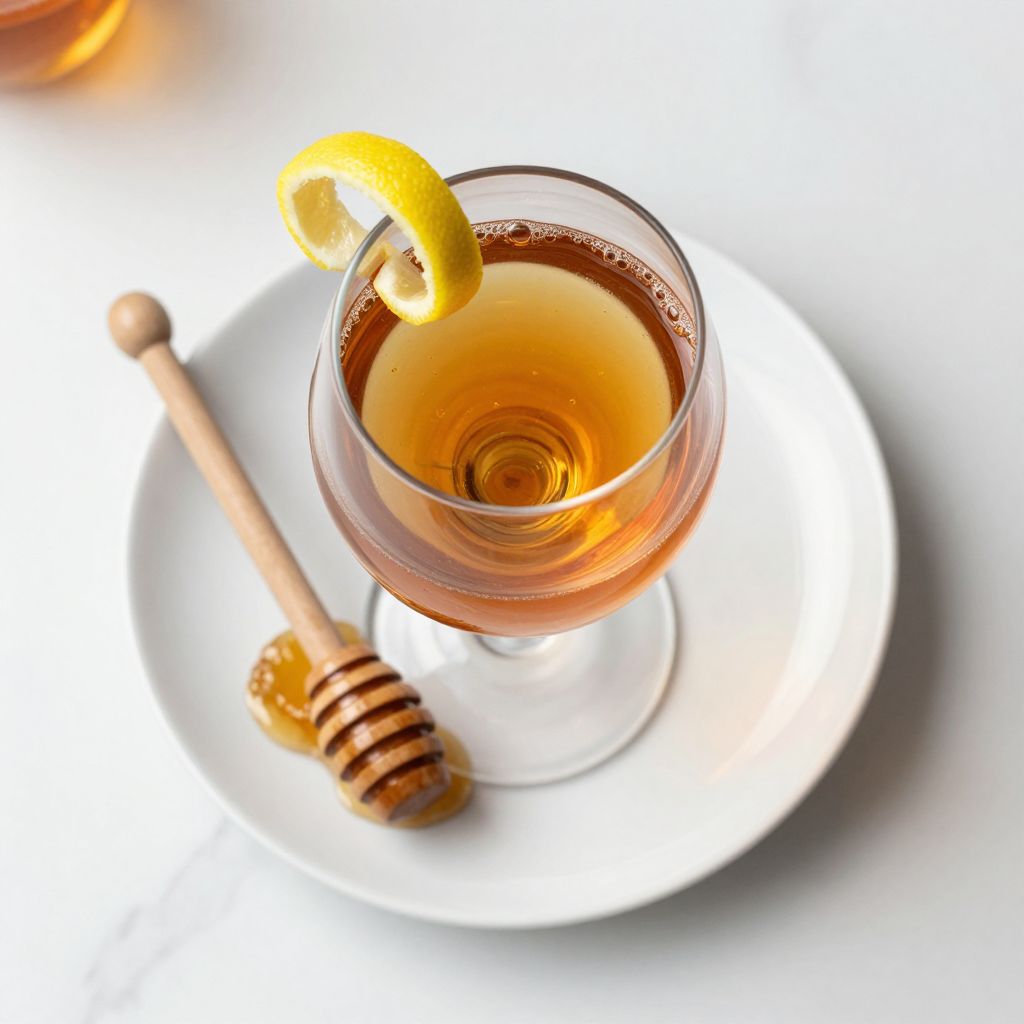
1 Gallon Mead
Ingredients
Equipment
Method
- Sanitize all equipment using brewing-grade sanitizer according to package directions; rinse or air dry completely.
- Pour 1 gallon of filtered water into a large pot and heat to 160°F, maintaining this temperature for 20 minutes.
- Remove from heat and stir in 3 pounds of honey for 5 minutes until fully dissolved.
- Allow the honey-water mixture to cool to room temperature (65–75°F), approximately 1–2 hours.
- Transfer the cooled must to a sanitized 1-gallon carboy using a funnel, leaving headspace.
- Rehydrate the wine yeast by sprinkling it into 1/4 cup of water warmed to 110°F; wait 15–20 minutes and swirl gently.
- Pitch the rehydrated yeast into the carboy, then add 1/4 teaspoon yeast nutrient and yeast energizer; stir gently to combine.
- Seal the carboy with an airlock and ferment at 65–75°F. Active fermentation appears in 24–48 hours.
- Allow primary fermentation to proceed 60–120 days, checking airlock activity periodically.
- Optional: Rack off sediment after 3–4 weeks to improve clarity and reduce off-flavors.
- When fermentation is complete and gravity readings are stable, bottle the mead and age for best flavor.