
This summer beer recipe delivers a light, citrusy, and clean-drinking brew that pairs perfectly with long days and outdoor gatherings. The beauty of making your own beer lies in controlling every ingredient, from the grain blend to the hop selection, creating something far more tailored to your palate than anything off a shelf.
Whether you are a seasoned homebrewer or picking up a fermentation vessel for the first time, this recipe guides you through each stage with confidence. By the end, you will have crafted a beer that tastes refreshingly crisp, slightly fruity, and impossibly satisfying on a hot day.
Why You’ll Love This Recipe
This summer beer strikes the perfect balance between approachable and flavorful, making it ideal for anyone wanting to brew without getting lost in technical complexity.
- Light body and low alcohol content (4.8% ABV) make it supremely drinkable on warm days
- Bright citrus and subtle stone fruit notes from the hop selection feel refreshingly summery
- Complete process from brew day to first pour takes about four weeks, rewarding patience with incredible flavor
- All-grain recipe offers full control over the final product and costs less than extract-based alternatives
- Forgiving fermentation profile suits both temperature-controlled and ambient brewing conditions
My Experience Making This Recipe
I brewed my first batch of this summer ale on a June morning when the kitchen thermometer already hit 78 degrees before noon. The smell of grains steeping and hops boiling filled the house with an aroma so inviting that my partner kept wandering into the kitchen asking when we could taste the results.
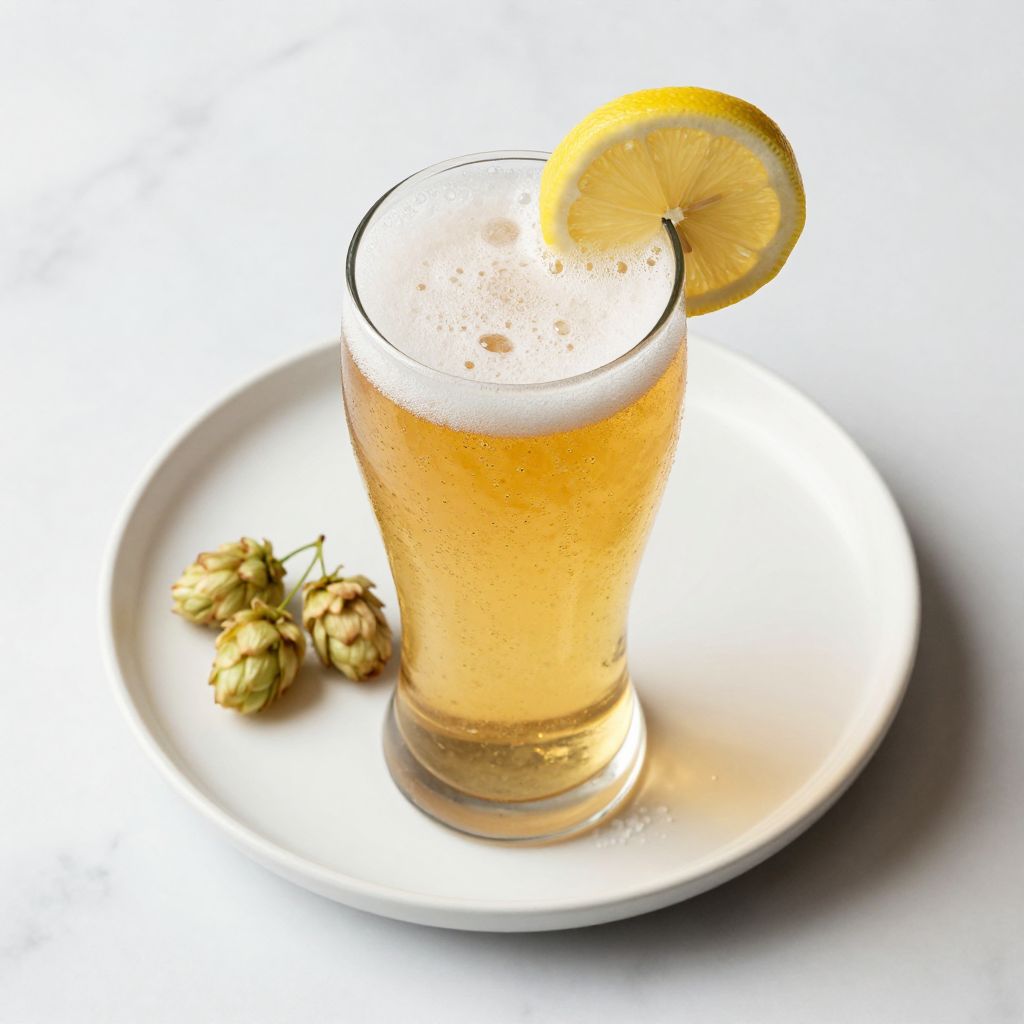
Watching the wort cool and then ferment over the following weeks became oddly meditative, checking gravity readings and taking photos to track progress. When I finally kegged the beer and carbonated it, the first pour revealed a pale golden hue with a whisper-thin white head that screamed summer.
Friends who typically reach for mass-market lagers were genuinely shocked by how smooth and flavorful the beer tasted, often asking if I had actually made it myself. The payoff of spending one afternoon brewing transformed into weeks of incredible beer that cost about half the price of buying comparable craft brews.
Recipe Overview
- Recipe Name: Summer Ale
- Servings: Makes 5 gallons (approximately 54 twelve-ounce servings)
- Prep Time: 30 minutes
- Brew Day Time: 4-5 hours
- Fermentation Time: 3-4 weeks
- Total Time: 4-5 weeks
- Course: Beverage
- Cuisine: American Craft
- Calories per Serving: 150
Equipment You Will Need
- Large stainless steel pot (10+ gallons) for heating and boiling water
- Mash tun or insulated cooler with a false bottom for steeping grains
- Thermometer accurate to within 1 degree Fahrenheit
- Hydrometer for measuring specific gravity
- Brewing spoon or large stainless steel stirring implement
- Immersion chiller or counterflow chiller to cool the wort rapidly
- Fermentation vessel (glass carboy or food-grade plastic bucket with airlock)
- Airlock and rubber stopper sized for your fermentation vessel
- Auto-siphon and food-grade tubing for transferring beer
- Bottling wand and bottle caps (or kegging equipment for force carbonation)
- Sanitizer solution such as Star San
- Measuring cups and spoons for ingredients and measurements
- Digital scale accurate to tenths of a gram for precise grain and hop weighing
- Cheese cloth or hop bag for containing loose hops during the boil
Ingredients for Summer Ale
- 2-row Pale Malt: 8 pounds (base grain providing fermentable sugars and light color)
- Pilsner Malt: 1.5 pounds (adds delicate sweetness and crisp character)
- Carapils Malt: 0.5 pounds (enhances head retention and body without adding color)
- Cascade Hops: 1.25 ounces at 60-minute boil (bittering)
- Centennial Hops: 0.75 ounces at 15-minute mark (aroma and flavor)
- Amarillo Hops: 1 ounce at flameout (bright citrus character in the finish)
- Fermentation Yeast: Wyeast 1056 American Ale or equivalent (dry yeast packet or liquid culture)
- Filtered Water: 7 gallons for brewing (more for cooling)
- Table Salt: 1/4 teaspoon for water chemistry adjustment
Ingredient Notes and Substitutions
- 2-row Pale Malt: This grain forms the backbone of your beer, providing the bulk of fermentable sugars and a light, clean flavor. If unavailable, substitute with any pale base malt from a quality supplier; avoid using only pilsner malt, as it needs a larger protein base.
- Pilsner Malt: This malt contributes a slightly spicy, refined quality that keeps the beer from tasting flat. You can replace it with additional 2-row pale malt, though the beer will taste slightly less complex and crisp.
- Carapils Malt: This specialty grain improves foam stability and body without adding sweetness or color. Substituting with wheat malt works in a pinch, though it will slightly increase turbidity in the finished beer.
- Cascade Hops: A classic American hop with floral, spicy notes that provide clean bittering. Substitute with Centennial or Chinook hops for a slightly earthier profile, though the flavor character will shift somewhat.
- Centennial Hops: This dual-purpose hop adds bright, citrusy complexity without overwhelming the palate. Replacing it with Amarillo hops shifts the flavor toward more stone fruit and orange character.
- Amarillo Hops: This late-boil addition delivers vivid lemon and peach notes that define the summery finish. Substituting with Citra or Mosaic hops creates a more tropical, modern flavor profile.
- Wyeast 1056 American Ale: This clean-fermenting yeast produces a crisp, dry finish that lets the hops shine. You can use SafAle US-05 dry yeast or Fermentis US-05 as budget-friendly alternatives with nearly identical results.
How to Make Summer Ale
Step 1: Prepare Your Water and Equipment
Fill your mash tun with 2.5 gallons of water heated to 168 degrees Fahrenheit, adding the table salt to adjust water chemistry slightly. Sanitize all equipment that will touch your beer after the boil, including the fermentation vessel, airlock, tubing, and any sampling equipment, using your sanitizer solution according to package directions.
Step 2: Mill and Mash Your Grains
Mill all grains just before brewing to expose the starches while keeping the husks intact, as crushing them too finely will cause stuck mashes. Add the milled grains to your mash tun in stages, stirring gently to break up any clumps and ensure even water absorption, maintaining a mash temperature between 152 and 156 degrees Fahrenheit throughout the 60-minute rest.
Step 3: Sparge and Collect Wort
After the mash rests, slowly run off the liquid into your brew pot, collecting roughly 5.5 gallons of wort. Rinse the grains with an additional 2 gallons of 168-degree water, pouring it slowly over the grain bed to extract remaining sugars while keeping the grain bed intact.
Step 4: Boil and Add Bittering Hops
Bring your collected wort to a rolling boil, skimming off any foam that rises to the surface during the first few minutes, as this improves clarity. Once at a full boil, add 1.25 ounces of Cascade hops in a hop bag and begin timing the 60-minute boil, which breaks down harsh alpha acids and integrates the bitter compounds smoothly into the beer.
Step 5: Add Flavor Hops at 15 Minutes Remaining
With 15 minutes left in the boil, add 0.75 ounces of Centennial hops, which will infuse the beer with subtle citrus and spice complexity without adding excessive bitterness. The shorter boil time preserves delicate flavor compounds that longer boiling would destroy, creating a balanced mid-palate impression.
Step 6: Cool the Wort Rapidly
At the end of the boil, turn off the heat and add 1 ounce of Amarillo hops directly to the hot wort, letting them steep for 5 minutes as residual heat extracts bright lemon and peach notes. Place your immersion chiller in the wort and run cold water through it, cooling the liquid from 212 degrees down to 68 degrees Fahrenheit within 20 to 30 minutes, which prevents unwanted bacteria growth and stops the cooking process.
Step 7: Transfer Wort and Pitch Yeast
Carefully siphon the cooled wort into your sanitized fermentation vessel, leaving as much sediment behind as possible to ensure a clean-tasting final beer. Once the wort fills your carboy and has settled for 10 minutes, check the temperature to ensure it has dropped to 65 to 70 degrees Fahrenheit, then pitch your yeast culture or rehydrate your dry yeast according to package instructions before adding it to the wort.
Step 8: Install Airlock and Ferment
Fit the airlock into the rubber stopper and insert the stopper into the carboy opening, creating an airtight seal that allows carbon dioxide to escape while preventing contamination. Place the carboy in a location where the temperature remains between 65 and 72 degrees Fahrenheit, ideally with minimal light exposure, and ferment for 10 to 14 days until vigorous bubbling subsides and the airlock activity drops to one bubble every 10 to 15 seconds.
Step 9: Monitor Fermentation Progress
Check specific gravity readings every few days using your hydrometer to track fermentation progress and estimate when the beer will finish fermenting. When the gravity reading stabilizes for three consecutive days and drops to approximately 1.010, the yeast has converted most of the fermentable sugars into alcohol and carbon dioxide, signaling readiness for the next stage.
Step 10: Bottle or Keg Your Beer
For bottling, add priming sugar (approximately 3/4 cup of dextrose dissolved in 1 cup of boiling water) to a sanitized bottling bucket, then siphon the beer out of the carboy into the bucket, mixing gently to distribute the sugar evenly. Fill sanitized bottles using a bottling wand, leaving 1 inch of headspace, cap them with sanitized caps, and store them upright at room temperature for 2 to 3 weeks while carbonation develops.
Pro Tip: The single most important factor in successful homebrewing is sanitization and preventing oxidation during transfer, so never skip cleaning steps and always use a auto-siphon to minimize splashing.
Tips for the Best Summer Ale
- Use fresh hops purchased within the last six months, as older hops lose potency and aromatics, resulting in a duller final beer. Store hops in the freezer if you will not use them within two months.
- Invest in a quality thermometer and check your mash temperature frequently during the grain steeping process, as one degree of variation can shift the balance between a crisp and sticky-sweet beer.
- Chill your wort as rapidly as possible after the boil ends, ideally within 20 to 30 minutes, since prolonged exposure to high temperatures invites oxidation and off-flavors.
- Keep your fermentation temperature as stable as possible between 65 and 70 degrees Fahrenheit, placing the carboy in a basement, closet, or temperature-controlled space away from sunlight.
- Take detailed notes on your brew day, recording actual temperatures, timing, gravity readings, and any changes you made, so you can replicate or improve the recipe on your next batch.
- Taste the beer multiple times throughout conditioning and aging to identify when it reaches peak flavor, as some batches develop best after three weeks while others need five weeks.
Common Mistakes to Avoid
- Crushing grain too finely before mashing creates a stuck sparge, where the grain bed compacts and wort runs off slowly or stops completely, dramatically reducing your yield and wasting time and ingredients.
- Skipping the sanitation step invites wild yeast and bacteria to colonize your beer, resulting in off-flavors, sourness, or complete batch loss that cannot be fixed after fermentation begins.
- Fermenting at temperatures above 75 degrees Fahrenheit causes the yeast to produce excessive esters and fusel alcohols, giving the beer a boozy, nail-polish-remover character instead of clean crispness.
- Adding all the hops at the start of the boil without timing the later additions correctly creates an unbalanced beer that tastes either too bitter or too grassy, missing the summery flavor you aimed for.
- Bottling or kegging before fermentation completely finishes leaves residual sugar in the beer, which ferments in the sealed container and creates excessive carbonation that can explode bottles or over-pressurize kegs.
Serving Suggestions
This summer ale shines in crisp, cool glasses served at 48 to 55 degrees Fahrenheit, the temperature at which the hop character and delicate grain flavors reveal themselves fully. Pair it with grilled foods, light seafood dishes, or simply enjoy it on its own as the ultimate refreshment on a hot afternoon.
- Grilled fish tacos with lime and cilantro complement the citrus notes in the beer perfectly
- Spicy chicken wings coated in sauce that has kick find balance in the beer’s clean, crisp finish
- Fresh salads with vinaigrette benefit from the ale’s brightness without overwhelming delicate greens
- Cheese boards featuring mild cheddar, gouda, and fresh mozzarella pair beautifully with the beer’s balanced bitterness
- Grilled vegetables like corn, zucchini, and peppers highlight the beer’s subtle sweetness from the grain bill
Variations to Try
- Wheat Beer Version: Replace 1 pound of 2-row pale malt with wheat malt to create a hazy, slightly fruity summer wheat ale that feels even more refreshing and pairs wonderfully with citrus garnishes.
- Extra Fruity Summer Ale: Increase Amarillo hops to 1.5 ounces at flameout and add 0.5 pounds of crystal malt to the grain bill for a beer with pronounced stone fruit and peach character with slightly more body.
- Session Beer Variation: Reduce all grain quantities by 25 percent to create a 3.5% ABV session ale that you can drink multiple pints of without getting too intoxicated, perfect for afternoon social gatherings.
- Hoppy IPA Summer Ale: Increase Centennial hops to 1.25 ounces at 15 minutes and add 0.75 ounces of Simcoe hops at 5 minutes before knockout for a more aggressively hopped, pine-forward version that leans IPA.
- Citrus-Infused Version: Add zest from two lemons or one grapefruit at the end of fermentation for extra brightness, though taste carefully as citrus can quickly overpower the delicate hop character if added too aggressively.
Dietary Adaptations
- Gluten-Free: Replace all grains with gluten-free alternatives like sorghum malt and rice malt, though the body and flavor will shift noticeably and require higher enzyme additions to convert starches properly.
- Dairy-Free: This recipe is naturally dairy-free, containing no milk or milk products at any stage of the brewing process.
- Vegan: Use plant-based gelatin alternative or simply skip the fining agent entirely, accepting slightly more cloudiness in the finished beer while keeping all other ingredients vegan-approved.
- Lower Carb and Keto: Ferment to dryness by using a more aggressive yeast strain or extending fermentation time, creating a beer with minimal residual sugar, though the alcohol content will climb slightly above the original 4.8% ABV.
Storage and Reheating
Refrigerator
Store bottled beer in the refrigerator at 38 to 42 degrees Fahrenheit, where it will maintain peak flavor for approximately 4 to 6 months before oxidation and staling become noticeable. Keep bottles upright to minimize contact between the beer and oxygen, storing them away from direct sunlight which causes UV light to damage hop compounds and create a skunky aroma.
- Check bottles regularly for leaks or weeping caps that indicate improper sealing or fermentation issues
- Rotate older bottles to the front of the shelf so older stock gets consumed first
- Remove bottles from the fridge only shortly before serving to prevent temperature fluctuations
Freezer
Freezing beer is not recommended, as the expansion during freezing can crack bottles and the thawing process damages flavor compounds and creates off-tastes. If you must store beer for longer periods, keep bottles in a cool, dark place at around 50 degrees Fahrenheit instead.
- Cellars or underground storage areas maintain naturally cool temperatures without active refrigeration
- Avoid basements prone to temperature swings or high humidity, both of which degrade labels and beer quality
Reheating
This beer should never be heated intentionally, as warming will release carbonation and damage all the delicate aromatics and flavors. Simply remove bottles from cold storage 10 to 15 minutes before serving to let them reach the optimal 48 to 55 degree serving temperature.
- Pour into glasses slowly to preserve the slight carbonation and create a small white head
- Drink immediately after pouring for the best aromatic experience before volatile compounds dissipate
Nutrition Information
| Nutrient | Amount |
|---|---|
| Calories | 150 |
| Total Fat | 0g |
| Saturated Fat | 0g |
| Carbohydrates | 12g |
| Fiber | 0g |
| Sugar | 0g |
| Protein | 1g |
| Sodium | 12mg |
| Cholesterol | 0mg |
These values represent a standard 12-ounce serving and may vary slightly based on exact fermentation efficiency and final gravity achieved during your specific brew day. Alcohol content approximates 4.8% ABV in this recipe.
Frequently Asked Questions
Can I Make This Recipe With Extract Instead of Whole Grains?
Yes, you can substitute 6 pounds of pale malt extract and 0.5 pounds of crystal malt extract for the whole grain bill, though the beer will lack the complex grain character and clean crispness of an all-grain version. Simply steep the crystal malt extract in 1.5 gallons of 155-degree water for 30 minutes, then add the pale extract and proceed with the boil as written.
What Temperature Should I Ferment At, and Can I Ferment in a Warm Climate?
Ideally ferment between 65 and 70 degrees Fahrenheit for the cleanest flavor, but temperatures between 70 and 75 degrees produce acceptable results with slightly increased ester production. In warm climates, use a swamp cooler (a carboy surrounded by evaporative wet towels changed twice daily) or an actual temperature controller with a heating/cooling unit to maintain the ideal range.
How Long Before the Beer is Ready to Drink After Bottling?
Bottle-conditioned beer typically takes 2 to 3 weeks to fully carbonate and reach peak flavor at room temperature. Chilling the bottles will make the carbonation appear faster, but the flavor compounds need the full timeframe to develop properly, so patience truly rewards the brewer.
What Should I Do If My Beer Smells Like Vinegar or Acetone After Fermentation?
A vinegar smell indicates acetobacter contamination from exposure to oxygen or inadequate sanitation, and the batch should be discarded as it will only worsen. An acetone or nail-polish-remover smell indicates excessive ester production from fermenting too warm, and while not dangerous, the beer will taste unpleasant and you should focus on temperature control for the next batch.
Can I Reuse the Yeast From This Batch to Brew Again?
Yes, professional and advanced homebrewers routinely harvest and reuse yeast from previous batches by collecting the yeast cake at the bottom of the carboy after siphoning off the beer. Store the harvested yeast in the refrigerator for up to a few weeks, then use it to pitch into your next brew, though viability decreases after multiple generations so plan to purchase fresh yeast every five to seven batches.
What Happens If I Accidentally Used Water That Was Too Hot or Too Cold During the Mash?
If mash temperature dropped below 148 degrees Fahrenheit, your beer will finish with residual sweetness, which actually creates a slightly fuller body but may not suit the crisp summer profile. If the mash exceeded 162 degrees Fahrenheit, you extracted tannins that create a harsh, astringent finish, and you should plan a different approach for the next brew.
Final Thoughts
Brewing your own summer beer recipe transforms a simple afternoon into a rewarding creative process that yields weeks of incredible refreshment. The first time you pour a glass of beer you crafted yourself and taste the bright citrus, clean grain character, and satisfying finish, the entire process becomes worth every minute of effort.
So grab your equipment, gather your ingredients, and brew a batch of this summer ale that will have everyone asking where you bought such fantastic beer. Trust the process, follow the steps carefully, and you will discover that homebrewing is far more approachable than you ever imagined.
Explore More Summer Beverages
If you loved brewing this summer beer recipe, check out more refreshing drinks perfect for warm weather gatherings and outdoor celebrations.
Discover the bright, hydrating flavors of agua fresca recipe for a non-alcoholic cooling option that pairs beautifully with your homemade ale. For those who prefer cocktails, learn how to mix the perfect ice cold margarita recipe that complements grilled summer fare just as well as this beer does.
Summer Ale
Ingredients
Equipment
Method
- Heat 2.5 gallons of water to 168°F, add 1/4 teaspoon table salt, and sanitize all equipment with sanitizer solution.
- Mill all grains and mash at 152–156°F for 60 minutes, stirring gently to maintain temperature.
- Sparge the grains with 2 gallons of 168°F water, collecting a total of 5.5 gallons of wort.
- Bring the wort to a rolling boil, add 1.25 ounces of Cascade hops in a hop bag, and boil for 60 minutes.
- With 15 minutes remaining in the boil, add 0.75 ounces of Centennial hops for flavor.
- Turn off heat, add 1 ounce of Amarillo hops at flameout, steep for 5 minutes, then cool the wort to 68°F with an immersion chiller.
- Siphon the cooled wort into a sanitized fermenter, leaving sediment behind, and verify temperature is between 65 and 70°F.
- Pitch the yeast into the wort, seal the fermenter with an airlock, and ferment at 65–72°F for 10–14 days.
- Monitor specific gravity until it stabilizes around 1.010 for three consecutive days.
- Dissolve 3/4 cup dextrose in 1 cup boiling water, add to bottling bucket, transfer beer, bottle with 1 inch headspace, cap and condition at room temperature for 2–3 weeks.