
There’s something magical about the first sip of makgeolli, that milky-white Korean rice wine that tastes like comfort wrapped in a bottle.
This traditional fermented beverage has been brewed in Korean kitchens for centuries, and making it at home is far more achievable than you might think. Unlike many fermented drinks, makgeolli delivers a subtly sweet, slightly tangy flavor with a creamy texture that feels more like a dessert than an alcoholic drink.
What makes this recipe special is how forgiving the fermentation process becomes once you understand the basics. You’ll transform simple rice, koji (rice mold), and water into a sophisticated homemade beverage that costs a fraction of what you’d pay in stores.
Why You’ll Love This Recipe
Brewing makgeolli at home connects you to centuries of Korean tradition while producing a unique, complex flavor you simply cannot replicate with store-bought versions. The entire process takes about one to two weeks from start to finish, and most of that time is hands-off fermentation.
- Surprisingly simple ingredients list with no exotic chemicals or additives required
- Produces a naturally sweet, creamy beverage with a smooth mouthfeel
- Perfect for entertaining, gifting, or enjoying quiet moments at home
- Teaches you valuable fermentation skills applicable to many other projects
- Costs significantly less than purchasing premium makgeolli from specialty shops
My Experience Making This Recipe
I first attempted making makgeolli on a chilly autumn morning when a Korean neighbor casually mentioned she brewed her own. My kitchen filled with the most wonderful yeasty aroma within 48 hours, and I knew I’d stumbled onto something special.
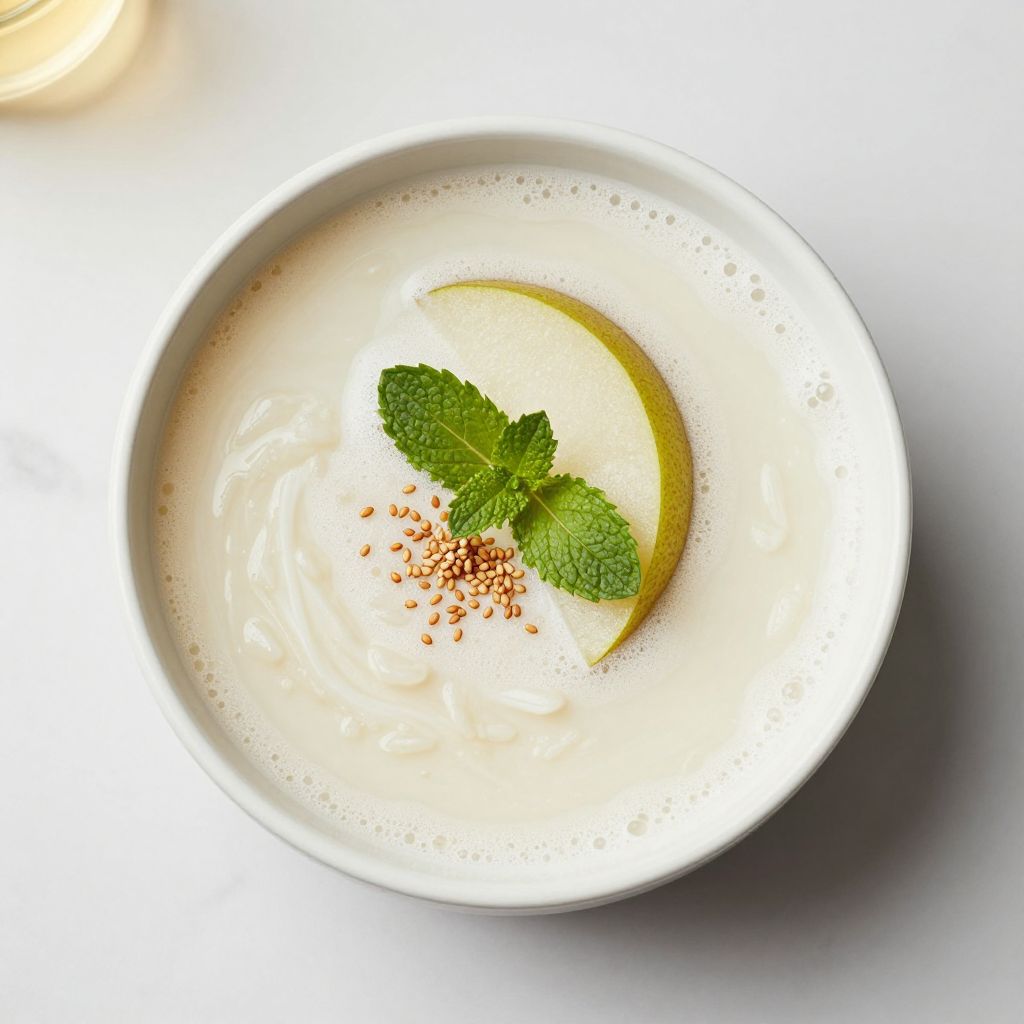
The texture of the finished product surprised me most. It poured thick and creamy, like a fancy dessert wine, with that characteristic milky appearance that makes makgeolli instantly recognizable. My friends were shocked when I told them I’d fermented it myself in a basic glass jar on my kitchen counter.
The subtle sweetness hit first, followed by a gentle tang that makes you want another sip immediately. I’ve made this recipe at least a dozen times now, and each batch teaches me something new about how temperature and fermentation timing affect the final flavor profile.
Recipe Overview
- Recipe Name: Homemade Makgeolli
- Servings: Approximately 1.5 liters (about 8 servings)
- Prep Time: 30 minutes
- Cook Time: 45 minutes
- Fermentation Time: 7 to 10 days
- Total Time: 8 to 11 days
- Course: Beverage
- Cuisine: Korean
- Alcohol Content: Approximately 6 to 8 percent ABV
- Calories per Serving: Approximately 90
Equipment You Will Need
- Large glass jar (2 to 3 liters capacity)
- Cheesecloth or fine mesh strainer
- Steamer basket or rice cooker
- Large mixing bowl
- Wooden spoon or silicone spatula
- Kitchen thermometer
- Measuring cups and spoons
- Coffee filters or fine straining cloth
- Bottles for storing finished makgeolli
- Paper towels or clean cloth for covering jar
Ingredients for Makgeolli
- Sweet rice (glutinous rice): 2 cups, uncooked
- Koji powder (rice mold starter): 1 tablespoon
- Nuruk (Korean grain starter): 1 tablespoon (optional but recommended)
- Water: 4 cups, filtered or distilled
- Salt: 1/4 teaspoon
Ingredient Notes and Substitutions
- Sweet rice (glutinous rice): This short-grain rice creates the starchy, creamy base that ferments beautifully. You can use regular white rice as a substitute, though the texture will be slightly less creamy and the fermentation may progress differently.
- Koji powder (rice mold starter): Koji contains beneficial mold spores that break down starches into sugars, which yeast then converts to alcohol. You cannot easily replace koji; if unavailable, consider ordering online from Korean or Japanese suppliers.
- Nuruk (Korean grain starter): This traditional fermentation starter contains naturally occurring yeast and bacteria that enhance flavor complexity. Plain baker’s yeast mixed with grain flour works as a backup, though the flavor profile will be less authentic.
- Water: Filtered or distilled water prevents chlorine and other chemicals from interfering with fermentation. Tap water works in a pinch, though leaving it out overnight helps chlorine dissipate.
How to Make Makgeolli
Step 1: Rinse and Prepare the Rice
Place 2 cups of sweet rice in a fine mesh strainer and rinse under cold running water until the water runs clear. This removes excess starch and debris that could cloud your final beverage or interfere with fermentation.
Step 2: Steam the Rice
Add the rinsed rice to a steamer basket or rice cooker with 2.5 cups of water and steam for about 30 to 40 minutes until the rice is completely cooked and fluffy. The rice should be tender enough to mash easily but still maintain individual grains; overcooking creates a mushy texture that ferments unevenly.
Step 3: Cool the Cooked Rice
Spread the steamed rice on a clean baking sheet or in a large bowl and let it cool to room temperature, about 30 to 45 minutes. Hot rice kills the koji and starter cultures, so patience here is absolutely essential for successful fermentation.
Step 4: Mix Koji and Starter
In a small bowl, combine 1 tablespoon of koji powder with 1 tablespoon of nuruk (or baker’s yeast if substituting) and mix thoroughly. This combination of ingredients creates the perfect microbial ecosystem for fermentation.
Step 5: Combine Rice, Koji, and Water
Transfer the cooled rice to your large glass jar and add 1.5 cups of filtered or distilled water, stirring gently to combine. Add the koji and starter mixture to the jar and stir thoroughly for about 2 to 3 minutes to distribute the cultures evenly throughout the rice.
Step 6: Set Up Your Fermentation Environment
Cover the jar loosely with cheesecloth or a clean cloth secured with a rubber band, leaving enough space for gases to escape during fermentation. Place the jar in a warm location with consistent temperature between 68 and 72 degrees Fahrenheit; a kitchen corner away from direct sunlight works perfectly.
Step 7: Monitor Fermentation Progress
Check your makgeolli daily, stirring gently with a clean spoon each morning and evening for the first 3 to 4 days. You’ll notice bubbling and fizzing as fermentation progresses; this is exactly what you want and means the koji and yeast are actively breaking down starches and producing alcohol.
Step 8: Transition to Secondary Fermentation
After 4 to 5 days of active fermentation, the mixture will appear creamy and smell pleasantly yeasty with a sweet undertone. Stop stirring at this point and cover the jar with cheesecloth, allowing it to ferment undisturbed for another 3 to 5 days depending on your temperature and desired flavor intensity.
Step 9: Strain and Filter Your Makgeolli
Line a fine mesh strainer with coffee filters and carefully pour the fermented mixture through, collecting the liquid in a clean bowl below. The solids left behind are the rice sediment; reserve a small amount of this thick mixture if you prefer traditional makgeolli with more body, or strain it completely for a cleaner beverage.
Step 10: Bottle and Store
Pour your finished makgeolli into clean glass bottles and seal with caps or corks. Refrigerate immediately to slow any remaining fermentation and preserve the flavor at its peak; properly stored makgeolli keeps for up to 2 weeks in the refrigerator.
Pro Tip: Temperature control makes or breaks your makgeolli fermentation, so invest in a reliable thermometer and check your fermentation area daily to ensure it stays between 68 and 72 degrees Fahrenheit.
Tips for the Best Makgeolli
- Use filtered water if possible, as chlorine in tap water can interfere with koji and yeast activity. If you only have tap water available, leave it out overnight to allow chlorine to dissipate.
- Stir gently during the first 4 to 5 days of fermentation to distribute koji and yeast evenly and prevent settling. This accelerates flavor development and creates a more consistent final product.
- Keep your fermentation jar away from direct sunlight and extreme temperature fluctuations. Light exposure can degrade flavor compounds, while temperature swings confuse the fermentation process.
- Save some of your finished makgeolli as a starter culture for your next batch, which requires less total fermentation time and develops more consistent flavor. Store this starter in the refrigerator between uses.
- Taste your makgeolli on day 7 to gauge fermentation progress, then decide if you want to continue fermenting for deeper flavor or bottle it immediately for a lighter, fresher taste.
Common Mistakes to Avoid
- Adding koji or starter to hot rice kills the living cultures and results in no fermentation. Always cool your rice completely to room temperature before combining with fermentation starters.
- Fermenting in temperatures below 65 degrees Fahrenheit or above 75 degrees Fahrenheit slows fermentation dramatically or creates off-flavors. Consistency in temperature matters more than finding the exact perfect temperature.
- Stirring after the first 4 to 5 days of fermentation introduces oxygen that can create vinegary flavors and spoilage. Once you stop the initial stirring phase, leave the jar alone to complete secondary fermentation undisturbed.
- Storing finished makgeolli at room temperature causes continued fermentation that produces excessive alcohol and carbonation. Always refrigerate your finished makgeolli immediately to halt fermentation and preserve quality.
- Using regular white rice instead of sweet rice produces a thinner, less creamy final product that lacks the characteristic mouthfeel that makes makgeolli special. Sweet rice is worth sourcing specifically for this recipe.
Serving Suggestions
Serve your homemade makgeolli chilled in small glasses or traditional Korean cups, either straight or with a gentle stir to incorporate the sediment. The creamy texture and subtle sweetness make it equally suited for sipping slowly as an aperitif or enjoying alongside Korean snacks and appetizers.
- Pair with Korean pancakes like pajeon or hotteok for a traditional combination that balances richness and sweetness
- Serve alongside spicy Korean fried chicken to cool and complement the heat with creamy sweetness
- Mix into desserts like shaved ice or serve as a dessert wine alongside Korean pastries
- Enjoy as an after-dinner digestif with fresh fruit or light cheese
- Use as a base for makgeolli cocktails combined with fresh fruit juices and herbs
Variations to Try
- Fruit-Infused Makgeolli: Add fresh fruit like strawberries, plums, or pears during the final 1 to 2 days of fermentation for subtle fruit notes and complexity. The natural sugars in fruit also slightly boost fermentation activity.
- Ginger Makgeolli: Include thin slices of fresh ginger during fermentation to add warming spice and aid digestion naturally. This variation works particularly well in cooler months and develops more flavorful complexity than plain makgeolli.
- Brown Rice Makgeolli: Substitute brown rice for sweet rice to create a nuttier, earthier flavor profile with more dietary fiber. Brown rice ferments more slowly, so expect fermentation to take 2 to 3 days longer.
- Traditional Makgeolli with Barley: Replace 1/2 cup of sweet rice with roasted barley for added complexity and a slightly drier final product. Barley adds subtle toasted grain notes that balance the sweetness beautifully.
- Higher Alcohol Makgeolli: Extend fermentation for 2 to 3 additional days and increase the nuruk starter to 1.5 tablespoons for a stronger, drier final beverage. This variation works best in warmer months when fermentation proceeds more quickly.
Dietary Adaptations
- Gluten-Free: This recipe is naturally gluten-free when using certified gluten-free koji and nuruk. Always verify your fermentation starters come from certified gluten-free sources, as cross-contamination can occur during production.
- Lower Carbohydrate: You cannot easily reduce carbohydrates in makgeolli without fundamentally changing the recipe, since fermentation requires sugars. Accept that makgeolli contains moderate carbohydrates or consider enjoying it as an occasional treat rather than daily beverage.
- Vegan and Vegetarian: This recipe is naturally vegan and vegetarian, containing only plant-based ingredients. No animal products are involved in traditional makgeolli production.
- Lower Alcohol Version: Reduce fermentation time to 5 to 6 days total and bottle immediately when fermentation appears to slow noticeably. This produces a beverage around 4 to 5 percent ABV with fresher, brighter flavors.
Storage and Reheating
Refrigerator
Store finished makgeolli in sealed glass bottles on your refrigerator shelf where it keeps for up to 2 weeks. The cold temperature halts fermentation and preserves the delicate flavor profile you’ve worked to develop.
- Seal bottles tightly to prevent oxidation and flavor loss
- Keep away from light by storing in a dark corner of the refrigerator if possible
- Stir gently before serving if sediment has settled
Freezer
Makgeolli can be frozen for extended storage up to 3 months in sealed glass bottles or freezer-safe containers. Thaw slowly in the refrigerator rather than at room temperature to preserve flavor integrity.
- Leave 1/2 inch of headspace to allow for expansion during freezing
- Expect slightly altered mouthfeel after thawing, though flavor remains pleasant
- Use frozen makgeolli primarily for cooking rather than drinking straight
Reheating
Makgeolli is typically served chilled and does not require heating, but you can gently warm it if you prefer. Heat to just below steaming temperature rather than boiling, as high heat destroys delicate fermented flavors.
- Warm in a saucepan over low heat for 3 to 5 minutes, stirring occasionally
- Serve warm in traditional Korean cups for a comforting winter experience
- Combine with hot water to create a lighter, more refreshing drink
Nutrition Information
| Nutrient | Amount |
|---|---|
| Calories | 90 |
| Total Fat | 0g |
| Saturated Fat | 0g |
| Carbohydrates | 12g |
| Fiber | 0g |
| Sugar | 3g |
| Protein | 1g |
| Sodium | 60mg |
| Cholesterol | 0mg |
These values are approximate and may vary based on specific ingredients used, fermentation duration, and final alcohol content. The carbohydrate content primarily comes from residual sugars that fermentation does not completely convert.
Frequently Asked Questions
Can I Use Regular Yeast Instead of Nuruk?
You can substitute baker’s yeast at 1/4 teaspoon mixed with 1 tablespoon of grain flour, though the flavor profile will be less complex and more one-dimensional. Nuruk contains wild yeasts and bacteria that create the depth and subtle complexity that makes authentic makgeolli distinctive.
What If My Makgeolli Doesn’t Ferment?
Non-fermentation typically results from temperature that’s too cold or koji that lost viability during storage. Verify your fermentation area stays between 68 and 72 degrees Fahrenheit and check that koji powder hasn’t been stored in hot conditions for extended periods.
How Long Can I Store Finished Makgeolli?
Refrigerated makgeolli keeps for 2 to 3 weeks before quality begins declining, while frozen makgeolli stays good for up to 3 months. After 3 weeks, the flavor becomes vinegary and less pleasant.
Why Is My Makgeolli Cloudy Instead of Clear?
Cloudiness is actually traditional and desirable in makgeolli, resulting from rice particles and fermentation byproducts. If you prefer a clearer product, strain through coffee filters multiple times or let it sit undisturbed in the refrigerator for several days to allow sediment to settle.
Can I Make Makgeolli Without Koji?
Koji is essential for breaking down rice starches into fermentable sugars, so you cannot make traditional makgeolli without it. If koji is unavailable, consider exploring other fermented rice beverages like amazake recipe that use different fermentation methods.
Should I Refrigerate Makgeolli During Fermentation?
Do not refrigerate during fermentation, as cold temperatures slow koji and yeast activity dramatically. Only refrigerate after fermentation completes and you’ve bottled your finished makgeolli.
Final Thoughts
Making makgeolli at home transforms how you think about fermented beverages and what’s possible in your own kitchen. This recipe teaches patience, observation, and respect for living cultures that work quietly behind the scenes to create something special and delicious.
Your first batch might not be perfect, and that’s entirely okay because each fermentation teaches you something valuable about timing, temperature, and technique. Once you’ve tasted your own homemade makgeolli, you’ll find store-bought versions pale in comparison, and you’ll want to brew another batch immediately.
If you enjoy exploring Korean beverages, consider trying hwachae recipe for a refreshing non-fermented complement to your homemade makgeolli collection.
Homemade Makgeolli
Ingredients
Equipment
Method
- Step 1: Rinse 2 cups of sweet rice in a fine mesh strainer under cold running water until the water runs clear.
- Step 2: Steam the rinsed rice in a steamer basket or rice cooker with 2.5 cups of water for 30 to 40 minutes until tender and fluffy.
- Step 3: Spread the steamed rice on a clean surface or in a large bowl and let cool to room temperature, about 30 to 45 minutes.
- Step 4: In a small bowl, mix 1 tablespoon of koji powder with 1 tablespoon of nuruk until evenly combined.
- Step 5: Transfer cooled rice to a large glass jar, add 1.5 cups of filtered water, and stir gently to combine.
- Step 6: Add the koji and nuruk mixture and stir thoroughly for 2 to 3 minutes to distribute the cultures.
- Step 7: Loosely cover the jar with cheesecloth secured by a rubber band and place in a warm spot (68–72°F) for 4 to 5 days, stirring gently twice daily.
- Step 8: After 4 to 5 days, stop stirring and allow secondary fermentation undisturbed for another 3 to 5 days at the same temperature.
- Step 9: Strain the fermented mixture through a coffee-filter–lined fine mesh strainer into a clean bowl, reserving or discarding the sediment as desired.
- Step 10: Pour the strained makgeolli into clean bottles, seal, and refrigerate immediately; serve chilled and use within 2 weeks.