
There’s nothing quite like the aroma of cocoa powder warming in a mug on a chilly morning, transforming instantly into rich, velvety hot chocolate without a single packet of powdered milk in sight.
This hot cocoa mix without dry milk proves that the best hot chocolate comes from quality cocoa, real sugar, and a few simple ingredients you probably already have in your pantry.
You’ll get a smoother, more intense chocolate flavor than commercial mixes, no weird aftertaste, and the satisfaction of knowing exactly what’s in your cup.
Why You’ll Love This Recipe
Homemade hot cocoa mix beats store-bought every single time when you taste how rich and pure it is. You control the sweetness, the cocoa intensity, and every single ingredient that goes into your mug.
- No artificial ingredients, weird stabilizers, or mystery powders
- Smoother, more chocolatey flavor than commercial mixes
- Costs less per serving than fancy coffee shop drinks
- Ready in under five minutes from start to sip
- Makes an impressive homemade gift in a mason jar
My Experience Making This Recipe
I started experimenting with homemade cocoa mix after my kids complained that store-bought packets tasted “chalky” (their word, not mine). I realized they were right; all that powdered milk was diluting the actual chocolate flavor.
On my first batch, I combined unsweetened cocoa powder with sugar, a pinch of salt, and a touch of cornstarch to keep it from clumping. The difference was instant.
My kids actually asked for hot chocolate without me bribing them, and I started making batches to keep in glass jars all winter long. Friends began requesting it as gifts, and now I always have a supply ready.
Recipe Overview
- Recipe Name: Hot Cocoa Mix Without Dry Milk
- Servings: Makes approximately 12 servings (about 2 tablespoons per serving)
- Prep Time: 5 minutes
- Cook Time: 0 minutes
- Total Time: 5 minutes
- Course: Beverage
- Cuisine: American
- Calories per Serving: 85
Equipment You Will Need
- Measuring cups and spoons
- Mixing bowl (medium size)
- Whisk or fork
- Fine-mesh sieve or sifter
- Airtight glass jar or container
- Mug for serving
Ingredients for Hot Cocoa Mix Without Dry Milk
- 1 cup unsweetened cocoa powder
- 3/4 cup granulated sugar
- 1/4 cup cornstarch
- 1/4 teaspoon salt
- 1/2 teaspoon vanilla extract
- 1/4 teaspoon ground cinnamon (optional but recommended)
Ingredient Notes and Substitutions
- Unsweetened cocoa powder: This is the star ingredient that delivers pure chocolate flavor without added sugar or milk solids. If you prefer a milder cocoa taste, you can swap half of it with Dutch-process cocoa, which has a smoother, slightly less bitter profile.
- Granulated sugar: White sugar dissolves cleanly and lets the cocoa shine. You can substitute it with coconut sugar for a slight caramel note, though the color will be darker and the flavor more complex.
- Cornstarch: This prevents clumping and keeps the mix flowing smoothly when you scoop it. Arrowroot powder works as an equal substitute if you need something slightly more digestible.
- Salt: A small amount enhances the chocolate flavor and balances sweetness beautifully. Don’t skip it, but you cannot replace it without losing depth.
- Vanilla extract: It adds warmth and rounds out the cocoa notes. Almond extract creates a different but equally delicious flavor profile with a nod toward chocolate-almond complexity.
How to Make Hot Cocoa Mix Without Dry Milk
Step 1: Measure Your Dry Ingredients
Gather your cocoa powder, sugar, cornstarch, and salt in front of you. Measuring accurately now ensures your final mix has the right balance of sweetness and chocolate intensity.
Step 2: Sift the Cocoa Powder
Pour the cocoa powder into a fine-mesh sieve and sift it into your mixing bowl. This breaks up any cocoa clumps that formed during storage and aerates the powder so it mixes smoothly with the other ingredients.
Step 3: Add Sugar and Cornstarch
Measure out your granulated sugar and cornstarch, then add both to the cocoa powder in the bowl. The cornstarch is crucial here because it absorbs any moisture and prevents the entire mixture from turning into a brick during storage.
Step 4: Combine the Dry Ingredients
Use a whisk or fork to blend the cocoa, sugar, and cornstarch together thoroughly, breaking up any lumps. Whisk for about one minute, making sure the cocoa powder is evenly distributed and no sugar granules are clumped together.
Step 5: Add Salt and Cinnamon
Sprinkle in your salt and cinnamon (if using) and whisk again for 30 seconds. The salt intensifies the chocolate flavor while cinnamon adds a subtle warmth that makes people ask what your secret ingredient is.
Step 6: Incorporate the Vanilla Extract
Add your vanilla extract and stir with a fork or whisk until it’s fully distributed throughout the mix. The vanilla will seem to create a slightly wet texture initially, but it will dry as the mixture sits and blends together.
Step 7: Final Blend and Break Up Lumps
Give the entire mixture one final whisking, paying special attention to any small clumps. Run the mixture through your fine-mesh sieve one more time if you want an ultra-smooth final product, though this step is optional.
Step 8: Store in an Airtight Container
Transfer your finished cocoa mix into a clean, dry glass jar with an airtight lid. Store it in a cool, dark place away from heat and moisture, and it will stay fresh for up to three months.
Pro Tip: Whisk your cocoa mix with a small amount of hot water first to create a smooth paste, then add your hot milk or milk alternative; this prevents lumps and creates a creamier drink.
Tips for the Best Hot Cocoa Mix Without Dry Milk
- Use high-quality unsweetened cocoa powder if possible; cheaper brands often taste more bitter and gritty. The difference between a $4 cocoa and a $8 cocoa is noticeable in the final cup.
- Store your mix in a glass jar rather than plastic, as glass keeps the cocoa aroma locked in better and prevents any plastic aftertaste from transferring to your mix.
- Add a vanilla bean or two to your storage jar after filling it; they will infuse the mix with extra vanilla aroma over time and look beautiful through the glass.
- Make a double batch and store it in two jars; you’ll always have fresh mix on hand and one ready to give as a gift.
- Sift your cocoa powder even if it looks fine; sifting removes micro-lumps that create a gritty mouthfeel in the final drink.
- Keep a small spoon clipped to the outside of your jar with a recipe card showing the mixing ratio (usually 2 to 3 tablespoons mix per cup of milk).
Common Mistakes to Avoid
- Skipping the sifting step: Unsifted cocoa powder leads to lumps in your finished drink, no matter how vigorously you stir. Sifting takes 30 seconds and makes all the difference.
- Using sweetened cocoa powder instead of unsweetened: This creates an overly sweet mix that masks the true chocolate flavor and leaves a waxy coating on your tongue.
- Forgetting the cornstarch: Without it, your mix will absorb moisture from the air and clump up into hard blocks within two weeks, rendering it impossible to scoop.
- Storing in the wrong container: Paper, plastic, or cardboard allows the cocoa aroma to escape and lets external odors seep in, so always use glass with an airtight seal.
- Making the mixture too wet with vanilla: Add vanilla slowly and mix thoroughly; too much creates a paste instead of a pourable mix, making it difficult to scoop.
Serving Suggestions
To serve, simply whisk 2 to 3 tablespoons of your hot cocoa mix into a cup of hot milk, adjusting the ratio to your taste preference. Top with whipped cream, marshmallows, or a sprinkle of extra cocoa powder for an indulgent finish.
- Top with a dollop of whipped cream and a drizzle of salted caramel sauce for a dessert-style drink
- Stir in a shot of espresso for a mocha version that doubles as an afternoon pick-me-up
- Add a pinch of cayenne pepper to the finished drink for a subtle spicy kick that complements dark chocolate
- Mix with almond milk or oat milk instead of regular milk for a different flavor profile and creamier texture
- Serve chilled with cold milk over ice as an iced cocoa drink during warmer months
Variations to Try
- Mocha Mix: Add 2 tablespoons of instant espresso powder to the dry ingredients for a coffee-chocolate combination that rivals fancy coffee shop drinks.
- Mint Chocolate: Omit the cinnamon and add 1/2 teaspoon of peppermint extract instead for a refreshing chocolate-mint flavor that feels luxurious and indulgent.
- Dark Chocolate Intensity: Swap half of the unsweetened cocoa with Dutch-process cocoa and reduce sugar by 2 tablespoons for a deeper, less bitter chocolate experience.
- Spiced Hot Cocoa: Add 1/4 teaspoon each of nutmeg and ginger plus the cinnamon for a warm, chai-inspired version that feels cozy and sophisticated.
- Mexican-Style Chocolate: Include 1/4 teaspoon of cayenne pepper and increase cinnamon to 1/2 teaspoon for an authentic spiced chocolate mix with historical roots.
Dietary Adaptations
- Gluten-Free: This recipe is naturally gluten-free as written; all ingredients contain no gluten, making it safe for anyone with celiac disease or gluten sensitivity.
- Dairy-Free: The dry mix itself contains no dairy, but serve it with coconut milk, almond milk, oat milk, or any plant-based alternative instead of regular milk.
- Vegan: The dry mix is vegan as written, but make sure your vanilla extract is alcohol-free or use vanilla powder instead if you prefer.
- Low-Carb/Keto: Replace the granulated sugar with an erythritol or stevia blend using a 1:1 sugar substitute ratio, though the flavor will be slightly less rounded.
- Paleo: Swap the regular sugar for coconut sugar or maple powder in equal amounts; the mix will taste slightly different but remain paleo-compliant.
Storage and Reheating
Refrigerator
Store your finished hot cocoa mix in an airtight glass jar in a cool, dark corner of your pantry or kitchen cabinet. Homemade hot cocoa mix stays fresh and potent for up to three months at room temperature.
- Keep the lid tightly sealed between uses
- Use a clean, dry spoon every time you scoop
- Transfer to the refrigerator only if your kitchen is very humid or warm
Freezer
You can freeze hot cocoa mix in an airtight freezer-safe container for up to six months, though it’s rarely necessary. Let it come to room temperature before opening to prevent condensation from making it clumpy.
- Use freezer-safe glass containers with tight-fitting lids
- Label the container with the date for easy tracking
- Thaw at room temperature for one hour before opening
Reheating
There’s no reheating needed since you’re mixing the dry cocoa with hot milk each time you serve it. Simply whisk the mix with a small amount of hot water to create a paste, then add your hot milk and stir until smooth.
- Use water that’s between 160 and 180 degrees Fahrenheit
- Whisk the paste for 15 to 20 seconds before adding milk
- Heat your milk separately for the smoothest, creamiest final drink
Nutrition Information
| Nutrient | Amount |
|---|---|
| Calories | 85 |
| Total Fat | 1.5g |
| Saturated Fat | 1g |
| Carbohydrates | 18g |
| Fiber | 2g |
| Sugar | 15g |
| Protein | 1.5g |
| Sodium | 75mg |
| Cholesterol | 0mg |
These values represent the dry mix per serving (approximately 2 tablespoons) and do not include the milk or milk alternative used to prepare the drink. Nutritional content will vary slightly depending on the brand of cocoa powder and other ingredients used.
Frequently Asked Questions
Can I use Dutch-process cocoa instead of natural cocoa powder?
Yes, you can use Dutch-process cocoa, though it will create a slightly smoother, less acidic flavor profile. Many people prefer Dutch-process for a mellower chocolate taste, so feel free to experiment and choose based on your preferences.
How do I prevent my hot cocoa mix from clumping in storage?
The cornstarch in this recipe absorbs moisture and prevents clumping, and storing in an airtight glass jar away from humidity keeps it fresh longer. If you live in a very humid climate, add a small silica gel packet to your jar to keep moisture out.
Can I make this mix without cornstarch?
You can, but the mix will likely clump within a week or two because cocoa powder absorbs moisture readily. If you must skip cornstarch, try arrowroot powder or potato starch as direct substitutes in equal amounts.
What’s the best type of milk to use with this mix?
Whole milk creates the richest, creamiest hot chocolate, but any milk type works beautifully. Oat milk and almond milk produce slightly thinner drinks with their own subtle flavors, while coconut milk creates a tropical-tinted version.
Is this mix safe for kids to make on their own?
The dry mix itself is safe, but kids will need adult supervision when heating milk or water. A great approach is to pre-portion the mix into jars with labeled instructions, so older kids can independently make their own hot chocolate with parental approval.
Can I use this mix as an ingredient in baking or cooking?
Absolutely; you can use it in brownie batters, chocolate cakes, or homemade chocolate frosting. Just remember that the sugar is already included in your mix, so adjust your recipe’s sugar content accordingly to avoid over-sweetening.
Final Thoughts
Making your own hot cocoa mix without dry milk transforms your daily hot chocolate habit from routine to something genuinely special. You’ll taste the difference immediately and wonder why you ever bought pre-made packets.
Keep a jar on your counter or give some away as gifts, and watch people’s faces light up when they taste real homemade hot chocolate. This simple recipe proves that the best things often come from the simplest ingredients mixed with a little care.
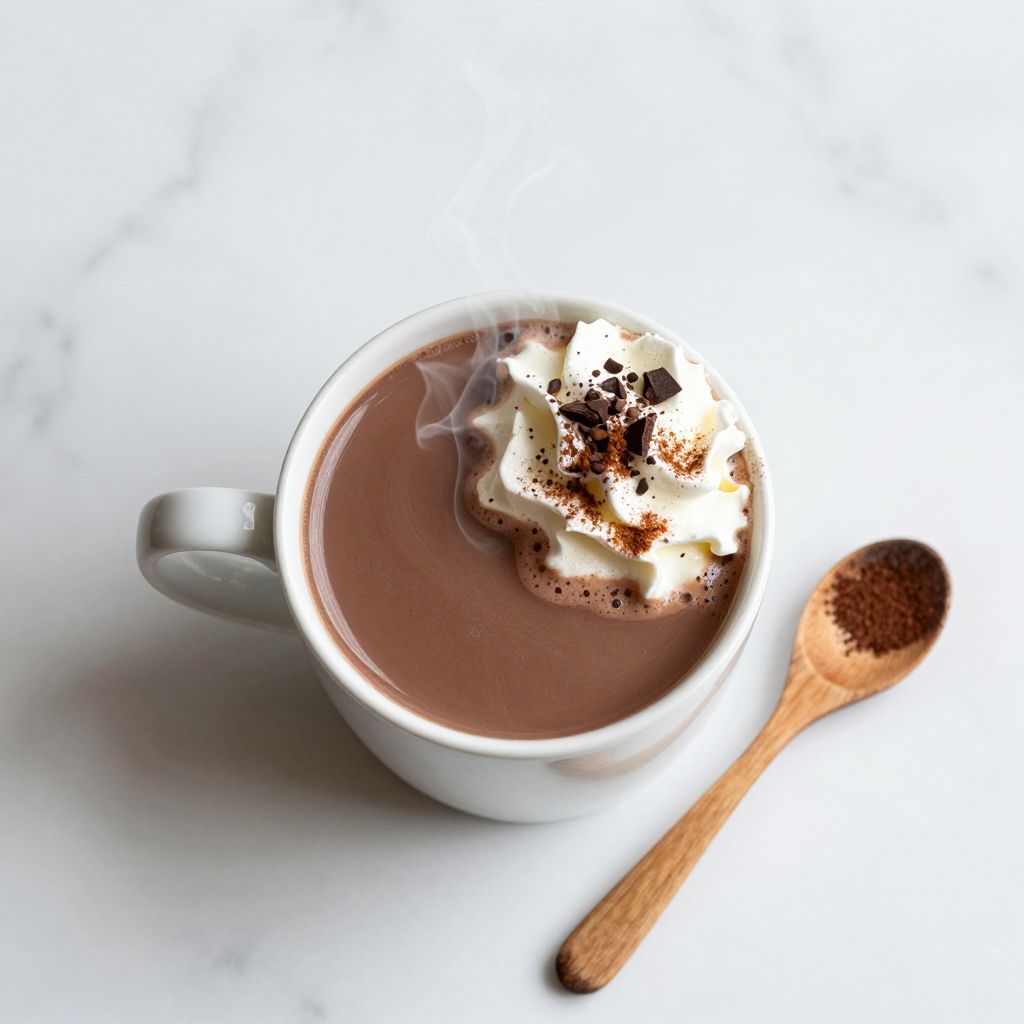
Hot Cocoa Mix Without Dry Milk
Ingredients
Equipment
Method
- Gather your cocoa powder, sugar, cornstarch, and salt in front of you. Measuring accurately now ensures your final mix has the right balance of sweetness and chocolate intensity.
- Pour the cocoa powder into a fine-mesh sieve and sift it into your mixing bowl. This breaks up any cocoa clumps that formed during storage and aerates the powder so it mixes smoothly with the other ingredients.
- Measure out your granulated sugar and cornstarch, then add both to the cocoa powder in the bowl. The cornstarch is crucial here because it absorbs any moisture and prevents the entire mixture from turning into a brick during storage.
- Use a whisk or fork to blend the cocoa, sugar, and cornstarch together thoroughly, breaking up any lumps. Whisk for about one minute, making sure the cocoa powder is evenly distributed and no sugar granules are clumped together.
- Sprinkle in your salt and cinnamon (if using) and whisk again for 30 seconds. The salt intensifies the chocolate flavor while cinnamon adds a subtle warmth that makes people ask what your secret ingredient is.
- Add your vanilla extract and stir with a fork or whisk until it's fully distributed throughout the mix. The vanilla will seem to create a slightly wet texture initially, but it will dry as the mixture sits and blends together.
- Give the entire mixture one final whisking, paying special attention to any small clumps. Run the mixture through your fine-mesh sieve one more time if you want an ultra-smooth final product, though this step is optional.
- Transfer your finished cocoa mix into a clean, dry glass jar with an airtight lid. Store it in a cool, dark place away from heat and moisture, and it will stay fresh for up to three months.
- To serve, whisk 2 to 3 tablespoons of your hot cocoa mix into a cup of hot milk, adjusting the ratio to your taste preference. Top with whipped cream, marshmallows, or a sprinkle of extra cocoa powder for an indulgent finish.