There’s something almost magical about wrapping your hands around a steaming mug of hot cocoa on a cold afternoon, that first sip hitting your tongue with pure chocolatey comfort. Hershey’s hot cocoa is the recipe that brings back childhood memories for many of us, yet it’s also the drink that tastes even better when you make it from scratch at home.
This straightforward recipe delivers rich, creamy hot chocolate using ingredients you likely already have in your pantry. What makes it special isn’t complexity—it’s the quality of a few simple components coming together to create something warm and deeply satisfying.
Why You’ll Love This Recipe
This hot cocoa recipe is quick, foolproof, and delivers café-quality results in minutes without any fussy technique or hard-to-find ingredients.
- Ready in under 10 minutes from start to finish
- Uses basic pantry staples that work every time
- Creamy and rich with just the right chocolate flavor
- Scales easily from one mug to a batch for a crowd
- Perfect base for countless flavor variations
My Experience Making This Recipe
I first made this recipe on a random Tuesday when my teenage daughter asked for hot chocolate, and I wanted something better than the instant packets she usually requested. I pulled together milk, cocoa powder, sugar, and a pinch of salt, and honestly, the transformation was immediate.
The drink came together in the time it took to heat the milk, and the difference compared to the packet version was night and day. My daughter came back for a second mug, and now it’s become our winter ritual on lazy mornings.
What struck me most was how the cocoa powder fully dissolved into the milk, creating that silky texture that you can’t achieve with pre-made mixes. The flavor felt personal and warm, like something made with intention rather than convenience.
Recipe Overview
- Recipe Name: Hershey’s Hot Cocoa
- Servings: 2
- Prep Time: 2 minutes
- Cook Time: 5 minutes
- Total Time: 7 minutes
- Course: Beverage
- Cuisine: American
- Calories per Serving: 195
Equipment You Will Need
- Medium saucepan
- Whisk or wooden spoon
- Measuring cups and spoons
- Microwave (optional alternative to stovetop)
- Mugs for serving
- Small bowl for mixing cocoa and sugar
Ingredients for Hershey’s Hot Cocoa
- 3 tablespoons unsweetened cocoa powder
- 4 tablespoons granulated sugar
- 1 pinch salt
- 1/3 cup hot water
- 2 cups whole milk
- 1/2 teaspoon vanilla extract
- Whipped cream for topping (optional)
- Mini marshmallows for topping (optional)
Ingredient Notes and Substitutions
- Unsweetened cocoa powder is the backbone of this recipe, delivering deep chocolate flavor without added sugar. If you only have Dutch-processed cocoa, use it, though the flavor will be slightly less sharp and more mellow.
- Granulated sugar sweetens the cocoa and balances the bitterness of the powder. Brown sugar works as a substitute and adds a subtle caramel note, though you may need an extra teaspoon to reach the same sweetness level.
- Salt enhances chocolate flavor and prevents the drink from tasting flat. Omit it only if you’re sensitive to sodium, but it makes a real difference in depth.
- Whole milk creates that creamy texture that makes this drink feel luxurious. Two percent milk works fine if that’s what you have, but skim milk will taste thinner and less rich.
- Vanilla extract adds a subtle warmth that rounds out the chocolate. Almond extract is an interesting swap if you want a different dimension, using the same amount.
How to Make Hershey’s Hot Cocoa
Step 1: Combine the Dry Ingredients
In a small bowl, whisk together the cocoa powder, sugar, and salt. Mixing these dry ingredients first prevents lumps from forming when you add liquid, saving you the frustration of gritty texture in your finished drink.
Step 2: Add Hot Water to the Cocoa Mixture
Pour the hot water into the cocoa mixture and whisk vigorously for about 30 seconds until you have a smooth paste. The hot water dissolves the cocoa powder completely, creating a concentrated chocolate base that will blend seamlessly into your milk later.
Step 3: Heat the Milk
Pour the milk into a medium saucepan and place it over medium heat. Stir occasionally and heat until the milk is steaming and small bubbles form around the edges, which typically takes 3 to 4 minutes.
Step 4: Combine the Cocoa Paste with Milk
Slowly pour the cocoa paste into the hot milk while whisking constantly. This gradual combination ensures the cocoa paste fully incorporates into the milk rather than clumping or settling at the bottom of the pan.
Step 5: Whisk Until Smooth and Frothy
Continue whisking for another minute after combining, incorporating air into the drink. This creates that light, slightly frothy texture that makes hot cocoa feel special rather than just warm chocolate milk.
Step 6: Remove From Heat
Take the saucepan off the heat once the mixture reaches your desired temperature and becomes steaming hot. Don’t let it boil, as this can scorch the milk and create an unpleasant burnt flavor.
Step 7: Stir in Vanilla Extract
Add the vanilla extract and stir well to distribute it evenly throughout the hot cocoa. Vanilla bridges the flavors and adds complexity that makes people wonder what the secret ingredient is.
Step 8: Pour Into Mugs and Serve
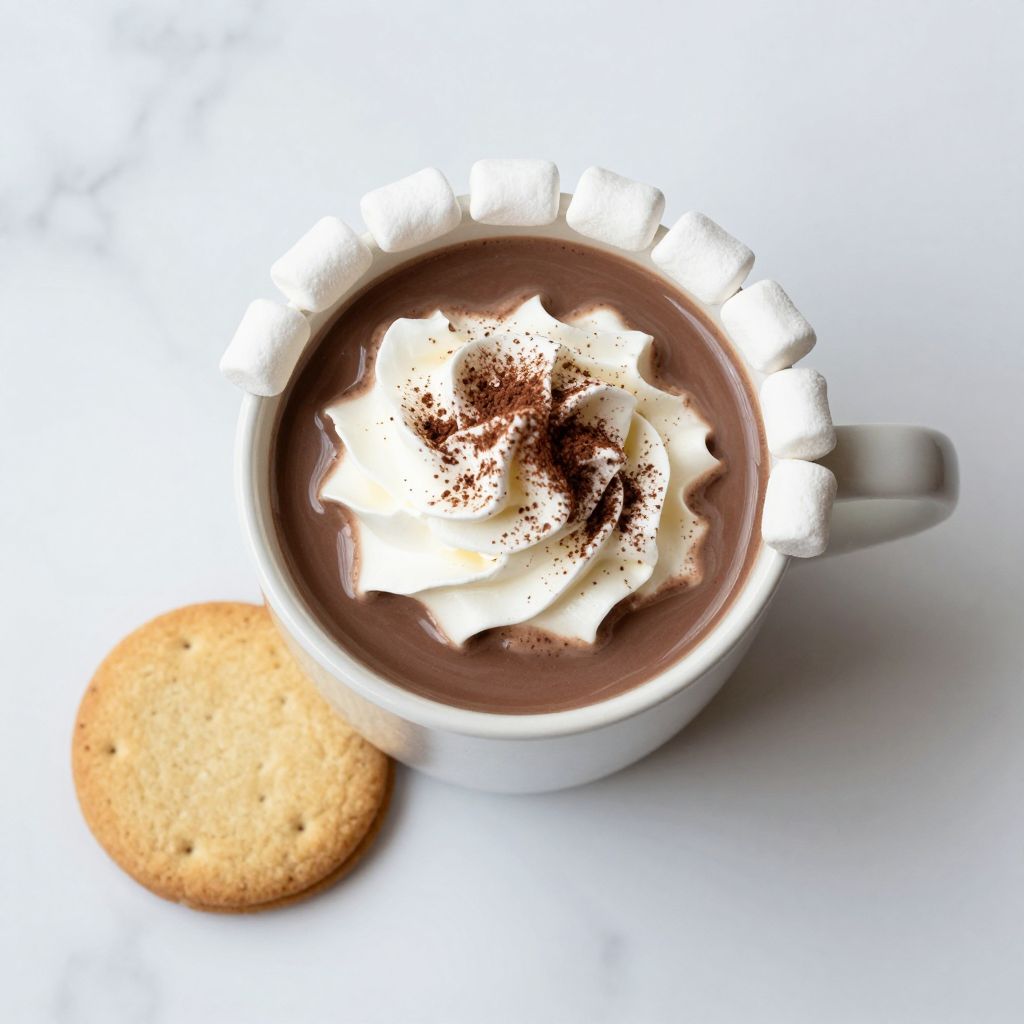
Carefully pour the hot cocoa into your mugs, dividing it evenly between servings. Top with whipped cream and marshmallows if desired, and serve immediately while it’s still steaming hot.
Pro Tip: Make a batch of the cocoa paste earlier in the day and store it in the refrigerator; when you want hot cocoa, just heat milk and stir in a few tablespoons of the paste for instant results.
Tips for the Best Hershey’s Hot Cocoa
- Use quality cocoa powder rather than hot cocoa mix, which contains added sugar and fillers that muddy the chocolate flavor. Good cocoa powder gives you control over sweetness and a purer taste.
- Whisk aggressively during every stage to incorporate air and prevent lumps; a whisk is genuinely superior to a spoon for this task.
- Heat the milk gently and avoid boiling it, as high heat can create a burnt or scorched flavor that ruins the entire drink.
- Don’t skip the salt even though the amount seems tiny; it amplifies chocolate notes and prevents the drink from tasting one-dimensional.
- Make the cocoa paste in advance if you’re serving multiple people, then just heat milk and combine; this saves time and reduces the chance of temperature-control mistakes.
- Taste and adjust sweetness before serving; if the cocoa is too bitter for your preference, stir in a bit more sugar rather than adding it after pouring into mugs.
Common Mistakes to Avoid
- Skipping the dry-ingredient step and adding cocoa powder directly to milk will create clumps that are nearly impossible to dissolve completely.
- Using water that isn’t hot enough means the cocoa powder won’t fully dissolve, resulting in a gritty texture throughout the drink.
- Boiling the milk creates a burnt, scalded flavor that dominates the drink and overshadows the chocolate.
- Pouring the cocoa paste into cold milk won’t fully incorporate, leaving you with separation and uneven flavor distribution.
- Forgetting to whisk during combining leads to a thin, muddy-looking drink with uneven chocolate distribution rather than a rich, creamy consistency.
Serving Suggestions
This hot cocoa is wonderful on its own, but it becomes even more special when paired with complementary flavors and textures. Think beyond the basic marshmallow and explore toppings and sides that elevate the experience.
- Serve with buttery shortbread cookies or biscotti for dunking and textural contrast
- Top with a dollop of whipped cream and a sprinkle of cocoa powder for an elegant finish
- Pair with a warm cinnamon roll or croissant for a cozy afternoon treat
- Add a shot of espresso for a mocha-style drink if you want extra richness and depth
- Serve alongside fresh berries or fruit to balance the sweetness with freshness
Variations to Try
- Spiced Hot Cocoa: Add 1/4 teaspoon cinnamon and a pinch of cayenne pepper to the dry ingredients for warmth and subtle heat that complements chocolate beautifully.
- Minty Hot Cocoa: Stir in 1/4 teaspoon peppermint extract or a few crushed candy canes after removing from heat for a refreshing twist that feels festive.
- Orange Hot Cocoa: Add 1/2 teaspoon orange zest and 1/4 teaspoon orange extract to the cocoa paste for a bright, citrusy flavor that cuts through richness.
- Maple Hot Cocoa: Replace 1 tablespoon of sugar with maple syrup for a deeper, more sophisticated sweetness that tastes like fall in a mug.
- Almond Joy Hot Cocoa: Stir in 1/4 teaspoon coconut extract and 1/4 teaspoon almond extract, then top with shredded coconut and chocolate chips for a candy bar inspired drink.
Dietary Adaptations
- Dairy-Free: Substitute oat milk or almond milk for whole milk; the drink will be slightly less rich but still delicious and creamy enough to satisfy.
- Vegan: Use vegan milk alternatives as above and top with dairy-free whipped cream or coconut cream instead of traditional whipped cream.
- Low-Carb/Keto: Replace sugar with erythritol or monk fruit sweetener at the same measurement; the flavor will be slightly different but still satisfying and without the sugar crash.
- Gluten-Free: This recipe is naturally gluten-free as written; always verify that your cocoa powder and any toppings haven’t been processed in a shared facility if you have severe allergies.
Storage and Reheating
Refrigerator
The cocoa paste keeps well in an airtight container for up to one week, making it incredibly convenient for weekday mornings.
- Store the cocoa paste in a glass jar with a tight-fitting lid
- Stir before using since ingredients may separate slightly during storage
- Heat fresh milk and add 2 to 3 tablespoons paste per serving
Freezer
You can freeze the cocoa paste for up to three months, though this is less common than refrigerating since the paste is so quick to make fresh.
- Freeze in ice cube trays for single-serving portions
- Transfer frozen cubes to a freezer bag once solid
- Thaw at room temperature or add directly to hot milk
Reheating
If you’ve made a batch of finished hot cocoa, you can reheat it gently on the stovetop or in the microwave, though fresh is always best.
- Stovetop: Pour into a saucepan and warm over medium heat, whisking occasionally, until steaming hot
- Microwave: Pour into a microwave-safe mug and heat in 30-second intervals, stirring between, until hot
- Never boil reheated cocoa or you’ll scorch the milk and ruin the flavor
Nutrition Information
| Nutrient | Amount |
|---|---|
| Calories | 195 |
| Total Fat | 8 g |
| Saturated Fat | 5 g |
| Carbohydrates | 28 g |
| Fiber | 1 g |
| Sugar | 25 g |
| Protein | 8 g |
| Sodium | 125 mg |
| Cholesterol | 30 mg |
These values are approximate and based on standard ingredient sizes; actual nutrition will vary based on your specific brands and any toppings you add.
Frequently Asked Questions
Can I make this recipe in the microwave instead of on the stovetop?
Absolutely, and it’s even faster. Combine the cocoa powder, sugar, and salt in a mug, add the hot water and whisk to a paste, then pour in cold milk and microwave the whole thing for 90 seconds, stirring halfway through.
What’s the difference between this homemade cocoa and instant hot cocoa mix?
Instant mixes contain added sugars, fillers, and emulsifiers that muffle the chocolate flavor, while this homemade version lets real cocoa shine through. You’ll taste the difference immediately and likely won’t go back to packets.
How far in advance can I make the cocoa paste?
The paste keeps in the refrigerator for up to one week, making it perfect for busy mornings when you just need to heat milk. This is honestly a game changer for weekday breakfasts.
Why does my hot cocoa taste grainy or gritty?
Grittiness usually means the cocoa powder didn’t fully dissolve, which happens when the water or milk wasn’t hot enough or you didn’t whisk vigorously. Always whisk for a full minute and make sure your water is genuinely hot before mixing.
Can I use hot chocolate instead of cocoa powder?
Hot chocolate mix contains added sugar and ingredients, so it’s not a one-to-one swap; you’d need to adjust the sugar downward significantly to avoid an overly sweet drink. Pure cocoa powder really is the better choice for this recipe.
What’s the best way to prevent a skin from forming on top?
A skin forms as the milk cools and proteins coagulate on the surface. Pour the cocoa into mugs immediately and drink while hot, or stir in whipped cream or marshmallows right away to break up any skin that forms.
Final Thoughts
This recipe proves that the best comfort drinks don’t require fancy equipment, hard-to-find ingredients, or complicated steps. In just seven minutes, you can create something that tastes like it came from a professional café, and the warmth and satisfaction it brings far outweigh the minimal effort.
Make a batch of the cocoa paste this weekend and keep it on hand for mornings when you need something warm and chocolatey. Your future self will thank you, and anyone you share this drink with will wonder why they’ve been settling for instant packets all this time.
Hershey's Hot Cocoa
Ingredients
Equipment
Method
- In a small bowl, whisk together the cocoa powder, sugar, and salt until well combined.
- Pour the hot water into the cocoa mixture and whisk vigorously for about 30 seconds until you have a smooth paste.
- Pour the milk into a medium saucepan and place it over medium heat. Stir occasionally and heat until the milk is steaming and small bubbles form around the edges, about 3 to 4 minutes.
- Slowly pour the cocoa paste into the hot milk while whisking constantly to ensure the cocoa paste fully incorporates.
- Continue whisking for another minute after combining, incorporating air into the drink to create a light, slightly frothy texture.
- Remove the saucepan from heat once the mixture reaches your desired temperature and is steaming hot. Do not let it boil.
- Stir in the vanilla extract and mix well to distribute it evenly throughout the hot cocoa.
- Carefully pour the hot cocoa into mugs, dividing it evenly between servings. Top with whipped cream and marshmallows if desired, and serve immediately.