
Picture yourself at a Spanish tapas bar on a warm evening, the fizz of a freshly opened bottle filling the air with anticipation. Cava, Spain’s beloved sparkling wine, has a way of turning ordinary moments into celebrations without the fuss or the price tag of champagne.
Making cava at home might sound intimidating, but the traditional method is surprisingly achievable for dedicated home winemakers and enthusiasts. This recipe walks you through creating your own bottle-fermented sparkling wine using the classic méthode champenoise technique. The result is a crisp, elegant sparkler with fine bubbles and complex flavors that rival commercial versions.
What makes homemade cava special is the control you gain over the final product. You choose the grape varieties, the sweetness level, and the aging time, crafting a bottle that reflects your personal taste and effort.
Why You’ll Love This Recipe
Creating cava at home transforms you from a casual wine drinker into a winemaker with real skills and knowledge. The process teaches you about fermentation, yeast management, and the science behind those beautiful bubbles you’ve always admired in the glass.
- Produces authentic bottle-fermented sparkling wine with professional quality
- Costs significantly less than purchasing equivalent cava bottles
- Offers complete control over sweetness, flavor profile, and aging
- Creates an impressive gift or conversation piece for any gathering
- Develops your winemaking skills through hands-on practice
My Experience Making This Recipe
I first attempted homemade cava during a particularly rainy winter when I had more time on my hands than usual. The initial fermentation was straightforward enough, but waiting nine months for the secondary fermentation and aging tested my patience like nothing else.
Opening that first bottle was genuinely thrilling. The cork popped with real authority, and the bubbles were finer and more persistent than I expected from a home batch. My friends were shocked to learn it came from my kitchen, not a Spanish winery.
The flavor was dry and crisp with subtle stone fruit notes, nothing like the overly sweet sparkling wines I’d assumed I’d have to drink. That success hooked me completely, and I’ve made at least one batch every year since.
Recipe Overview
- Recipe Name: Homemade Cava
- Servings: Makes 12 bottles (750 ml each)
- Prep Time: 3 hours
- Fermentation Time: 9 months (primary and secondary fermentation combined)
- Total Time: 9 months plus 3 hours active work
- Course: Beverage
- Cuisine: Spanish
- Alcohol Content: Approximately 11.5 percent by volume
Equipment You Will Need
- Large glass carboy or food-grade plastic demijohn (5-10 gallons)
- Airlock and rubber bung to fit your carboy
- Hydrometer for measuring sugar content
- Thermometer (0-100 degrees Fahrenheit)
- Large sanitized pot for heating and cooling juice
- Long stirring spoon or paddle
- Siphon hose and racking cane
- Bottles designed for sparkling wine (750 ml, thick glass)
- Champagne-style corks and corker machine
- Cheesecloth or fine mesh strainer
- Test tubes for gravity readings
- Funnels (large and small)
Ingredients for Homemade Cava
For the Base Wine
- 5 gallons of fresh white grape juice (preferably Macabeo, Xarel-lo, or Parellada varieties, or a blend)
- 1 packet of dried white wine yeast (Saccharomyces cerevisiae, champagne strain recommended)
- 1 teaspoon of yeast nutrient
- 1/2 teaspoon of potassium metabisulfite (to prevent oxidation)
For the Secondary Fermentation and Bottling
- 1/4 cup of white grape juice
- 1/4 teaspoon of champagne yeast (same strain as primary fermentation)
- 2 tablespoons of sugar dissolved in 1/4 cup of water (for priming)
Ingredient Notes and Substitutions
- White grape juice: Fresh juice without preservatives is essential for successful fermentation. Store-bought juice with added sulfites will kill your yeast. If fresh juice is unavailable, frozen juice concentrate works, but thaw it thoroughly and use 1 gallon of concentrate mixed with 4 gallons of water.
- Champagne yeast: This strain produces the fine bubbles and complex flavors that define quality cava. Regular wine yeast works but produces fewer bubbles and less elegant results. Do not substitute with baking yeast.
- Potassium metabisulfite: This prevents oxidation and unwanted bacteria growth during storage. Sodium metabisulfite works but can leave a slight aftertaste in sensitive palates. Use half the amount if substituting.
- Sugar for priming: White table sugar works perfectly and dissolves completely. Brown sugar or honey imparts unwanted flavors and colors. Corn sugar is an acceptable alternative with identical results.
How to Make Homemade Cava
Step 1: Sanitize All Equipment
Sterilization is non-negotiable in winemaking because any bacteria or wild yeast will ruin your batch. Submerge your carboy, airlock, bung, siphon equipment, and bottles in a solution of one tablespoon of potassium metabisulfite per gallon of water for at least 20 minutes.
Rinse everything thoroughly with filtered water after soaking. Any residual sanitizer will kill your cultured yeast and compromise fermentation.
Step 2: Prepare Your Juice Base
Pour your 5 gallons of fresh white grape juice into a large sanitized pot. Heat it gently to 65 degrees Fahrenheit if it’s cooler, since yeast needs warmth to activate properly.
Do not boil or overheat the juice, as this damages the delicate flavors and kills beneficial compounds. Stir in the potassium metabisulfite to prevent unwanted bacterial growth during the initial fermentation phase.
Step 3: Rehydrate Your Yeast
Sprinkle your champagne yeast packet into a small cup of warm water (around 80 degrees Fahrenheit) and let it sit undisturbed for 10 minutes. This process, called blooming, wakes up dormant yeast cells and improves fermentation vigor.
After 10 minutes, stir gently and let sit for another 5 minutes. Never use yeast that smells rotten or shows no signs of activation, as dead yeast produces no bubbles.
Step 4: Pitch the Yeast Into Your Juice
Pour the rehydrated yeast mixture into your large pot of prepared juice and stir thoroughly for about one minute. This distributes yeast evenly throughout the liquid and ensures consistent fermentation.
Transfer the entire mixture into your sanitized carboy using a large funnel. Leave about 2 inches of headspace at the top, as the yeast will expand during fermentation.
Step 5: Install the Airlock and Monitor Primary Fermentation
Insert your rubber bung with the airlock into the mouth of the carboy. The airlock allows carbon dioxide to escape while preventing outside air from entering, protecting your wine from oxidation.
Place your carboy in a cool, dark location between 60 and 70 degrees Fahrenheit. Temperature stability is critical; fluctuations can stress the yeast and produce off-flavors. Primary fermentation typically takes 10 to 14 days, during which you’ll see vigorous bubbling in the airlock.
Step 6: Rack the Wine Off the Sediment
When bubbling slows significantly (usually after two to three weeks), it’s time to rack the wine off the dead yeast and sediment settled at the bottom. This prevents off-flavors and improves clarity.
Use a sanitized siphon hose and racking cane to transfer the clear wine into a second sanitized carboy, leaving the sediment behind. Install a fresh airlock on the new carboy and return it to cool storage for two to three weeks of secondary fermentation and settling.
Step 7: Prepare for Bottling With Priming Sugar
About nine months after your initial fermentation started, your wine is ready for bottling. Dissolve two tablespoons of sugar in one-quarter cup of water, heat it to dissolve completely, then cool it to room temperature.
Rack your settled wine into a sanitized bucket, then stir in your cooled sugar solution very gently. This priming sugar provides food for your fresh yeast, which will consume it and produce the bubbles trapped in the sealed bottles.
Step 8: Add Fresh Yeast and Bottle Your Cava
Sprinkle one-quarter teaspoon of fresh champagne yeast over the surface of your primed wine and stir gently for 30 seconds. Use sanitized champagne-style bottles and fill each one leaving about three-quarters of an inch of headspace.
Immediately cap each bottle with a champagne cork using your corker machine. Apply firm, even pressure to ensure the cork seats properly and prevents leakage.
Pro Tip: Store your bottles horizontally at 55 to 60 degrees Fahrenheit for a minimum of three months, though six months or longer develops more complex flavors and finer bubbles.
Tips for the Best Homemade Cava
- Use only fresh grape juice without preservatives or additives, as these inhibit fermentation. If purchasing bottled juice, read the label carefully and avoid anything with potassium sorbate.
- Keep your carboy out of direct sunlight, which causes premature aging and flattens the delicate flavors. A cool, dark closet or basement is ideal.
- Monitor temperature closely during primary fermentation; even a five-degree drop can slow yeast activity and extend the process by weeks. Use a strip thermometer on the outside of your carboy for easy monitoring.
- Rack your wine gently and avoid splashing, which introduces oxygen and can oxidize your wine. Slow, steady siphoning preserves quality.
- Age your bottles at a consistent cool temperature after bottling. Fluctuating temperatures stress the corks and can allow carbon dioxide to escape, resulting in flat, disappointing cava.
- Keep detailed notes on fermentation dates, temperatures, and gravity readings. This information helps you troubleshoot problems and replicate successes in future batches.
Common Mistakes to Avoid
- Using juice with preservatives or antimicrobial additives kills your yeast and prevents fermentation entirely. Always start with fresh, additive-free juice, or your batch will sit dormant and eventually spoil.
- Rushing secondary fermentation and bottling before the wine fully settles introduces sediment into your bottles, creating a cloudy, gritty final product. Patience here is truly rewarded.
- Overfilling bottles or using insufficient priming sugar produces either exploding bottles or flat, lifeless cava with no carbonation. Precision matters at this stage.
- Storing bottles upright instead of horizontally after bottling allows the cork to dry and shrink, letting gas escape. Always store on their sides for proper aging.
- Forgetting to sanitize equipment adequately invites bacteria and wild yeast that produce vinegar or off-flavors. Sanitation is your first defense against ruined batches.
Serving Suggestions
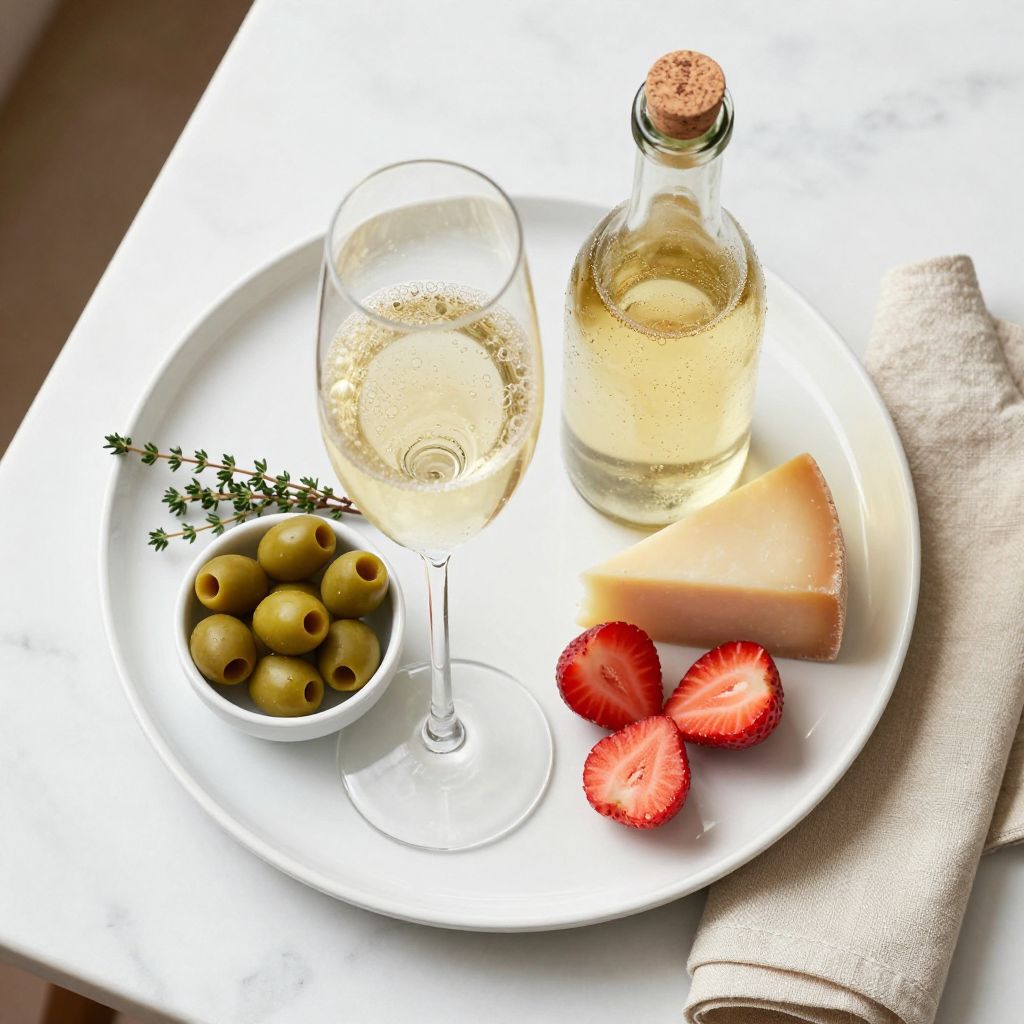
Serve your homemade cava well chilled in flute or tulip-shaped glasses to showcase the bubbles and aromas. The crisp, dry profile pairs beautifully with appetizers and celebration moments.
- Pair with Spanish cured meats, aged manchego cheese, and olives for an authentic tapas experience
- Serve alongside light seafood dishes like shrimp, crab, or white fish for elegant dinner parties
- Combine with fresh fruit like strawberries or peaches for a refreshing aperitif
- Use as the base for cocktails by adding a splash of fruit juice or herbal liqueurs
- Toast special occasions and milestones with pride, knowing you crafted the bottle yourself
Variations to Try
- Rose Cava: Substitute one gallon of red grape juice for one gallon of white juice to create a pale pink sparkler with berry undertones. This variation ferments identically but produces a delicate, visually stunning result.
- Slightly Sweeter Cava: Add one additional tablespoon of sugar when priming to increase residual sweetness in the final bottle. This produces a demi-sec style cava, perfect for dessert pairing.
- Extended Aging: Store your bottles for 12 to 18 months instead of the minimum three months to develop deeper, more complex flavors and even finer bubbles. This creates a premium product comparable to expensive commercial cava.
- Oak-Aged Cava: Add a small sanitized oak chip to each bottle before corking to impart subtle vanilla and toasted oak flavors. Remove the chips after three months of aging to prevent over-oaking.
- Fruit-Forward Cava: Blend 20 percent fresh pineapple, pear, or apple juice into your base juice before fermentation for subtle fruit character without overwhelming the wine’s natural acidity.
Dietary Adaptations
- Gluten-Free: Cava is naturally gluten-free since it contains no wheat, barley, or rye. Champagne yeast is also gluten-free, so your entire batch meets gluten-free requirements without any substitutions needed.
- Vegan: Standard cava production is already vegan, as you’re fermenting pure juice with yeast and sugar. Avoid fining agents like isinglass or gelatin if you rack the wine; instead, simply let it settle naturally over time.
- Lower Alcohol: Stop fermentation earlier by refrigerating your bottles just before secondary fermentation completes, resulting in slightly lower alcohol content around 10 percent. This preserves more residual sugar and produces a slightly sweeter result.
- Sulfite-Free: Omit the potassium metabisulfite entirely if you prefer no added sulfites, though this increases your risk of bacterial spoilage. Keep temperatures stable and work meticulously with sanitation to minimize this risk.
Storage and Reheating
Refrigerator
Chill your bottle for at least two hours before opening to enhance the carbonation and bring out the delicate flavors. Once opened, recork the bottle tightly or use a champagne stopper and refrigerate for up to three days.
- Store unopened bottles on their sides on a cool shelf for two years maximum
- Keep away from strong-smelling foods, as cork allows slight gas exchange over time
Freezer
Do not store cava in the freezer, as freezing expands the liquid and can push the cork out or crack the bottle. Cava loses quality in frozen storage even if the bottle survives intact.
- Accidental freezing can ruin your entire batch, so keep bottles away from freezing temperatures
Reheating
Sparkling wine is never heated or reheated, as this destroys the bubbles and damages the delicate flavors you worked so hard to develop. Simply chill and serve as intended.
- If you accidentally warm your cava, rechill it gently, though it will have lost most of its carbonation
Nutrition Information
| Nutrient | Amount |
|---|---|
| Calories | 90 |
| Total Fat | 0 g |
| Saturated Fat | 0 g |
| Carbohydrates | 3 g |
| Fiber | 0 g |
| Sugar | 1 g |
| Protein | 0 g |
| Sodium | 10 mg |
| Cholesterol | 0 mg |
Nutrition values are calculated for a standard 5-ounce serving of dry cava with approximately 11.5 percent alcohol by volume. Individual batches may vary slightly based on fermentation conditions and aging length.
Frequently Asked Questions
Can I use regular white wine yeast instead of champagne yeast?
Regular wine yeast produces larger, fewer bubbles and lacks the complexity that champagne yeast develops. Your batch will still ferment, but the final product tastes flatter and less refined compared to bottles made with champagne yeast.
What if my fermentation stops before the wine reaches dryness?
Stuck fermentation usually results from temperature drops or yeast stress. Gently warm your carboy to 70 degrees Fahrenheit and stir the wine to aerate it, which often restarts fermentation within 24 hours.
How long can I store finished cava bottles?
Properly aged cava stays fresh for two to three years when stored horizontally in a cool, dark location. Beyond this window, quality gradually declines as the bubbles slowly escape and flavors oxidize.
Why is my finished cava cloudy instead of clear?
Cloudy cava usually indicates insufficient racking or premature bottling before sediment settled completely. Your cava is still safe to drink, but clarity suffers. Future batches benefit from longer settling time before bottling.
Can I make cava with organic or biodynamic juice?
Yes, organic and biodynamic juices work beautifully and often produce more complex flavors. Just verify the juice contains no added preservatives, as sulfites and sorbates inhibit fermentation.
What does the hydrometer reading tell me during fermentation?
Hydrometer readings track sugar consumption as yeast ferments, indicating fermentation progress and final alcohol content. A reading of 1.090 at the start dropping to 0.990 at completion means your yeast converted approximately 11 percent of the juice to alcohol.
Final Thoughts
Making cava at home requires patience and attention to detail, but the reward is a bottle of sparkling wine that reflects your effort and skill. There’s genuine magic in opening a bottle nine months later and hearing that satisfying pop, knowing you created it entirely yourself.
Start with this recipe, keep meticulous notes, and don’t hesitate to adjust variables slightly for your next batch. Every batch teaches you something new, and your winemaking improves with each bottle you produce.
If you’re looking to expand your sparkling wine skills further, try crafting a Cointreau margarita for comparison cocktails, or explore the smoky complexity of a mezcal margarita recipe to round out your home entertaining skills. Both pair wonderfully with cava at sophisticated gatherings.
Homemade Cava
Ingredients
Equipment
Method
- Sanitize all equipment by soaking in 1 tablespoon potassium metabisulfite per gallon of water for 20 minutes, then rinse thoroughly.
- Pour 5 gallons of grape juice into a sanitized pot and heat gently to 65°F; stir in 1/2 teaspoon potassium metabisulfite.
- Rehydrate yeast by sprinkling packet into 80°F water, let sit 10 minutes undisturbed, then stir and wait 5 more minutes.
- Pitch yeast into juice, stir for 1 minute, transfer to carboy leaving 2 inches headspace, and seal with airlock.
- Ferment at 60–70°F for 10–14 days until bubbling slows, monitoring with hydrometer readings.
- Rack wine off sediment into a second sanitized carboy, install airlock and ferment/settle at cool temperature for 2–3 weeks.
- After 9 months total aging, dissolve 2 tablespoons sugar in 1/4 cup water, cool, rack wine into sanitized bucket and stir in sugar solution.
- Sprinkle 1/4 teaspoon champagne yeast over wine, stir gently 30 seconds, bottle in 750 ml sparkling bottles leaving 3/4" headspace, cork and seal.
- Age bottled cava horizontally at 55–60°F for a minimum of 3 months (6–12 months for finer bubbles) before serving.