
There’s something almost magical about that first sip of a cookies and cream milkshake, when cold vanilla ice cream meets the sweet crunch of cookie pieces and you remember exactly why you loved this flavor as a kid. This recipe takes that nostalgic dessert and makes it foolproof, creamy, and ready in under five minutes. It’s the kind of drink that works for a quick afternoon treat, a kids’ birthday party, or when you need dessert without turning on the oven.
What makes this version special is the balance between smooth vanilla creaminess and those satisfying cookie chunks that give you texture in every sip. You’ll use real vanilla ice cream paired with classic sandwich cookies, plus a splash of milk to get the consistency just right. Best of all, you can customize it endlessly once you nail the basic formula.
Why You’ll Love This Recipe
This milkshake delivers restaurant-quality results with grocery store ingredients and minimal effort. It’s thick, creamy, and packed with that cookie flavor you crave.
- Ready in under 5 minutes with zero baking required
- Uses simple ingredients you probably already have at home
- Works for kids and adults alike
- Endlessly customizable with different cookies or add-ins
- No special equipment beyond a basic blender
My Experience Making This Recipe
I made this milkshake on a hot summer afternoon when my kids asked for something cold and sweet, and honestly, I was shocked at how good it turned out. The vanilla ice cream created this silky base, and those crushed cookies gave it real character without making it gritty or unpleasant to drink.
The first time I blended it, I added the cookies all at once and ended up with a few large chunks, which sounds bad but actually felt special. My daughter said it tasted like drinking a cookie, and that’s exactly the compliment I wanted to hear.
Since then, I’ve made it dozens of times, and I’ve learned that the timing of when you add the cookies really matters. Add them at the start and you get smaller bits throughout; add them at the end and you get bigger chunks that settle at the bottom. Both approaches work depending on your mood.
Recipe Overview
- Recipe Name: Cookies and Cream Milkshake
- Servings: 2 milkshakes
- Prep Time: 2 minutes
- Cook Time: 0 minutes
- Total Time: 3 minutes
- Course: Dessert or Beverage
- Cuisine: American
- Calories per Serving: 385 calories
Equipment You Will Need
- Blender (standard or high-powered)
- Measuring cups
- Measuring spoons
- Two tall glasses
- Spoon or spatula for scraping blender
- Optional: whipped cream dispenser or can
Ingredients for Cookies and Cream Milkshake
- Vanilla ice cream: 2 cups (about 4 generous scoops), softened slightly
- Whole milk: 1/2 cup, cold
- Sandwich cookies (such as Oreos): 8 to 10 cookies, plus extra for garnish
- Vanilla extract: 1/2 teaspoon, optional but recommended
- Sugar: 1 tablespoon, optional for extra sweetness
- Whipped cream: for topping, optional
Ingredient Notes and Substitutions
- Vanilla ice cream: The base of this drink, providing creaminess and sweetness. If you don’t have vanilla, use a neutral flavor like plain or sweet cream ice cream; avoid strongly flavored varieties that might clash with the cookies.
- Whole milk: Creates the drinkable consistency without thinning flavor. Use 2% milk for a slightly lighter version, or cream for an ultra-rich shake; avoid skim milk as it won’t deliver enough richness.
- Sandwich cookies: Oreos are traditional, but try Thin Mints, generic sandwich cookies, or even birthday cake-flavored cookies for fun variations; the flavor will shift but the method stays the same.
- Vanilla extract: Adds depth and prevents an icy taste from frozen ingredients. If you skip it, add an extra half-scoop of ice cream instead to maintain richness.
- Sugar: Use only if your ice cream is mild or you like extra sweetness; most commercial vanilla ice creams are already quite sweet, so taste before adding.
How to Make Cookies and Cream Milkshake
Step 1: Gather and Measure Your Ingredients
Pull your ice cream from the freezer and let it sit on the counter for 2 to 3 minutes to soften just slightly. You want it soft enough to scoop easily but still frozen, not melted, so the shake stays thick and cold rather than watery.
Step 2: Separate and Prepare Your Cookies
Take 8 to 10 sandwich cookies and separate the filling from the cookie wafers, setting them on a clean cutting board or napkin. This step isn’t strictly necessary but gives you control over texture; keeping them whole blends into the drink more smoothly, while separating them creates more dramatic chunks.
Step 3: Add Ice Cream to the Blender
Scoop your softened vanilla ice cream directly into the blender pitcher. Two cups (about 4 generous scoops) creates a thick shake that feels luxurious without being so dense you need a spoon to drink it.
Step 4: Pour in the Cold Milk
Add 1/2 cup of cold whole milk to the blender, pouring it around the ice cream rather than directly on top. Cold milk helps keep the shake from warming up and becoming thin during blending.
Step 5: Add Vanilla Extract and Optional Sugar
Sprinkle in 1/2 teaspoon of vanilla extract and taste the ice cream mixture (yes, really). If your ice cream is mild, add 1 tablespoon of sugar; if it’s already quite sweet, skip this step to avoid an overly sugary shake.
Step 6: Blend the Base Until Smooth
Blend the ice cream and milk on high speed for about 30 to 45 seconds, stopping to scrape down the sides halfway through if needed. You’re aiming for a smooth, creamy base with no visible streaks of milk or unmixed ice cream.
Step 7: Add the Cookies and Blend Again
Add your prepared cookies to the blender and pulse on high speed for 10 to 15 seconds, counting your pulses carefully. Pulsing rather than continuous blending gives you control over cookie chunk size; fewer pulses mean bigger pieces, more pulses mean finer bits mixed throughout.
Step 8: Check Consistency and Divide Into Glasses
Stop the blender and look at the texture of your shake. If it’s too thick and won’t pour, add 2 to 3 tablespoons more milk and blend briefly; if it’s too thin, add another small scoop of ice cream and pulse to combine.
Step 9: Pour and Serve Immediately
Pour your shake into two tall glasses right away, working quickly so it stays cold. Top each with a dollop of whipped cream and a crushed cookie if you like, then insert a straw and serve at once.
Pro Tip: Don’t over-blend your finished shake or the cookies will pulverize into powder and the ice cream will start to melt into a sloppy mess; short pulses are your friend here.
Tips for the Best Cookies and Cream Milkshake
- Keep everything cold: use cold milk straight from the fridge and partially softened ice cream, never melted. A cold shake tastes better and stays drinkable longer.
- Pulse rather than blend when adding cookies so you control the texture and avoid turning them into fine crumbs. Two to three pulses usually gives the best texture.
- If your blender struggles with frozen ice cream, let it sit on the counter for 3 to 4 minutes before blending, then work in shorter bursts. High-powered blenders handle cold ice cream better than basic models.
- Use quality vanilla ice cream with real vanilla flavor rather than imitation or no-name brands; the difference is noticeable in the final shake.
- Chill your glasses in the freezer for 5 minutes before pouring if you have time; they’ll keep your shake cold longer and feel fancier.
- Don’t fill the blender more than two-thirds full or the mixture will splash out when you pulse; work in batches if making more than two shakes.
Common Mistakes to Avoid
- Using melted or over-soft ice cream results in a thin, watery shake that tastes more like sweet milk than a proper milkshake. Let ice cream soften just slightly, not completely.
- Adding too much milk turns your shake into more of a beverage than a dessert; stick to 1/2 cup for a thick shake and add more only if needed for drinkability.
- Blending the cookies with the ice cream from the start creates fine cookie powder instead of satisfying chunks throughout. Add cookies in the final step with short pulses.
- Forgetting to scrape down the blender sides leaves unmixed ice cream stuck to the walls, resulting in an uneven texture. Stop halfway through blending the base and scrape.
- Making the shake too far ahead of serving causes it to separate and warm up, creating a sloppy texture. Blend and serve immediately for the best results.
Serving Suggestions
This milkshake works as a standalone dessert, but pairing it with something salty or crispy makes it even more special. Consider what you’re eating it with and adjust your toppings accordingly.
- Serve alongside a warm chocolate chip cookie or brownie for contrast between hot and cold
- Top with crushed cookie pieces and a sprinkle of sea salt to play up the sweet-salty dynamic
- Add a dollop of whipped cream and a drizzle of chocolate syrup for an over-the-top indulgence
- Pair with fresh fruit on the side like strawberries or raspberries for a lighter balance
- Offer alongside a simple vanilla wafer or butter cookie for dunking
Variations to Try
- Chocolate Cookies and Cream: Use chocolate sandwich cookies instead of vanilla, or add 2 tablespoons of chocolate syrup to the base before blending. The result is richer and more indulgent, almost like a brownie milkshake.
- Cookies and Cream with Caramel: Drizzle 2 tablespoons of caramel sauce into the blender before blending, then top with a caramel drizzle. This version tastes like salted caramel meets cookies and cream.
- Mint Cookies and Cream: Substitute mint chip ice cream for vanilla and use chocolate sandwich cookies like Thin Mints. The result is refreshing, dessert-like, and tastes like an upscale frozen treat.
- Cookies and Cream Protein Shake: Add 20 grams of vanilla protein powder to the blender with the ice cream and milk to boost the protein content. This version works as a post-workout treat that still tastes indulgent.
- Brown Butter Cookies and Cream: Toast your sandwich cookies in a dry skillet for 1 to 2 minutes to deepen their flavor before blending. The toasted cookie flavor becomes more complex and nutty.
Dietary Adaptations
- Dairy-free: Use dairy-free vanilla ice cream and unsweetened almond or oat milk instead of whole milk. The shake will be slightly less creamy but still satisfying, with a trade-off in richness.
- Vegan: Choose vegan ice cream made from coconut or cashew cream, and use vegan sandwich cookies like Oreo cookies (which are accidentally vegan in most markets). The flavor profile stays nearly identical to the original.
- Gluten-free: Most sandwich cookies now come in gluten-free versions, so swap those in without changing the rest of the recipe. Ice cream and milk are naturally gluten-free, so no other adjustments needed.
- Low-carb or Keto: Use keto-friendly ice cream sweetened with erythritol and sugar-free sandwich cookies, then add extra cream instead of milk. The result is lower in carbs but higher in fat, so portions should be smaller.
Storage and Reheating
Refrigerator
Milkshakes don’t store well in the fridge because they separate and become thin and watery within a few hours. If you must make ahead, blend the shake and pour it into glasses, then cover with plastic wrap and refrigerate for up to 2 hours, though the texture won’t be ideal.
- Best practice: make and serve immediately for the best texture and taste
- If you have leftovers, drink them within an hour of blending
Freezer
You can freeze individual milkshakes in freezer-safe containers or tall glasses for up to 2 weeks, though the texture will be more like a smoothie popsicle than a traditional shake. To serve, let it thaw for 10 to 15 minutes on the counter until it reaches a sippable consistency.
- Cover the container tightly to prevent ice crystal formation
- Thaw slowly in the refrigerator rather than at room temperature for the best texture
Reheating
There’s no reheating involved with milkshakes, but you can refresh a shake that’s started to melt by adding a fresh scoop of ice cream or a few ice cubes and blending briefly. This restores the cold temperature and thick texture without watering it down completely.
- Add ice cubes only if you’re comfortable with slight dilution
- A fresh scoop of ice cream is the better option for maintaining flavor intensity
Nutrition Information
| Nutrient | Amount |
|---|---|
| Calories | 385 |
| Total Fat | 16g |
| Saturated Fat | 10g |
| Carbohydrates | 52g |
| Fiber | 0g |
| Sugar | 43g |
| Protein | 6g |
| Sodium | 185mg |
| Cholesterol | 32mg |
Nutrition values are approximate and based on standard commercial brands of vanilla ice cream, whole milk, and sandwich cookies. Actual values vary depending on specific ingredients and brands used in your version.
Frequently Asked Questions
Can I make this shake with frozen cookies instead of thawing them?
Frozen cookies will blend into fine powder and won’t create the satisfying chunks you want in a cookies and cream shake. Use cookies that are at room temperature so they break into pieces rather than pulverizing.
What if my blender is weak and struggles with ice cream?
Let the ice cream soften for a full 5 minutes on the counter until it’s quite soft but still frozen, then blend in shorter pulses. You can also add the milk first, then the softened ice cream, to make the blender’s job easier.
Can I use cookie butter or cookie spread instead of whole cookies?
Absolutely, and it creates a smoother, creamier shake with more intense cookie flavor throughout. Stir 3 to 4 tablespoons of cookie butter into the blended ice cream and milk mixture, then top with a few crushed cookies for texture.
How do I know if my shake is the right thickness?
It should be thick enough that it doesn’t pour like water, but loose enough to drink through a standard straw without heroic effort. If you can drink it with a regular straw in about 10 to 15 seconds, you’ve got the consistency right.
Can I make this recipe in a food processor if I don’t have a blender?
A food processor will work but will create a chunkier, less smooth texture than a blender because it doesn’t incorporate as much air. You’ll end up with more of a thick ice cream soup, which is still tasty but not quite the same.
Is there a way to make this shake less sweet?
Skip the added sugar, use reduced-sugar ice cream, and choose cookies that are less sweet. You can also add a pinch of salt to balance the sweetness and make other flavors pop more.
Can I add coffee to this shake?
Yes, add 1/4 cup of strong brewed coffee that’s been cooled to room temperature and blend it in with the ice cream and milk. This creates a cookies and cream coffee shake with a slightly more sophisticated flavor profile.
Final Thoughts
The cookies and cream milkshake is proof that some of the best desserts don’t require any cooking, fancy techniques, or rare ingredients. A few quality basics and a blender are all you need to create something creamy, satisfying, and genuinely delicious that works for any occasion.
Whether you’re making this for a hot summer day, a kids’ party, or just because you deserve a treat, follow the steps carefully and trust the process. Once you nail this recipe, try experimenting with different cookies and add-ins to make it your own, and you’ll never buy a fast-food milkshake again.
Explore more frozen drink options on the blog to expand your dessert repertoire. Try our Ninja Creami milkshake recipe for texture variations, or dive into our peanut butter milkshake recipe for a different flavor adventure. Each recipe builds on these basic milkshake principles while taking you in exciting new directions.
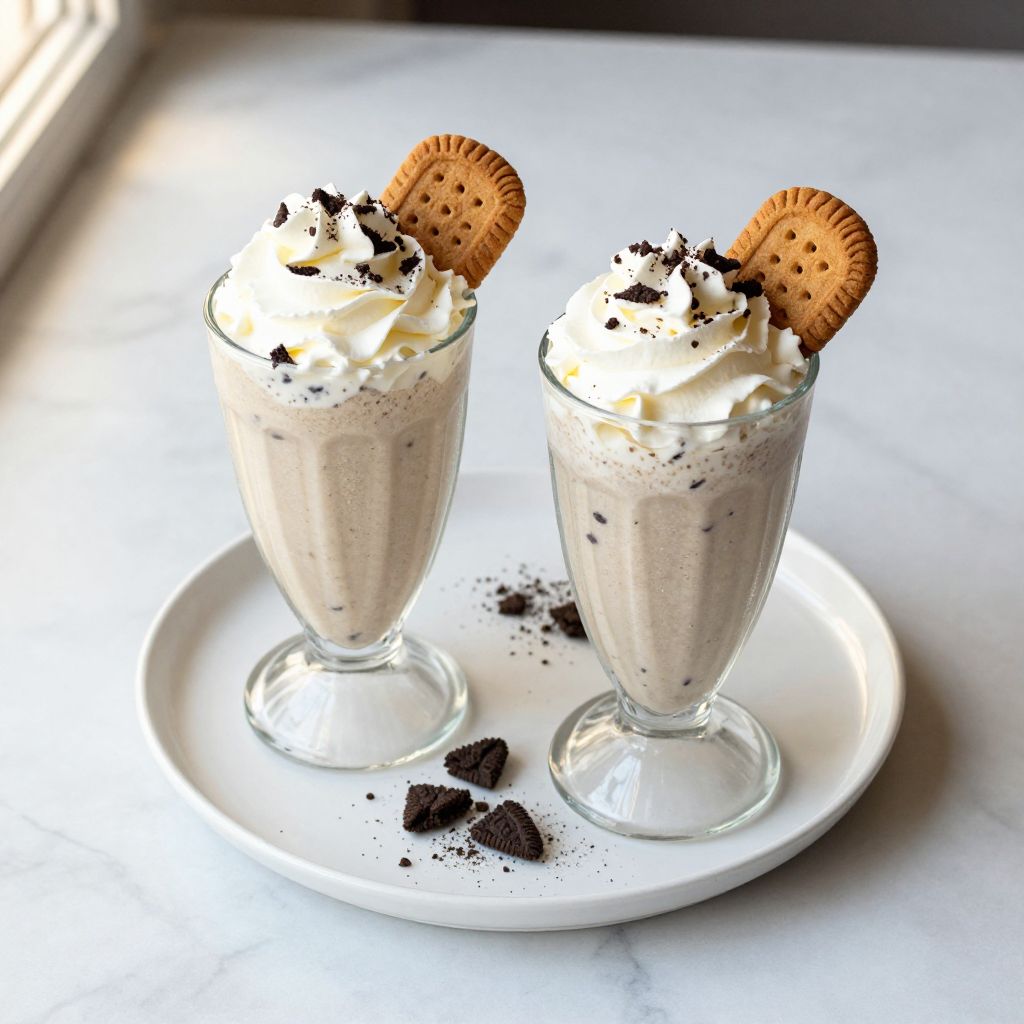
Cookies and Cream Milkshake
Ingredients
Equipment
Method
- Pull ice cream from the freezer and let it sit for 2 to 3 minutes to soften slightly.
- Separate the filling from the cookie wafers on a clean surface if desired for larger chunks, or keep cookies whole for finer texture.
- Scoop 2 cups of softened vanilla ice cream into the blender.
- Add 1/2 cup of cold whole milk around the ice cream in the blender.
- Add 1/2 teaspoon vanilla extract and taste; if your ice cream is mild, add 1 tablespoon sugar.
- Blend on high for 30 to 45 seconds until smooth, scraping down the sides halfway through if needed.
- Add cookies and pulse on high for 10 to 15 seconds, using short bursts to achieve desired chunk size.
- Check consistency: if too thick, add 2 to 3 tablespoons of milk and blend briefly; if too thin, add another small scoop of ice cream and pulse to combine.
- Pour into two tall glasses, top with whipped cream and extra cookie pieces, insert straws, and serve immediately.