
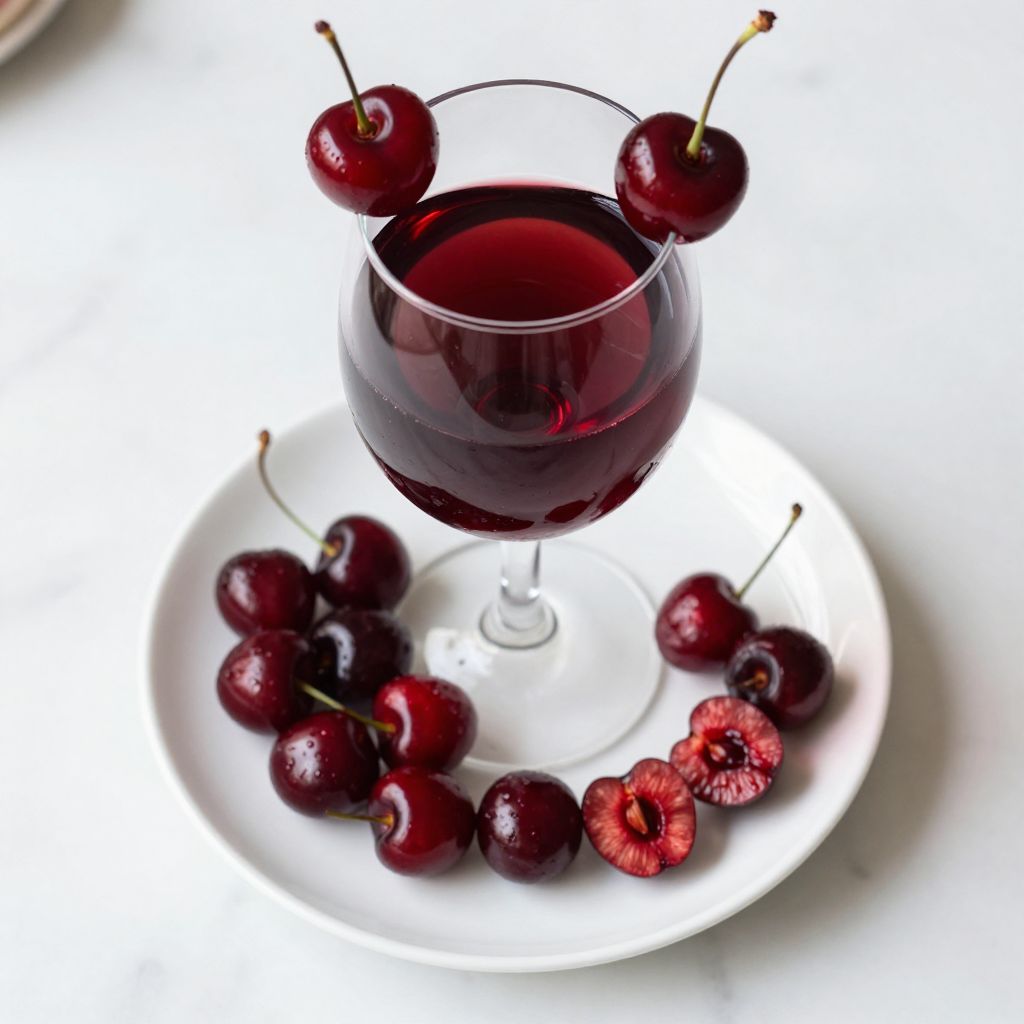
There’s something magical about watching deep crimson juice transform into a smooth, fruity wine that tastes like autumn captured in a bottle. Cherry wine is one of those homemade projects that feels fancy but requires just a handful of ingredients and patience rather than fancy equipment.
This recipe is special because it turns fresh cherries into a sophisticated drink you’d be proud to share with friends, and the process itself becomes a rewarding ritual you’ll look forward to each season. The beauty of cherry wine lies in its natural sweetness, bright acidity, and the way it improves with age, revealing deeper flavors over time.
Why You’ll Love This Recipe
Cherry wine offers a perfect balance of fruit-forward flavor and elegant simplicity that makes it a standout choice for home fermentation.
- Creates a beautifully colored, naturally sweet wine without artificial additives
- Ready to drink in 3 to 6 months, though it improves with longer aging
- Uses readily available cherries during peak season for maximum flavor and value
- Minimal equipment needed, just basic kitchen tools and glass bottles
- Makes an impressive homemade gift that showcases your effort and creativity
My Experience Making This Recipe
The first time I made cherry wine, I was skeptical that something so simple could actually work. After my first batch cleared and I poured that first glass, the doubt vanished instantly as the complex cherry flavor rolled across my palate.
My friends were stunned when I told them I’d made it myself, and the conversation always turned to how they could attempt their own batch. The most satisfying part was opening a bottle eight months later and tasting how much richer and smoother it had become, proof that patience truly pays off in fermentation.
I’ve since made five batches with slight variations, and each one teaches me something new about how cherry variety, sugar levels, and aging time affect the final product. The sensory experience of crushing fresh cherries, watching the fermentation bubble away, and eventually bottling your creation makes this recipe feel less like cooking and more like personal alchemy.
Recipe Overview
- Recipe Name: Cherry Wine
- Servings: Approximately 5 bottles (750ml each)
- Prep Time: 45 minutes
- Fermentation Time: 3 to 6 months
- Total Time: 3 to 6 months plus bottling
- Course: Beverage
- Cuisine: Homemade Fermentation
- Alcohol Content: Approximately 11 to 13 percent ABV
Equipment You Will Need
- One 1-gallon glass demijohn or carboy
- Airlock and rubber bung (to fit your carboy)
- Large food-grade plastic or stainless steel bucket
- Wooden spoon or fermenting paddle
- Cheesecloth or fine mesh strainer
- Hydrometer (optional but helpful for tracking fermentation)
- Siphon tube for racking
- Glass bottles with caps or corks for storage
- Sanitizing solution or campden tablets
- Kitchen scale or measuring cups
- Funnel
Ingredients for Cherry Wine
- Fresh red or black cherries: 4 pounds, pitted and halved
- Sugar: 2.5 pounds (for fermentation)
- Water: 1 gallon (filtered or boiled and cooled)
- Wine yeast: 1 packet (Montrachet or Burgundy strain recommended)
- Yeast nutrient: 1 teaspoon
- Acid blend: 0.5 teaspoon (optional, to balance pH)
- Campden tablet: 1 tablet (crushed, for sanitizing initial must)
- Pectic enzyme: 0.5 teaspoon (helps break down fruit solids)
Ingredient Notes and Substitutions
- Fresh cherries: Use fully ripe, unblemished fruit for the best flavor and natural sugar content. Frozen cherries work if fresh aren’t available, though thaw them first and expect slightly less vibrant color in the finished wine.
- Sugar: Granulated white sugar ferments cleanly and predictably, allowing the cherry flavor to shine. Brown sugar or honey will add different flavor notes and may slightly darken the wine, creating a richer profile if you prefer deeper tones.
- Wine yeast: Montrachet and Burgundy strains are forgiving and bring out fruit character well. Champagne yeast ferments faster but produces a drier result, while Lalvin D47 creates a slightly more delicate, elegant wine if you want to experiment.
- Acid blend: Cherries vary in natural acidity, and this blend balances the pH for proper fermentation and shelf stability. Fresh lemon juice at 0.5 teaspoon serves as a natural substitute if you prefer avoiding additives.
- Pectic enzyme: This breaks down fruit cell walls, increasing juice extraction and clarity in your final wine. Skipping it won’t ruin your batch, but the wine may remain slightly cloudier and take longer to clear.
How to Make Cherry Wine
Step 1: Sanitize Your Equipment
Begin by thoroughly sanitizing all equipment that will contact your wine, including the carboy, bucket, spoon, and airlock. Use a sanitizing solution mixed to package instructions or soak items in a solution of one campden tablet dissolved in water for 24 hours, then rinse well with filtered water.
Proper sanitization prevents wild yeast and bacteria from competing with your wine yeast and ruining the batch. This step takes only minutes but protects weeks of fermentation work.
Step 2: Prepare Your Cherries
Wash fresh cherries thoroughly under cool running water and pat them dry with a clean cloth. Pit each cherry using a cherry pitter or the back of a knife, cutting them in half to expose the flesh and maximize juice extraction.
Halving the cherries increases surface area and allows the yeast to access sugars and flavor compounds more easily during fermentation. Remove any stems, leaves, or damaged fruit to prevent off-flavors in your finished wine.
Step 3: Create Your Initial Must
Place your prepared cherries into the sanitized bucket and sprinkle the crushed campden tablet over them, stirring well to distribute it evenly. Add the pectic enzyme and acid blend, stirring thoroughly, then cover the bucket loosely with cheesecloth.
The campden tablet kills any wild microorganisms on the fruit while the pectic enzyme begins breaking down cell walls to release more juice. Let this mixture sit at room temperature for 24 hours, which allows the campden to do its work and gives you time to prepare the sugar solution.
Step 4: Dissolve Sugar and Add Water
Boil the filtered water and remove it from heat, then stir in the sugar until completely dissolved, creating a simple syrup. Allow this syrup to cool to room temperature before adding it to your cherry must in the bucket.
Dissolving sugar in hot water ensures even distribution and prevents crystallization, while cooling it first prevents killing your wine yeast. Stir the entire mixture thoroughly until well combined, breaking up cherry pieces as you go.
Step 5: Pitch Your Wine Yeast
Sprinkle the wine yeast directly over the surface of your must and stir gently but thoroughly for about one minute. Add the yeast nutrient and stir again to distribute it evenly throughout the liquid.
Pitching the yeast directly onto the must (called “dry pitching”) works well for home winemakers and avoids the extra step of rehydrating. Yeast nutrient gives the microbes what they need to ferment vigorously and healthily, reducing the risk of stuck fermentation.
Step 6: Begin Primary Fermentation
Cover your bucket loosely with cheesecloth or a clean kitchen towel, allowing carbon dioxide to escape while preventing dust and insects from entering. Place the bucket in a cool, dark location where the temperature stays between 65 and 75 degrees Fahrenheit.
Optimal fermentation temperature keeps yeast active without stressing it or creating unpleasant flavors. You should see signs of fermentation (bubbling, foam, cloudiness) within 24 to 48 hours as the yeast population explodes and begins converting sugar to alcohol.
Step 7: Rack Into Your Carboy
After 7 to 10 days of primary fermentation, when the activity has visibly slowed, strain the must through cheesecloth into your sanitized carboy using a funnel. Discard the solids and fill the carboy to just below the neck, leaving some headspace for continued fermentation.
Racking separates your clear liquid from the settled fruit solids, which would otherwise create off-flavors if left in contact too long. Leaving headspace prevents your wine from bubbling over as secondary fermentation continues.
Step 8: Install Airlock and Continue Fermentation
Insert a sanitized rubber bung with an airlock into the carboy’s opening, ensuring a tight seal that allows gas out but prevents air from entering. Place the carboy in the same cool, dark location and monitor fermentation over the next 2 to 4 weeks.
The airlock lets you watch fermentation progress through bubble activity while protecting your wine from oxidation and contamination. When bubbling slows dramatically or stops completely, your wine is approaching dryness and readiness for the next racking.
Step 9: Rack Again and Begin Aging
After fermentation stops, siphon your wine into a clean carboy, leaving behind the sediment layer (lees) that settled on the bottom. Top off with a small amount of similar wine or filtered water to minimize headspace, then replace the airlock.
This second racking removes dead yeast and particles that would otherwise cloud your wine and create off-flavors during aging. Minimizing headspace prevents oxidation, which would turn your wine vinegary and unpleasant over time.
Step 10: Age and Monitor
Leave your wine undisturbed in the carboy to age for a minimum of 3 months, though 6 months produces noticeably better results. Check the airlock occasionally to ensure it contains liquid and hasn’t dried out, refilling if needed.
Extended aging allows flavors to mature and mellow, reducing harsh notes and creating a smoother, more integrated final product. Patience during this stage transforms a decent wine into something genuinely impressive.
Pro Tip: Invest in a hydrometer to track your fermentation’s progress by measuring gravity changes; it tells you exactly when fermentation ends and helps you know when your wine is truly dry and ready for bottling.
Tips for the Best Cherry Wine
- Choose ripe, deeply colored cherries with good flavor for the most satisfying results; under-ripe fruit produces thin, acidic wine even with added sugar. Visit a farmers market during peak season for the best selection and freshness.
- Keep your fermentation location consistently cool and dark, away from sunlight and temperature fluctuations; wild swings stress the yeast and create off-flavors. A basement corner or cool closet works perfectly.
- Taste your wine during aging to monitor flavor development and catch any problems early; a small sample won’t hurt your batch. Take notes on what you taste so you learn from each batch you make.
- Resist the urge to bottle too early; properly aged cherry wine tastes dramatically better than wine bottled after just a few weeks. Mark your calendar so you don’t forget how long your wine has aged.
- Use proper wine bottles and caps or corks for storage; regular glass bottles don’t seal well enough for long-term aging. Store finished bottles upright in a cool place for consistency and ease of access.
- Keep detailed notes on your process, including exact dates, temperatures, and any adjustments you made; this turns each batch into data you can learn from and improve upon.
Common Mistakes to Avoid
- Over-sanitizing with harsh chemicals that don’t fully rinse away can impart off-flavors and kill your yeast; use campden tablets or approved sanitizing solutions mixed to proper strength. Rinse all equipment thoroughly with filtered water before using.
- Fermenting at temperatures above 75 degrees speeds up fermentation but creates unpleasant flavors and can produce vinegar-like notes; maintain consistent cool temperatures throughout. If your space is warm, fermentation will still happen, just more slowly and with better results.
- Adding all your sugar at once instead of measuring properly based on desired alcohol content leads to stuck fermentation or excessively dry or sweet wine. Use a scale or measuring cups for accuracy and consider using a hydrometer to verify your starting gravity.
- Bottling before fermentation truly completes causes bottles to explode from built-up pressure; wait until your airlock shows no activity for at least two weeks. A hydrometer reading of 0.998 or lower confirms the wine is fully fermented.
- Exposing your wine to light, heat, and air during aging damages flavor and color; store your carboy in a dark place with minimal headspace and check the airlock regularly. Even small amounts of light exposure over months degrades your final product noticeably.
Serving Suggestions
Cherry wine pairs beautifully with a wide range of foods and occasions, from casual weeknight dinners to formal celebrations. Serve it slightly chilled, around 50 to 55 degrees Fahrenheit, to bring out its fruit character without numbing the delicate flavors.
- Pair with rich duck or roasted game meats where the wine’s acidity cuts through fat and the fruit complements savory preparations
- Serve alongside chocolate desserts, particularly dark chocolate tarts or truffles, where the cherry and cocoa notes enhance each other
- Enjoy with creamy cheese courses, especially soft cheeses or brie, which create a luxurious flavor combination
- Complement spiced dishes like Moroccan tagines or Indian curries where the fruity sweetness balances heat and complexity
- Offer as an elegant aperitif on its own or diluted slightly with sparkling water for a lighter, refreshing drink before dinner
Variations to Try
- Cherry and Plum Wine: Replace 1 pound of cherries with fresh plums to add deeper complexity and a subtle tannic structure; the plums contribute additional body and interesting spice notes.
- Dry Cherry Wine: Reduce sugar to 2 pounds and allow fermentation to complete fully to create a drier wine with more acidity and food-friendliness; this style pairs exceptionally well with savory dishes.
- Sweet Dessert Cherry Wine: Increase sugar to 3 pounds and consider back-sweetening with a small amount of honey after fermentation stops; the result is a luscious dessert wine that shines with chocolate or berry desserts.
- Cherry Wine with Spices: Add 2 to 3 whole cloves or a small cinnamon stick during primary fermentation for subtle warming spice notes that complement the fruit without overwhelming it.
- Wild Cherry Wine: If you can source wild or sour cherries, use them in place of sweet cherries for a more complex, tart wine with incredible depth; expect a longer aging period for optimal results.
Dietary Adaptations
- Gluten-Free: Cherry wine is naturally gluten-free; simply verify your yeast and any additives carry gluten-free certification, which most commercial wine yeasts do.
- Vegan and Vegetarian: Cherry wine is vegan and vegetarian by default; avoid any fining agents like isinglass or gelatin if you prefer not to use animal products, or use pea protein or bentonite clay instead.
- Sugar-Conscious: Use a lower amount of starting sugar and allow fermentation to reduce residual sweetness, creating a drier wine with fewer remaining carbohydrates than a sweet version.
- Low-Histamine: Fresh fermentation produces histamines over time; if you’re sensitive, drink your wine younger rather than aged, and avoid prolonged contact with fruit solids during fermentation.
Storage and Reheating
Refrigerator
Finished cherry wine keeps beautifully in the refrigerator for several weeks once opened, as the cold slows oxidation and preserves flavor. Store it in a wine bottle with the cork or cap sealed tightly.
- Opened bottles stay fresh for 2 to 3 weeks when refrigerated and sealed properly
- Unopened bottles can age safely in a cool fridge for years without degradation
Freezer
While freezing wine changes its chemistry slightly and isn’t ideal for premium bottles, it works for wine you plan to use in cooking or drinking casually. Expect some flavor softening and potential separation if you freeze and thaw.
- Freeze in small portions in ice cube trays for convenient cooking additions
- Frozen wine keeps for several months but should be used rather than saved long-term
Long-Term Cellar Storage
Your best storage option is keeping unopened bottles in a cool, dark location like a cellar, closet, or wine fridge at 50 to 65 degrees Fahrenheit. Proper storage dramatically extends your wine’s lifespan and allows continued aging.
- Store bottles upright in darkness away from vibration and temperature fluctuation
- Properly stored cherry wine improves for 5 to 10 years, developing deeper, more complex flavors
- Check bottles occasionally for leaks or signs of cork failure, which indicates oxidation
Nutrition Information
| Nutrient | Amount |
|---|---|
| Calories | 125 |
| Total Fat | 0g |
| Saturated Fat | 0g |
| Carbohydrates | 8g |
| Fiber | 0g |
| Sugar | 4g |
| Protein | 0.5g |
| Sodium | 5mg |
| Cholesterol | 0mg |
These values represent a 5-ounce serving of finished cherry wine and are approximate, varying based on exact fermentation completion and residual sugar. Wine produced through home fermentation may differ slightly from commercial versions depending on your specific process and ingredients.
Frequently Asked Questions
Can I use frozen cherries instead of fresh ones?
Yes, frozen cherries work well for cherry wine and sometimes actually yield better results because freezing breaks down cell walls and increases juice extraction. Thaw them completely and drain any excess liquid before using, then proceed with the recipe as written.
How do I know when fermentation is truly complete?
Fermentation finishes when the airlock shows no bubbles for at least two weeks and a hydrometer reading stabilizes at 0.998 or lower. You can also taste the wine to confirm dryness, as finished wine contains no residual sweetness and tastes dry on the palate.
Why is my wine still cloudy after three months?
Cloudiness often comes from suspended particles that settle slowly, particularly if you skipped the pectic enzyme or didn’t rack properly. Another racking into a clean carboy helps, and time will eventually clear even stubborn cloudiness, though it might take 6 to 12 months.
Can I back-sweeten my wine after fermentation?
Yes, you can add honey, simple syrup, or even additional fruit juice after fermentation to create sweetness; stir in small amounts and taste frequently to reach your desired level. Remember that any added sweetness feeds residual yeast, so add a campden tablet afterward to prevent re-fermentation.
What does wine taste like if fermentation sticks mid-process?
Stuck fermentation leaves residual sugar that makes the wine taste unfinished and overly sweet, with harsh alcohol notes when the yeast dies before converting all available sugar. Prevention through proper temperature control and yeast nutrients is far easier than attempting to restart a stuck fermentation.
Is it safe to drink homemade wine?
Yes, homemade wine is completely safe when you follow proper sanitation and fermentation procedures; the fermentation process itself creates an environment hostile to dangerous pathogens. Millions of home winemakers worldwide make safe, delicious wine using these same methods.
Final Thoughts
Making cherry wine transforms a humble basket of fruit into something that brings genuine pleasure and pride with every sip you share. The process teaches patience, attention to detail, and the magic of fermentation while requiring surprisingly little equipment or expertise.
If you’ve been hesitant to try home fermentation, cherry wine is the perfect entry point into a rewarding hobby that deepens your appreciation for flavor and craftsmanship. Start your first batch today, and you’ll join countless others who’ve discovered the satisfaction of creating something truly special from scratch.
Explore More Homemade Wines and Beverages
Once you’ve mastered cherry wine, expand your home fermentation adventures with other exciting fruit-based beverages that showcase seasonal ingredients and creative flavor combinations.
Try making cherry bounce for a sparkling variation that captures the bright, festive nature of fermented fruit drinks, or explore strawberry wine for a lighter, more delicate alternative to cherry’s deeper complexity. Each recipe opens new possibilities for home fermentation and flavor exploration.
Cherry Wine
Ingredients
Equipment
Method
- Sanitize all equipment with a campden tablet solution or approved sanitizer, then rinse with filtered water.
- Wash and pit cherries, halving them to expose the flesh.
- Place cherries in the bucket, sprinkle crushed campden tablet, pectic enzyme, and acid blend over them, stir, cover with cheesecloth, and let rest 24 hours.
- Boil water and dissolve sugar to make simple syrup, cool to room temperature, then add to the cherry must and stir thoroughly.
- Sprinkle wine yeast and yeast nutrient over the surface of the must, stir gently for 1 minute to distribute.
- Cover the bucket with cheesecloth and ferment at 65–75°F for 7–10 days, stirring daily until activity slows.
- Strain the must through cheesecloth into the sanitized carboy, discard solids, leaving headspace for fermentation.
- Install airlock and ferment at 65–75°F for 2–4 weeks until bubbling nearly stops.
- Rack wine into a clean carboy, top off to minimize headspace, replace airlock, and ferment undisturbed.
- Age the wine in a cool, dark place for at least 3 months before bottling and serving.