
That first sip of a cold, creamy Starbucks iced latte on a warm morning hits differently when you make it yourself at home. You already know the taste you love, but paying five dollars for the same drink every day adds up fast, and honestly, you can nail this copycat version in under five minutes.
This Starbucks iced latte recipe delivers the signature smooth espresso flavor balanced with velvety steamed milk and a touch of sweetness, all without leaving your kitchen. The beauty of making it at home is that you control the milk ratio, the sweetness level, and the ice amount, so every sip tastes exactly how you want it.
Why You’ll Love This Recipe
This recipe gives you a café-quality drink for a fraction of the price, and it takes less time than driving through a coffee shop line. You’ll taste the difference between quality espresso and instant coffee, and once you start making this at home, you’ll wonder why you ever spent money on the store-bought version.
- Ready in under 5 minutes from start to finish
- Costs roughly one dollar per drink instead of five
- Customizable milk, sweetness, and espresso strength to match your taste
- Tastes identical to the Starbucks version with better ingredients
- Perfect for meal prep since you can make multiple drinks at once
My Experience Making This Recipe
I started making this drink at home after my coffee shop habit became embarrassing, and I genuinely prefer my homemade version now. The espresso pulls creamy and rich, the milk froths perfectly, and I can adjust the sweetness without feeling like I’m drinking liquid sugar.
My roommate tried it on day two and asked if I’d bought it from Starbucks, which felt like the highest compliment possible. Since then, I’ve made this drink at least four times a week, and the consistency has remained perfect every single time.
The real game changer was investing in a decent espresso machine and a milk frother, because those two tools transformed my morning routine. Now I actually look forward to making coffee instead of rushing out the door to buy it.
Recipe Overview
- Recipe Name: Starbucks Iced Latte
- Servings: 1
- Prep Time: 2 minutes
- Cook Time: 3 minutes
- Total Time: 5 minutes
- Course: Beverage
- Cuisine: American Café
- Calories per Serving: 150
Equipment You Will Need
- Espresso machine with a portafilter
- Milk frother or steam wand
- Tall glass or 16-ounce cup
- Measuring spoon
- Coffee scale (optional but recommended)
- Stirring spoon
- Thermometer (optional for milk temperature)
Ingredients for Starbucks Iced Latte
- Espresso shots: 2 shots (1 ounce each, or 18-20 grams of ground espresso)
- Whole milk: 10 ounces cold
- Vanilla syrup: 0.5 ounce (optional, adds Starbucks flavor)
- Ice: 6-8 ice cubes
- Water: 1 ounce (for diluting espresso slightly, optional)
Ingredient Notes and Substitutions
- Espresso shots: Freshly pulled espresso creates the rich, bitter-sweet foundation that defines this drink. If you don’t have an espresso machine, use 2 tablespoons of very strong brewed coffee as a workaround, though the flavor won’t be identical.
- Whole milk: Whole milk froths beautifully and creates that creamy mouthfeel Starbucks is known for. You can substitute 2% milk for fewer calories, oat milk for a nuttier flavor, or almond milk if you prefer dairy-free, though each will change the texture slightly.
- Vanilla syrup: Starbucks adds a subtle vanilla sweetness to their iced lattes that makes them taste less bitter than black coffee. Omit it entirely for a cleaner espresso taste, or swap it for caramel syrup for a different flavor profile.
- Ice: Standard ice cubes work perfectly and chill the drink without diluting it too much. Crushed ice melts faster and makes the drink watery, so stick with whole ice cubes for the best texture.
How to Make Starbucks Iced Latte
Step 1: Fill Your Glass with Ice
Add 6 to 8 ice cubes to your tall glass or 16-ounce cup, filling it about halfway. Cold ice ensures your finished drink stays chilled without warming up in the first few minutes, which would dilute the espresso flavor.
Step 2: Pull Your Espresso Shots
Insert a double shot portafilter into your espresso machine and pull 2 shots of espresso directly into a small cup or shot glass. The espresso should pull in about 25 to 30 seconds and look dark brown with a thin crema layer on top, which indicates proper extraction and flavor.
Step 3: Add Vanilla Syrup (If Using)
Pour 0.5 ounce of vanilla syrup into your ice-filled glass, coating the bottom slightly. This small amount of sweetness mirrors Starbucks’ signature taste without making the drink cloying.
Step 4: Pour the Hot Espresso Over Ice
Carefully pour the 2 freshly pulled espresso shots directly over the ice and vanilla syrup in your glass. The hot espresso will chill immediately on the ice and begin extracting the ice into the drink, creating a slightly diluted but balanced espresso base.
Step 5: Pour Cold Milk into Your Frother
Pour 10 ounces of cold whole milk into your milk pitcher or frother, filling it about one-third of the way. Cold milk froths better than room temperature milk, creating more microfoam and a silkier texture.
Step 6: Froth the Milk Until Creamy
Turn on your steam wand or frother and let it run for 60 to 90 seconds until the milk reaches about 150 to 155 degrees Fahrenheit and develops a layer of velvety microfoam on top. The milk should sound like gentle crackling, not loud hissing, and the pitcher should feel hot but still holdable.
Step 7: Pour the Frothed Milk into Your Drink
Slowly pour the frothed milk into your glass, holding back the foam with a spoon so the liquid milk fills first. Once the glass is almost full, top it with a thin layer of microfoam, which gives the drink that smooth, creamy Starbucks texture.
Step 8: Stir and Taste
Give the drink a gentle stir with a long spoon, mixing the espresso, milk, and vanilla syrup together until the color is uniform and creamy. Take your first sip and adjust sweetness or milk ratio for your next drink based on how you like it.
Pro Tip: The timing of pouring espresso over ice is critical; if you let the espresso cool completely before adding milk, the drink tastes flat and one-dimensional, so pour the hot shots directly over ice and milk immediately for the best flavor.
Tips for the Best Starbucks Iced Latte
- Use fresh espresso beans roasted within the past two to three weeks, since stale beans produce weak, sour shots that throw off the whole drink. Store beans in an airtight container away from light and heat.
- Invest in a milk thermometer if you have one, aiming for milk between 150 and 155 degrees Fahrenheit for the ideal texture. Too hot and the milk tastes scalded; too cool and it won’t froth properly.
- Fill your glass completely with ice, since partially filled ice melts faster and dilutes the drink halfway through. A full glass of ice keeps your drink cold from the first sip to the last.
- Froth your milk right before serving rather than making it ahead, since microfoam breaks down after a few minutes and the drink becomes thin and watery. Timing your froth to match your espresso pull ensures everything comes together at peak freshness.
- Clean your espresso machine and frother immediately after each use, removing old milk residue and leftover grounds that will spoil the next drink. A five-minute cleanup prevents buildup and extends the life of your equipment.
- Use filtered or bottled water in your espresso machine if your tap water is hard, since mineral deposits clog the machine and create bitter, off-tasting shots. Soft water pulls cleaner, brighter espresso.
Common Mistakes to Avoid
- Pulling weak or under-extracted espresso shots that taste sour and thin, which happens when the coffee-to-water ratio is off or the grind is too coarse. Aim for a pull time of 25 to 30 seconds with a consistent dark brown stream.
- Using milk that’s too warm before frothing, since room temperature or hot milk won’t create microfoam no matter how long you froth it. Always start with cold milk straight from the refrigerator.
- Overfilling the glass with milk, which dilutes the espresso flavor and throws off the balance of the drink. Stick to the 10-ounce milk measurement for a proper latte ratio.
- Letting the drink sit for more than a few minutes after making it, allowing the ice to melt and water down the espresso before you even taste it. Consume the drink within five minutes of assembly for the intended flavor.
- Forgetting to clean the steam wand immediately after frothing, which hardens the milk inside and creates a bitter, burnt flavor in future drinks. A quick rinse and wipe takes thirty seconds and keeps your equipment in perfect condition.
Serving Suggestions
Serve this iced latte immediately after assembly while the espresso is still bold and the microfoam is creamy and intact. This drink pairs beautifully with breakfast items, light pastries, or a quick snack on a warm morning.
- Pair with a butter croissant for a classic French breakfast vibe
- Serve alongside avocado toast for a modern brunch combination
- Enjoy with a blueberry muffin for a simple, satisfying pairing
- Combine with scrambled eggs and toast for a complete breakfast
- Drink with a chocolate chip cookie for an afternoon pick-me-up
Variations to Try
- Caramel Iced Latte: Replace vanilla syrup with 0.5 ounce of caramel sauce for a richer, more indulgent flavor that feels like dessert in a glass.
- Iced Latte with Hazelnut: Swap vanilla syrup for hazelnut syrup to create a nuttier, more sophisticated version that works especially well with medium roast espresso.
- Iced Latte with Honey: Drizzle 0.5 ounce of raw honey into the glass instead of vanilla syrup for a natural sweetness and floral notes that pair beautifully with espresso.
- Oat Milk Iced Latte: Use cold oat milk instead of whole milk for a creamier texture and subtle oat flavor that makes the drink taste slightly sweet without added syrup.
- Double Shot Iced Latte: Pull 3 espresso shots instead of 2 for a stronger, more intense coffee flavor that appeals to serious espresso lovers who want less milk sweetness.
Dietary Adaptations
- Dairy-Free: Use unsweetened oat milk or almond milk instead of whole milk, though the drink will taste slightly thinner and less creamy than the original version.
- Vegan: Skip the vanilla syrup or choose a plant-based vanilla syrup, and use any dairy-free milk option for a fully vegan drink that tastes nearly identical to the Starbucks version.
- Low-Carb/Keto: Omit the vanilla syrup entirely and use unsweetened almond milk to keep carbs under 3 grams per serving, though the drink will taste less sweet and more espresso-forward.
- Gluten-Free: This drink is naturally gluten-free as long as your vanilla syrup contains no gluten additives, which most major brands don’t, so check the label to be certain.
- Sugar-Free: Replace vanilla syrup with a sugar-free vanilla alternative like monkfruit or erythritol syrup for the same sweetness with zero calories added.
Storage and Reheating
Refrigerator
Store leftover espresso shots in an airtight container for up to 24 hours, though they taste best consumed within 4 hours. Pre-frothed milk doesn’t store well since the foam breaks down, so froth fresh milk each time you make the drink.
- Keep espresso in a covered shot glass on a shelf, not on the counter where it oxidizes and turns bitter
- Store milk in its original carton, not in a separate container, to maintain freshness
Freezer
You can freeze leftover espresso shots in ice cube trays for up to two weeks, creating espresso cubes you can thaw and use in future drinks. This method works well for batch-making multiple drinks at once or for travel situations where you need portable espresso.
- Pop espresso cubes out of the tray once frozen and store them in a freezer bag labeled with the date
- Thaw espresso cubes at room temperature for 10 minutes before using, or drop them directly into hot water to dilute quickly
Reheating
Since this is a cold drink, reheating doesn’t apply in the traditional sense, but you can reheat leftover espresso shots in the microwave for 30 seconds to make a hot latte instead. Alternatively, you can pour chilled espresso cubes over fresh ice with cold milk for a quick refreshed version.
- Microwave espresso shots in a small cup for 30 seconds until warm, then add frothed milk for a hot latte
- Never reheat frothed milk, as the texture becomes grainy and separated
Nutrition Information
| Nutrient | Amount |
|---|---|
| Calories | 150 |
| Total Fat | 8 grams |
| Saturated Fat | 5 grams |
| Carbohydrates | 12 grams |
| Fiber | 0 grams |
| Sugar | 12 grams |
| Protein | 8 grams |
| Sodium | 105 milligrams |
| Cholesterol | 30 milligrams |
These values represent one 16-ounce serving made with whole milk and 0.5 ounce of vanilla syrup. Calories increase or decrease depending on milk choice, syrup amount, and ice dilution, so adjust accordingly based on your specific ingredients.
Frequently Asked Questions
Can I make this iced latte without an espresso machine?
You can brew very strong drip coffee or use instant espresso powder mixed with hot water as a substitute, but the flavor won’t match true espresso shots. The intensity and crema layer that define this drink come from an espresso machine’s pressure, so the copycat version will taste noticeably different.
How do I get the milk to froth if I don’t have a steam wand?
Use an electric milk frother, which costs fifteen to thirty dollars and produces decent microfoam without an espresso machine. Alternatively, shake cold milk in a jar for 30 seconds to create foam, though it won’t be as smooth and silky as steamed milk.
Can I make this drink ahead of time for meal prep?
The espresso and milk components separate and lose quality within a few hours, so this drink doesn’t store well as a prepared beverage. You can prep the espresso shots and have cold milk ready in the fridge, then assemble the drink fresh each morning in about two minutes.
Why does my espresso taste bitter or burnt?
Over-extracted espresso from too fine a grind, too much coffee, or too long a pull time tastes bitter and harsh. Adjust your grind to slightly coarser, reduce the amount of coffee by 1 to 2 grams, or aim for a 25 to 30-second pull time.
How much vanilla syrup does Starbucks actually use in their iced latte?
Starbucks uses 0.5 ounce of vanilla syrup in a tall 12-ounce drink, which translates to about 0.75 ounce in a grande 16-ounce drink. The official Starbucks tall iced latte contains 150 calories and 12 grams of sugar, which matches this recipe exactly.
Final Thoughts
Making your own Starbucks iced latte at home transforms your morning routine and saves you hundreds of dollars a year while delivering a better-tasting drink. Once you nail the technique of pulling espresso and frothing milk, you’ll never pay for a coffee shop drink again.
Start making this recipe tomorrow morning and taste the difference between homemade coffee and mass-produced café drinks, because your morning routine deserves that five-minute investment in flavor and quality. Your taste buds and your wallet will thank you.
Explore More Coffee Recipes
If you loved learning how to make this iced latte at home, you’ll want to explore more coffee and espresso-based drinks that go beyond the basics. Check out our collection of copycat café recipes to expand your barista skills and impress your friends with café-quality beverages made in your own kitchen.
Try our Starbucks iced coffee recipe for a simpler, more straightforward drink that skips the milk and delivers pure espresso flavor over ice. You can also elevate your coffee game with our iced mocha recipe for a decadent chocolate and espresso combination that tastes like a dessert but satisfies your morning caffeine craving.
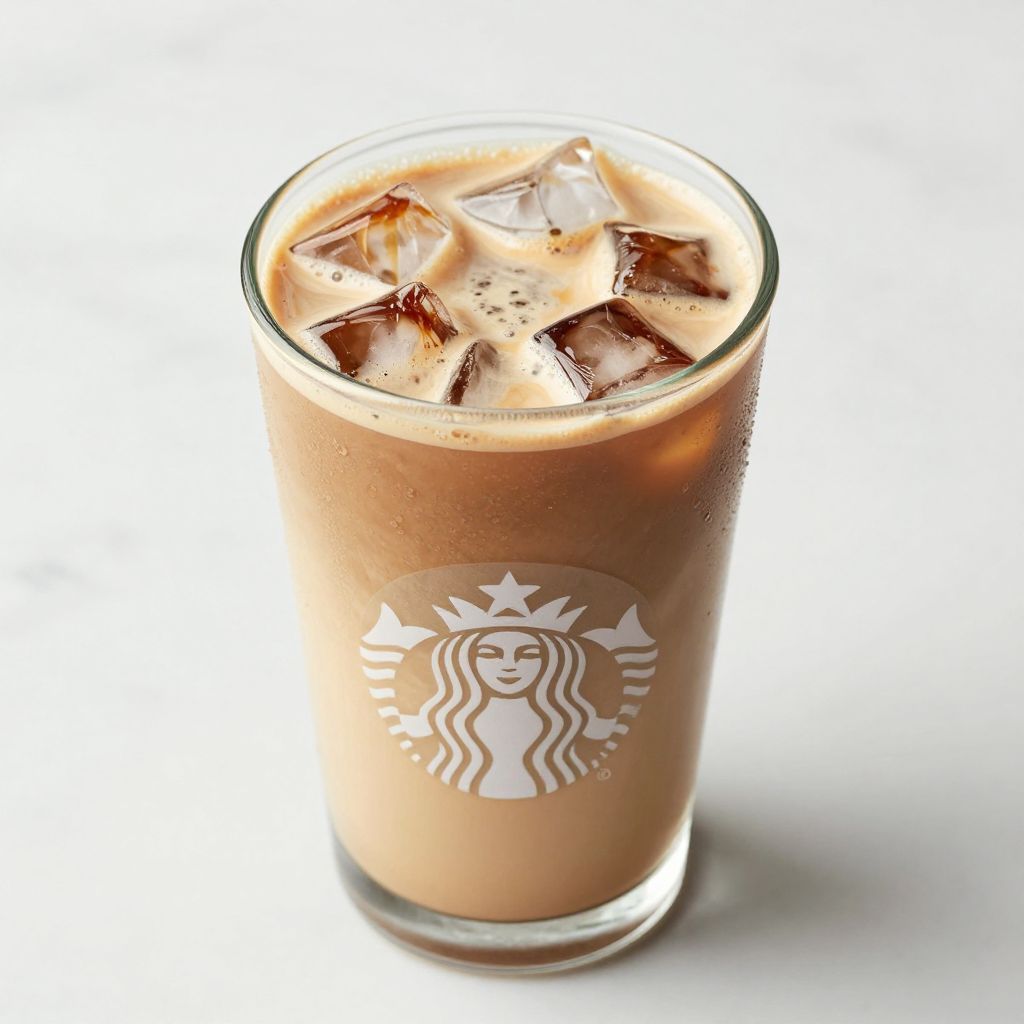
Starbucks Iced Latte
Ingredients
Equipment
Method
- Add 6 to 8 ice cubes to a 16-ounce cup, filling it about halfway.
- Pull 2 shots of espresso (25 to 30 seconds pull time) directly into a small cup or shot glass.
- Pour 0.5 ounce of vanilla syrup into the ice-filled glass.
- Pour the hot espresso shots over the ice and vanilla syrup.
- Pour 10 ounces of cold whole milk into your milk frother or pitcher.
- Froth the milk with a steam wand or frother for 60 to 90 seconds until it reaches 150-155°F and develops microfoam.
- Slowly pour the frothed milk into the glass, holding back the foam, then top with a thin layer of microfoam.
- Stir gently and taste, adjusting sweetness or milk ratio as desired.