
There’s something magical about that first sip of cold foam sitting atop your morning coffee, silky and luxurious without a single calorie of guilt. Cold foam has become the coffee shop secret that home baristas everywhere are now mastering, and once you make it at home, you’ll wonder why you ever paid five dollars for it.
This recipe teaches you how to create that cloud-like texture in minutes using ingredients you likely have in your kitchen right now. The best part: it’s endlessly customizable, works with any milk, and transforms your regular coffee into something that feels special.
Why You’ll Love This Recipe
Cold foam is a game-changer for coffee lovers who want cafe-quality drinks at home without the complicated equipment or barista training. It’s fast, forgiving, and packed with flavor possibilities.
- Ready in under two minutes with zero special gadgets required
- Works with dairy milk, oat milk, almond milk, or any plant-based option you prefer
- Creates a restaurant-quality texture that makes ordinary coffee feel indulgent
- Infinitely flavored: add vanilla, caramel, cinnamon, or cocoa to customize your drink
- Cheaper than buying cold foam drinks daily at coffee shops
My Experience Making This Recipe
I discovered cold foam by accident when my milk frother arrived broken and I was desperate for my morning coffee ritual. I grabbed my electric mixer in frustration and started whipping cold milk, expecting nothing, and suddenly had this gorgeous, pillowy foam sitting in my bowl.
The first time I poured it over an iced vanilla latte, my roommate actually asked which coffee shop I’d gone to. That moment sold me completely, and now I make it almost every day, experimenting with different milk types and flavor combinations.
My favorite discovery was adding a pinch of sea salt and a splash of vanilla extract to create a salted vanilla foam that tastes like liquid caramel. The texture stays stable for about fifteen minutes, which is the perfect window to enjoy your drink before gravity inevitably wins.
Recipe Overview
- Recipe Name: Cold Foam for Coffee
- Servings: 1 to 2 drinks
- Prep Time: 2 minutes
- Cook Time: 0 minutes
- Total Time: 2 minutes
- Course: Beverage
- Cuisine: Modern Cafe
- Calories per Serving: 20 to 40 calories (depending on milk type and add-ins)
Equipment You Will Need
- Electric hand mixer or stand mixer with whisk attachment
- Measuring cups and spoons
- Small mixing bowl or cup
- Tall glass or coffee cup
- Spoon or small spatula for scooping foam
Ingredients for Cold Foam
- Cold milk (dairy, oat, almond, or your preferred type): 1/2 cup
- Vanilla extract (optional): 1/4 teaspoon
- Sweetener of choice (optional): 1/2 to 1 teaspoon honey, maple syrup, or simple syrup
- Pinch of salt (optional): helps enhance flavor and stability
- Your favorite cold brew or iced coffee: as needed
Ingredient Notes and Substitutions
- Cold milk: The base of your foam needs to be cold straight from the fridge so the bubbles set properly. Whole milk creates the most stable foam, but oat milk actually foams better for some people and offers a vegan option with minimal flavor compromise.
- Vanilla extract: This adds subtle depth and makes the foam taste less like plain air. Almond extract, maple extract, or even a splash of maple syrup works beautifully as an alternative.
- Sweetener: Use honey, simple syrup, or agave instead of granulated sugar because they dissolve instantly in cold liquid without leaving gritty texture.
- Salt: A tiny pinch transforms the flavor profile and makes the foam bubble structure more stable, though it’s completely optional if you prefer unsalted foam.
How to Make Cold Foam
Step 1: Pour Your Cold Milk Into a Bowl
Measure 1/2 cup of cold milk directly from your refrigerator into a small mixing bowl or measuring cup. Cold temperature is critical because warm milk won’t trap air bubbles effectively, and your foam will collapse instantly.
Step 2: Add Your Flavorings
Stir in your vanilla extract, sweetener, and salt if you’re using them, making sure everything is fully dissolved before you start mixing. This prevents clumps and ensures every spoonful of foam tastes consistent.
Step 3: Assemble Your Electric Mixer
Attach the whisk attachment to your hand mixer or stand mixer, or grab your hand mixer if that’s what you have available. There’s no need to use a stand mixer for this; a hand mixer works just as well and uses less cleanup.
Step 4: Begin Whisking on Medium Speed
Turn your mixer to medium speed and start whisking the cold milk, holding the bowl steady with your other hand if using a hand mixer. You’ll notice the milk starting to get foamy almost immediately as air bubbles form.
Step 5: Increase to Medium-High Speed
After about thirty seconds, bump the speed up to medium-high and keep whisking until you see stiff peaks forming in the foam. This typically takes another thirty to forty-five seconds total, so you’re looking at roughly one to two minutes from start to finish.
Step 6: Watch for the Peak Stage
Stop whisking when you can see thick, fluffy peaks that hold their shape when you lift the whisk out of the bowl. Over-whisking will eventually turn your foam into whipped cream, which isn’t bad but loses that delicate cold foam texture you’re after.
Step 7: Prepare Your Coffee Drink
Pour your cold brew, iced coffee, or any chilled coffee beverage into a tall glass filled with ice. Make sure your coffee is completely cold, as pouring cold foam into warm coffee will cause it to dissolve immediately.
Step 8: Top With Cold Foam
Using a spoon or small spatula, gently scoop the cold foam from the bowl and layer it generously over the top of your coffee. The foam should sit on top of the coffee like a cloud, creating that beautiful visual moment before you take your first sip.
Pro Tip: Make your cold foam right before pouring your coffee, as it holds its peak for about fifteen minutes at most before starting to settle back into liquid milk.
Tips for the Best Cold Foam
- Use the coldest milk possible straight from the back of your fridge, as this helps air bubbles set faster and hold longer.
- Don’t walk away from your mixer during whisking, as the difference between perfect foam and over-whipped cream happens in seconds.
- If your foam collapses into liquid milk, your milk likely wasn’t cold enough or your bowl had residual warmth; try again with a chilled bowl next time.
- Whole milk and 2% milk create more stable foam than skim milk, but oat milk often produces superior texture for plant-based drinkers.
- Make your foam in small batches rather than doubling the recipe, as larger volumes take longer to whisk and are harder to control.
- Use filtered or bottled cold water in your coffee instead of tap water, as minerals can affect how your foam performs and tastes.
Common Mistakes to Avoid
- Using warm or room-temperature milk ruins everything, as the heat prevents bubble formation and your foam collapses immediately into the coffee.
- Over-whisking turns your foam into actual whipped cream, which tastes richer but loses that signature airy cold foam texture.
- Pouring cold foam into hot coffee causes immediate deflation and leaves you with sad, dissolved milk floating on top instead of a beautiful cloud.
- Letting your foam sit too long before adding it to coffee guarantees collapse, so work quickly from whisking to pouring your drink.
- Using flavored syrups instead of extracts or liquid sweeteners creates grittiness because granulated sugar doesn’t dissolve in cold liquid.
Serving Suggestions
Cold foam transforms any coffee drink into something special, and pairing it thoughtfully makes your morning ritual feel like a visit to your favorite cafe. The silky foam mellows harsh coffee notes while adding visual appeal that makes you want to photograph your drink.
- Classic iced latte topped with vanilla cold foam and a drizzle of caramel sauce
- Cold brew with a pinch of sea salt and salted vanilla foam for a sweet and salty contrast
- Iced cappuccino topped with cinnamon-dusted foam for a spiced kick
- Flavored cold foam over black cold brew for a sophisticated, minimalist presentation
- Chocolate-flavored foam over regular iced coffee for a quick mocha-style drink
Variations to Try
- Cinnamon Cold Foam: Add 1/4 teaspoon ground cinnamon to your milk before whisking, then dust the finished foam with more cinnamon for a cozy autumn flavor that pairs beautifully with vanilla lattes.
- Brown Sugar Cold Foam: Substitute brown sugar syrup for regular sweetener, creating a deeper molasses note that works wonderfully over cold brew.
- Chocolate Cold Foam: Whisk in 1/2 teaspoon of unsweetened cocoa powder and a touch of honey before beating for a mocha-inspired topping.
- Honey Lavender Cold Foam: Mix in 1/2 teaspoon honey and two drops of food-grade lavender extract for a floral, sophisticated version that sounds fancy but takes thirty seconds.
- Maple Pecan Cold Foam: Use maple syrup as your sweetener and add a pinch of nutmeg plus 1/4 teaspoon of pecan extract for a fall-forward flavor combination.
Dietary Adaptations
- Gluten-Free: All base cold foam ingredients are naturally gluten-free, so simply verify that any flavoring extracts you use are certified gluten-free if you have celiac sensitivity.
- Dairy-Free: Oat milk, almond milk, and soy milk all create excellent cold foam, though oat milk typically performs best; cashew milk is also worth experimenting with for creamier results.
- Vegan: Use any plant-based cold milk and verify your sweetener is vegan (honey is not vegan, so use maple syrup or agave instead).
- Low-Carb or Keto: Substitute regular sweetener with erythritol or monk fruit sweetener to keep carbs minimal while maintaining the same flavor profile.
Storage and Reheating
Refrigerator
Cold foam technically doesn’t store because the texture is the whole point, and it separates back into liquid milk within fifteen to twenty minutes. Make your foam fresh right before you’re ready to drink your coffee for the best texture and presentation.
- If you’ve made extra foam by accident, cover the bowl and refrigerate it for up to one hour, though texture will degrade significantly.
Freezer
Freezing cold foam doesn’t work, as thawing destroys the delicate bubble structure and you’ll end up with plain milk again.
- Skip the freezer and make fresh foam instead whenever you want it, since the whole process takes under two minutes.
Reheating
There’s no reheating involved with cold foam, as the entire point is serving it cold atop cold coffee. If your foam has started to collapse, simply re-whisk the liquid milk for thirty seconds to recreate the texture.
- Never try to heat cold foam, as this destroys the airy structure and leaves you with hot milk instead.
Nutrition Information
| Nutrient | Amount |
|---|---|
| Calories | 30 |
| Total Fat | 2g |
| Saturated Fat | 1g |
| Carbohydrates | 2g |
| Fiber | 0g |
| Sugar | 2g |
| Protein | 2g |
| Sodium | 25mg |
| Cholesterol | 5mg |
Nutritional values are calculated using whole milk as the base with optional sweetener included; values will vary depending on your milk choice and any flavor additions you use.
Frequently Asked Questions
Can I make cold foam with non-dairy milk?
Absolutely, and oat milk often produces the best texture because of its naturally higher fat content. Almond milk and soy milk work well too, though some brands foam better than others, so experiment if your first attempt doesn’t seem right.
How long does cold foam actually last?
Cold foam holds its peak texture for about fifteen minutes before gradually settling back into liquid milk, so drink your coffee right after making the foam. The exact timing depends on your room temperature and how densely you whisked the foam, but faster is always better for best presentation.
Do I really need an electric mixer?
You can whisk cold foam by hand in a jar with a tight-fitting lid by shaking vigorously for two to three minutes, though this is more work and produces less consistent results than an electric mixer. A small electric milk frother also works beautifully if you have one available, typically taking just sixty seconds.
What if my cold foam isn’t forming at all?
Your milk is likely too warm or not cold enough, so pull a fresh bottle from the back of your refrigerator and try again in a chilled bowl. If you’re using skim milk, consider trying 2% or oat milk, as these foam much more reliably than ultra-low-fat options.
Can I make cold foam ahead of time for multiple coffees?
Unfortunately no, as each batch of cold foam should be made fresh right before you pour your drink, but since the whole process takes under two minutes, this isn’t as inconvenient as it sounds. If you’re making coffee for multiple people, whisk larger batches in stages and serve immediately.
Why does my foam taste watery sometimes?
This happens when you over-whisk beyond the peak stage and start to dissolve some of the milk proteins, creating an unstable structure that doesn’t hold your flavorings well. Stop whisking as soon as you see stiff peaks forming to avoid this problem.
Final Thoughts
Cold foam is one of those simple kitchen techniques that feels like magic the first time you pull it off, yet becomes ridiculously easy once you understand what’s happening. You’ve now got all the knowledge to create cafe-quality cold foam at home anytime you want, for a fraction of what coffee shops charge.
Start with the classic vanilla version this week, then experiment with the variations once you’re comfortable with the basic technique. Your morning coffee ritual is about to get significantly more delicious, and you’ll probably find yourself making cold foam so often that your electric mixer gets its own special spot on the counter.
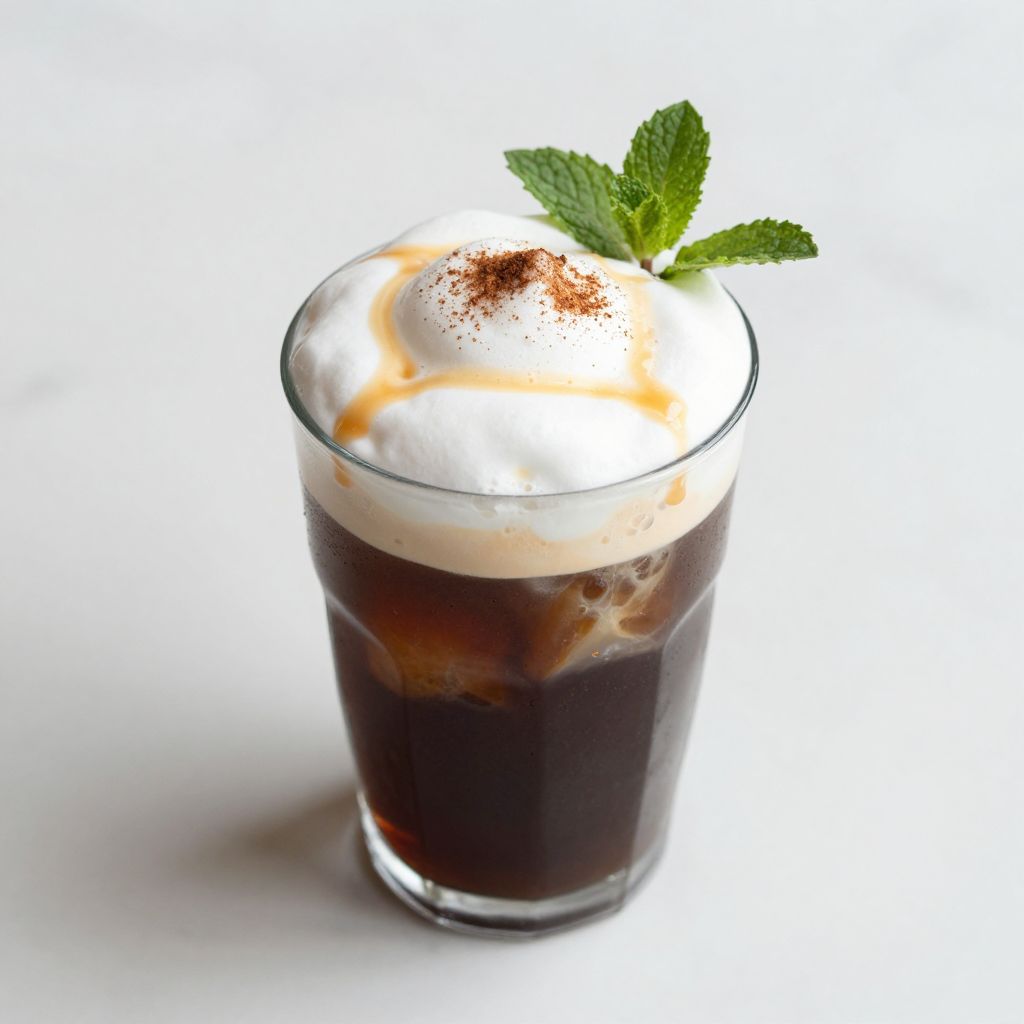
Cold Foam for Coffee
Ingredients
Equipment
Method
- Measure 1/2 cup of cold milk directly from your refrigerator into a small mixing bowl or measuring cup. Cold temperature is critical because warm milk won't trap air bubbles effectively.
- Stir in your vanilla extract, sweetener, and salt if you're using them, making sure everything is fully dissolved before you start mixing.
- Attach the whisk attachment to your hand mixer or stand mixer.
- Turn your mixer to medium speed and start whisking the cold milk, holding the bowl steady with your other hand if using a hand mixer. You'll notice the milk starting to get foamy almost immediately.
- After about 30 seconds, increase the speed to medium-high and keep whisking until you see stiff peaks forming in the foam. This typically takes another 30 to 45 seconds total.
- Stop whisking when you can see thick, fluffy peaks that hold their shape when you lift the whisk out of the bowl.
- Pour your cold brew or iced coffee into a tall glass filled with ice. Make sure your coffee is completely cold.
- Using a spoon or small spatula, gently scoop the cold foam from the bowl and layer it generously over the top of your coffee. Serve immediately.