
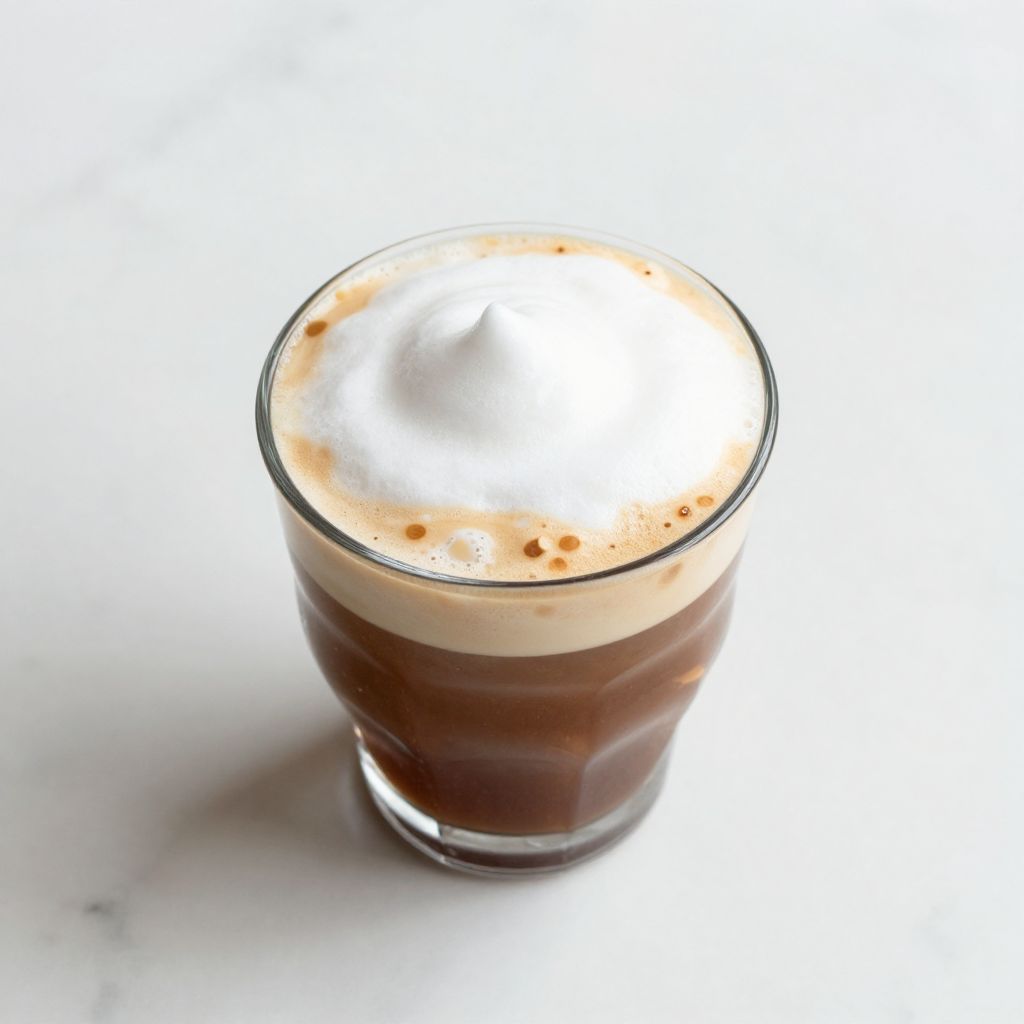
There’s something magical about the first sip of an Aerocano, when cold espresso meets velvety milk foam in a glass and creates that perfect balance of bold and smooth.
This drink sits beautifully between an Americano and a cappuccino, offering the best of both worlds without committing fully to either side.
The Aerocano is refreshingly simple to make at home, requires minimal equipment, and delivers that café-quality result that makes you feel like a barista without the years of training.
Whether you’re a coffee lover seeking something lighter than an espresso or someone who wants more coffee flavor than a traditional latte, this drink hits the sweet spot.
Why You’ll Love This Recipe
The Aerocano combines the best qualities of espresso-based drinks into one glass that’s both impressive and achievable at home.
- Perfect balance of espresso strength and creamy milk texture
- Quick to prepare, taking just 5 minutes from start to finish
- Works with any espresso machine or even strong brewed coffee
- Elegant enough for entertaining yet simple enough for daily enjoyment
- Customizable to your preferred coffee-to-milk ratio
My Experience Making This Recipe
I first encountered an Aerocano at a specialty coffee shop in Melbourne, and I was instantly hooked by how it tasted nothing like the bitter espresso shots I’d been forcing down for years.
What struck me most was how the barista created such silky microfoam that it didn’t sink into the espresso but rather floated on top like a cloud, creating distinct layers of flavor.
I went home determined to replicate it, and after a few attempts with my home machine, I cracked the technique and never looked back.
Now my friends ask for Aerocanos when they visit, which is a far better compliment than any rating I could receive.
Recipe Overview
- Recipe Name: Aerocano
- Servings: 1 drink
- Prep Time: 2 minutes
- Cook Time: 3 minutes
- Total Time: 5 minutes
- Course: Beverage
- Cuisine: Coffee (Contemporary Australian)
- Calories per Serving: 25
Equipment You Will Need
- Espresso machine with steam wand
- Espresso cup or small bowl for pulling shots
- 7 to 8 ounce drinking glass
- Milk pitcher or frothing jug
- Thermometer (optional but helpful for beginners)
- Tamper for espresso grounds
- Spoon for serving
Ingredients for Aerocano
- Espresso: 2 shots (approximately 2 ounces or 60 milliliters)
- Whole milk: 4 ounces or 120 milliliters
- Water: 2 ounces or 60 milliliters (hot)
Ingredient Notes and Substitutions
- Espresso creates the drink’s bold backbone and defines its character; if you lack an espresso machine, use 2 ounces of very strong brewed coffee as a substitute, though the flavor profile shifts slightly toward coffee rather than espresso.
- Whole milk froths beautifully and adds natural sweetness and body; you can swap for 2% milk for fewer calories, but the microfoam won’t be quite as luxurious.
- Hot water dilutes the espresso shots slightly to reduce bitterness; if you prefer a stronger drink, reduce this to 1 ounce or skip it entirely.
- For dairy-free versions, use oat milk or barista blend almond milk, which both froth reasonably well, though the texture won’t be identical to dairy.
How to Make Aerocano
Step 1: Pull Your Espresso Shots
Start by pulling 2 fresh espresso shots into a small cup or shot glass using your espresso machine. Make sure your machine is preheated and your grounds are finely ground and properly tamped with firm, even pressure.
Fresh espresso is crucial here because stale shots taste thin and sour, which will ruin the entire drink no matter how perfect your milk turns out.
Step 2: Heat Your Milk
Pour 4 ounces of cold whole milk into your milk pitcher, filling it to roughly one-third capacity to allow room for foam expansion. Place the steam wand just below the surface of the milk and turn the steam knob to full power.
Heating the milk first, before frothing, ensures you can control the temperature more effectively and avoid scalding, which burns the milk’s natural sugars and creates a bitter taste.
Step 3: Create the Microfoam
Once the milk begins to steam, lower the pitcher slightly so the steam wand sits just at the milk’s surface, creating that distinctive whirlpool sound. Keep the angle consistent and listen for the soft hissing that tells you the milk is frothing properly.
The key is developing microfoam, not big bubbles, which means the steam should be breaking the surface tension continuously rather than creating visible bubbles that would look unprofessional.
Step 4: Monitor Temperature
Watch the milk pitcher as it heats and listen for when the hissing slows or changes pitch, indicating you’re reaching around 150 to 155 degrees Fahrenheit. If using a thermometer, pull the steam wand out once you hit 155 degrees to stop the heating process.
Overheating milk past 160 degrees destroys the foam structure and burns the flavor, turning your beautiful drink into something that tastes like hot milk rather than craft coffee.
Step 5: Prepare Your Glass
While the milk steams, grab your 7 to 8 ounce drinking glass and rinse it with hot water to warm it up. Pour out the rinse water just as you finish steaming the milk.
A preheated glass keeps your finished drink at the perfect temperature longer and prevents the thermal shock that can crack thin glassware when you add hot liquids.
Step 6: Heat Your Water
Heat 2 ounces of fresh water to just under boiling temperature, around 195 to 205 degrees Fahrenheit. You can use water from a kettle, a hot water dispenser, or even water that’s been sitting in your espresso machine’s group head.
This hot water dilutes your espresso slightly, reducing harshness while maintaining the coffee’s essential character and preventing the drink from tasting too concentrated or bitter.
Step 7: Pour Espresso and Water
Pour your 2 espresso shots into the preheated glass first, then immediately add the 2 ounces of hot water. Stir gently to combine, creating a unified base that’s balanced and smooth.
Pouring espresso before water ensures the crema mixes properly and the drink achieves even flavor distribution rather than separating into bitter and diluted layers.
Step 8: Add the Microfoam
Hold your milk pitcher about an inch above the glass and pour the steamed milk slowly into the espresso and water mixture. Pour the liquid milk first, then top with the thick microfoam, using the pitcher’s spout to control the foam layer.
This layering technique creates visual appeal and ensures you get both milk and foam in each sip, giving you the complete textural experience the drink is designed to deliver.
Pro Tip: The secret to an exceptional Aerocano lies in creating perfectly silky microfoam rather than large bubbles, which requires holding the steam wand at the milk’s surface and listening carefully for the right pitch and sound as you steam.
Tips for the Best Aerocano
- Use espresso beans that were roasted within the past two weeks, as older beans create flat, lifeless shots that won’t shine through even with perfect milk technique.
- Clean your steam wand immediately after steaming by running steam through it for a few seconds, then wiping with a damp cloth, because dried milk buildup creates off-flavors and poor foam quality.
- Pour your espresso shots and add water while they’re still hot and fresh, within 10 seconds of pulling, to capture all the aromatic compounds before they dissipate.
- Tilt your glass slightly when pouring milk to reduce splash and create that beautiful, controlled layering effect that makes the drink visually impressive.
- Start with a 1:2 ratio of espresso to milk and adjust based on your taste preference, adding more espresso for boldness or more milk for smoothness on your next attempt.
- Practice your steam technique on multiple pitchers until you develop a feel for the angle and position that creates perfect microfoam consistently.
Common Mistakes to Avoid
- Pulling espresso shots too far in advance and then adding milk to lukewarm espresso creates a drink that tastes flat and loses all its brightness, so always work quickly from shot to finish.
- Overheating milk past 160 degrees burns the lactose and creates a scorched, unpleasant flavor that overpowers the espresso’s delicate notes.
- Using a steam wand that’s too deep in the milk creates large bubbles instead of microfoam, resulting in a drink that looks amateurish and has poor texture.
- Skipping the hot water step when you have a strong espresso makes the drink taste overly concentrated and can be unpleasantly bitter, especially with darker roasts.
- Pouring cold milk into hot espresso instead of steamed milk defeats the entire purpose and gives you more of a watered down coffee than an Aerocano.
Serving Suggestions
The Aerocano shines as a standalone drink but pairs beautifully with light breakfast items or afternoon snacks that complement its smooth, approachable character.
- Serve alongside a buttery croissant or pastry to echo the drink’s creamy richness
- Pair with fresh berries and yogurt for a lighter, more modern brunch combination
- Enjoy with a simple shortbread cookie that won’t overpower the coffee’s subtle flavors
- Complement with avocado toast for a contemporary cafe-style meal
- Sip alongside a almond biscotti for dunking and enjoying with the drink
Variations to Try
- Iced Aerocano: Pull hot espresso shots, add room temperature water, then pour over ice and top with cold frothed milk for a refreshing summer version that maintains the same flavor balance.
- Flavored Aerocano: Add a pump of vanilla, hazelnut, or caramel syrup to the espresso and water base before adding milk to create a subtly sweetened variation without overdoing the flavor.
- Extra Strong Aerocano: Pull 3 espresso shots instead of 2 and reduce the water to 1 ounce for coffee enthusiasts who want maximum espresso character with just enough milk for texture.
- Cortado Style: Reduce milk to 2 ounces and skip the hot water entirely, creating a drink that’s closer to a traditional cortado with a stronger espresso presence.
- With Honey or Sweetener: Stir a teaspoon of honey or your preferred sweetener into the espresso base before adding milk for a naturally sweet version.
Dietary Adaptations
- Gluten-free: Espresso and milk are naturally gluten-free, so this drink is automatically suitable for gluten-free diets with no modifications needed.
- Dairy-free: Substitute whole milk with oat milk or barista blend almond milk, though the microfoam texture will be slightly less dense and luxurious than dairy versions.
- Vegan: Use the same dairy-free milk substitutes, and your Aerocano becomes completely vegan while maintaining nearly identical flavor and texture.
- Low-carb or Keto: Use unsweetened almond milk or heavy cream diluted with water to keep carbs minimal while maintaining a rich, creamy texture that works beautifully in this drink.
Storage and Reheating
Refrigerator
Aerocanos don’t store well because the microfoam breaks down and the espresso oxidizes, affecting flavor. If you must refrigerate, store the espresso and milk separately in airtight containers for up to 24 hours.
- Keep espresso in one container and steamed milk in another
- Reassemble fresh when ready to drink rather than storing the completed drink
Freezer
Freezing an Aerocano ruins the texture and separates the components, so it’s not recommended for long-term storage.
- Espresso can be frozen for up to one month in ice cube trays for making cold coffee drinks later
- Milk should never be frozen as it affects texture and taste
Reheating
If you’ve refrigerated the components separately, reheat the espresso gently on the stovetop or microwave it for 20 to 30 seconds, then refroth the milk and pour fresh.
- Never microwave milk directly, as this creates scalded flavor and prevents proper frothing
- Reassemble the drink immediately after reheating each component for best results
Nutrition Information
| Nutrient | Amount |
|---|---|
| Calories | 25 |
| Total Fat | 1.5g |
| Saturated Fat | 0.8g |
| Carbohydrates | 1.2g |
| Fiber | 0g |
| Sugar | 1g |
| Protein | 1.8g |
| Sodium | 35mg |
| Cholesterol | 5mg |
These values are based on using whole milk and no added sweeteners, and they vary slightly depending on the specific milk brand and espresso strength you choose.
Frequently Asked Questions
Can I make an Aerocano without an espresso machine?
Yes, you can use very strong brewed coffee in place of espresso shots, though the flavor will be different since brewed coffee lacks espresso’s concentrated intensity. The technique works the same, but true espresso creates a more authentic and delicious result.
How long does it take to make an Aerocano?
From start to finish, you’re looking at about 5 minutes total, with most of that time spent steaming the milk and pulling espresso shots. Once you get comfortable with the technique, you can cut this down to 3 to 4 minutes.
What’s the difference between an Aerocano and a cappuccino?
An Aerocano has less microfoam and more liquid milk than a cappuccino, plus it includes hot water to dilute the espresso slightly, creating a drink that’s smoother and less intense. A cappuccino is heavier on foam and lighter on liquid milk, giving it a fluffier texture.
Can I make an Aerocano with decaf espresso?
Absolutely, the technique works exactly the same with decaf espresso, though you lose the caffeine boost and some subtle flavor complexity that makes caffeinated espresso special. Decaf espresso still creates that beautiful crema if it’s freshly roasted and pulled correctly.
Why is my microfoam too bubbly and not smooth?
Your steam wand is likely too deep in the milk or the angle is wrong, causing large bubbles instead of fine foam. Keep the wand just at the milk’s surface and listen for a soft hissing sound rather than aggressive boiling, which creates tiny bubbles that layer into silky microfoam.
What type of milk creates the best microfoam?
Whole milk froths beautifully because of its fat content and protein structure, which trap steam bubbles efficiently. Oat milk is your best non-dairy option, though it won’t achieve quite the same luxurious texture as dairy.
Final Thoughts
The Aerocano deserves a permanent place in your coffee rotation because it delivers that café-quality experience without the café price tag or the complexity of drinks that require years of practice. Once you nail the microfoam technique, you’ll find yourself making these repeatedly for yourself and anyone lucky enough to visit.
Start making Aerocanos today and experience how this simple combination of espresso, water, and milk creates something genuinely special that’s far greater than the sum of its parts.
If you’re looking for other coffee cocktail inspiration, explore our collection of espresso-based drinks and variations that let you expand your home barista skills in exciting new directions.
For those interested in exploring coffee-based cocktails beyond the traditional espresso drinks, check out our tequila margarita recipe and mezcal margarita recipe for creative ways to mix coffee with spirits when you want to venture into more adventurous territory.
Aerocano
Ingredients
Equipment
Method
- Preheat your espresso machine and fresh grind and tamp enough coffee to pull two shots of espresso (about 25–30 seconds).
- Pull 2 fresh espresso shots (2 ounces or 60 milliliters) into an espresso cup or small bowl.
- Pour 4 ounces (120 milliliters) of cold whole milk into a frothing pitcher, filling no more than one-third full.
- Position the steam wand just below the surface of the milk, turn on full steam, and create microfoam by maintaining a soft hissing sound for about 20–30 seconds.
- Heat the milk to 150–155°F (65–68°C), monitoring with a thermometer, then remove the steam wand.
- Rinse and warm a 7–8 ounce drinking glass with hot water, then discard the rinse water.
- Heat 2 ounces (60 milliliters) of water to 195–205°F (90–96°C) using a kettle or espresso machine dispenser.
- Pour the pulled espresso shots into the warmed glass, then add the hot water and stir gently to combine.
- Slowly pour the steamed milk into the espresso and water mixture, then use the pitcher spout to top with the microfoam layer for a velvety finish.