
Picture yourself at a cozy gathering, watching friends light up as they taste a smooth, craft beer that you brewed yourself at home. BDO beer, or “Big Dumb Orange,” is a beloved homebrewing recipe that delivers a bold, citrusy flavor with surprising approachability for first-time brewers.
This recipe stands out because it balances simplicity with genuinely impressive results. You don’t need years of brewing experience to pull it off, yet the final product tastes like it came from a professional brewhouse.
Why You’ll Love This Recipe
This beer recipe offers the perfect entry point into homebrewing without sacrificing taste or quality. The straightforward process means you’ll spend more time enjoying the craft and less time troubleshooting complications.
- Bright citrus notes from generous hop additions create a refreshing, modern flavor profile
- Approachable enough for beginners but interesting enough for experienced brewers to enjoy
- Yields about 5 gallons, perfect for sharing with friends or stocking your fridge
- Forgiving fermentation process with minimal risk of off-flavors
- Ready to drink in about 3 to 4 weeks from start to finish
My Experience Making This Recipe
The first time I brewed BDO beer, I was skeptical that such a simple recipe could produce something genuinely delicious. My brewing partner and I spent an afternoon boiling grain and hops, and the kitchen smelled absolutely incredible.
Two weeks later, when we cracked open the first bottle, we were blown away by how crisp and balanced it tasted. The orange character came through beautifully without overwhelming the malt backbone, and the carbonation was perfect.
Friends who tried it had no idea I’d brewed it at home, which felt like the ultimate compliment. Now I make this recipe at least twice a year because it consistently delivers and people actually ask for it by name.
Recipe Overview
- Recipe Name: BDO Beer (Big Dumb Orange)
- Servings: Makes approximately 50 twelve-ounce servings
- Prep Time: 30 minutes
- Brew Time: 60 minutes
- Fermentation Time: 14 to 21 days
- Total Time: 3 to 4 weeks
- Course: Beverage
- Cuisine: American Craft Beer
- Alcohol by Volume: Approximately 6.2%
Equipment You Will Need
- Large stainless steel brew kettle (at least 10 gallons capacity)
- Thermometer accurate to 1 degree Fahrenheit
- Long-handled stainless steel stirring spoon
- Airlock and carboy bung
- 5-gallon glass carboy or food-grade plastic fermenter
- Hydrometer for measuring specific gravity
- Bottle capper and caps
- Siphon and auto-siphon with tubing
- Sanitizer solution and spray bottle
- Strainer or mesh bag for grains
- Empty beer bottles (approximately 50 twelve-ounce bottles)
- Kitchen scale for precise measurements
Ingredients for BDO Beer
- 6 pounds two-row pale malt
- 0.5 pounds crystal 20L malt
- 0.25 pounds munich malt
- 1 ounce Cascade hops for bittering (60-minute addition)
- 0.75 ounces Centennial hops for flavor (15-minute addition)
- 1 ounce Cascade hops for aroma (5-minute addition)
- 0.5 ounces Centennial hops for dry hopping
- 1 package (11.5 grams) American ale yeast such as SafAle US-05
- 5 gallons filtered water
- 0.5 teaspoons calcium chloride (optional but recommended)
- Priming sugar approximately 0.75 cups corn sugar for carbonation
Ingredient Notes and Substitutions
- Two-row pale malt forms the backbone and fermentable base of the beer. You can substitute with pilsner malt for a crisper profile, though the beer will taste slightly different.
- Crystal 20L malt adds body and subtle sweetness. Vienna malt works as a substitute if you want a drier, more elegant finish.
- Cascade hops deliver the signature citrus character that defines this recipe. Centennial hops offer a similar profile with slightly more floral notes, making them a reliable backup.
- American ale yeast creates clean fermentation and subtle fruity esters. If unavailable, Safale S-04 or Wyeast 1056 produce similar clean results, though fermentation times may vary slightly.
- Filtered water removes chlorine and other minerals that can affect flavor. Tap water works in a pinch, but filtering improves consistency across batches.
How to Make BDO Beer
Step 1: Sanitize Everything
Before you do anything else, sanitize every piece of equipment that will touch your beer from the kettle to the bottles. This step seems tedious but prevents infections that ruin entire batches, so treat it seriously.
Step 2: Prepare Your Grain
Crush or mill your grains just before brewing to preserve freshness and avoid oxidation. If your homebrew shop offers free milling, take advantage of it unless you know their mill has been used recently on different grains.
Step 3: Mash the Grain
Heat 2.5 gallons of filtered water to 168 degrees Fahrenheit, then add your crushed grains slowly while stirring to avoid clumps. Maintain a temperature of 152 to 154 degrees Fahrenheit for 60 minutes, which allows enzymes to convert starches into fermentable sugars.
Step 4: Sparge and Collect Wort
After 60 minutes, slowly run off the liquid into your kettle while maintaining the grain bed, collecting about 5.5 gallons of wort. Sparge by pouring 170-degree water over the grains to extract remaining sugars, which maximizes your yield and efficiency.
Step 5: Bring to a Boil
Bring your wort to a rolling boil over high heat, skimming off foam and proteins that rise to the surface for the first few minutes. A vigorous boil sterilizes the wort and helps set the stage for clean fermentation.
Step 6: Add Bittering Hops
Add 1 ounce of Cascade hops at the 60-minute mark, as measured from when you started the boil. Early additions integrate bitterness throughout the beer rather than contributing flavor, creating a balanced foundation.
Step 7: Add Flavor Hops
At 15 minutes remaining in the boil, add 0.75 ounces of Centennial hops to develop the characteristic citrus flavor. At 5 minutes remaining, add 1 ounce of Cascade hops for bright, fresh aroma that defines this recipe.
Step 8: Cool the Wort
After the boil ends, cool the wort to 68 to 70 degrees Fahrenheit as quickly as possible using an ice bath or wort chiller. Rapid cooling reduces the risk of infection and helps the yeast work efficiently during fermentation.
Step 9: Transfer and Pitch Yeast
Pour the cooled wort into your sanitized carboy through a strainer to catch any sediment, then pitch your yeast according to package directions. The yeast will wake up and start fermenting within 12 to 24 hours, visible as foam rising to the top.
Step 10: Monitor Fermentation
Attach an airlock to your carboy and keep it in a cool, dark place at 65 to 70 degrees Fahrenheit for 14 to 21 days. Check your hydrometer after 7 days to monitor progress; fermentation is complete when the specific gravity remains stable for 3 consecutive days.
Step 11: Dry Hop
About 3 to 5 days before bottling, add 0.5 ounces of Centennial hops directly to the carboy to boost aroma without adding bitterness. Dry hopping in the late stages of fermentation preserves delicate hop oils that make this beer so refreshing.
Step 12: Bottle Your Beer
Dissolve 0.75 cups of corn sugar in 1 cup of boiling water, cool it, then mix into your beer before bottling for carbonation. Siphon the beer into sanitized bottles, cap each one firmly, and store upright in a cool, dark place for 2 to 3 weeks while carbonation develops.
Pro Tip: Temperature control during fermentation makes the biggest difference between good beer and great beer, so invest in a temperature-controlled chamber or closet if you plan to brew regularly.
Tips for the Best BDO Beer
- Keep detailed notes throughout your brew day, recording temperatures, times, and observations so you can replicate success or troubleshoot issues in future batches.
- Use fresh hops stored in a freezer whenever possible, as old or warm-stored hops lose potency and fail to deliver the bright citrus character this recipe needs.
- Aerate your wort well before pitching yeast by pouring it back and forth between containers or using an aeration stone; yeast needs oxygen to reproduce and ferment cleanly.
- Taste your beer at various stages during conditioning to understand how it develops, which teaches you more about fermentation than any textbook.
- Bottle a few samples in clear bottles so you can track color and clarity development, which serves as an early warning sign if something goes wrong.
- Keep your fermentation space consistently cool; temperature swings cause stuck fermentations and off-flavors that ruin otherwise good batches.
Common Mistakes to Avoid
- Skipping sanitation creates infections that sour your beer or produce vinegar instead of a refreshing beverage, making this the most expensive mistake a brewer can make.
- Using old or stale yeast results in slow or incomplete fermentation, leaving residual sweetness and flat flavor profiles that disappoint.
- Boiling hops too aggressively breaks down delicate aromatic compounds, producing harsh bitterness instead of the subtle citrus notes this recipe promises.
- Bottling before fermentation truly completes leaves residual sugars that over-carbonate bottles, causing gushers or exploding caps when you open them.
- Fermenting at temperatures above 75 degrees Fahrenheit produces fruity esters and fusel alcohols that taste like nail polish remover and completely change the beer’s character.
Serving Suggestions
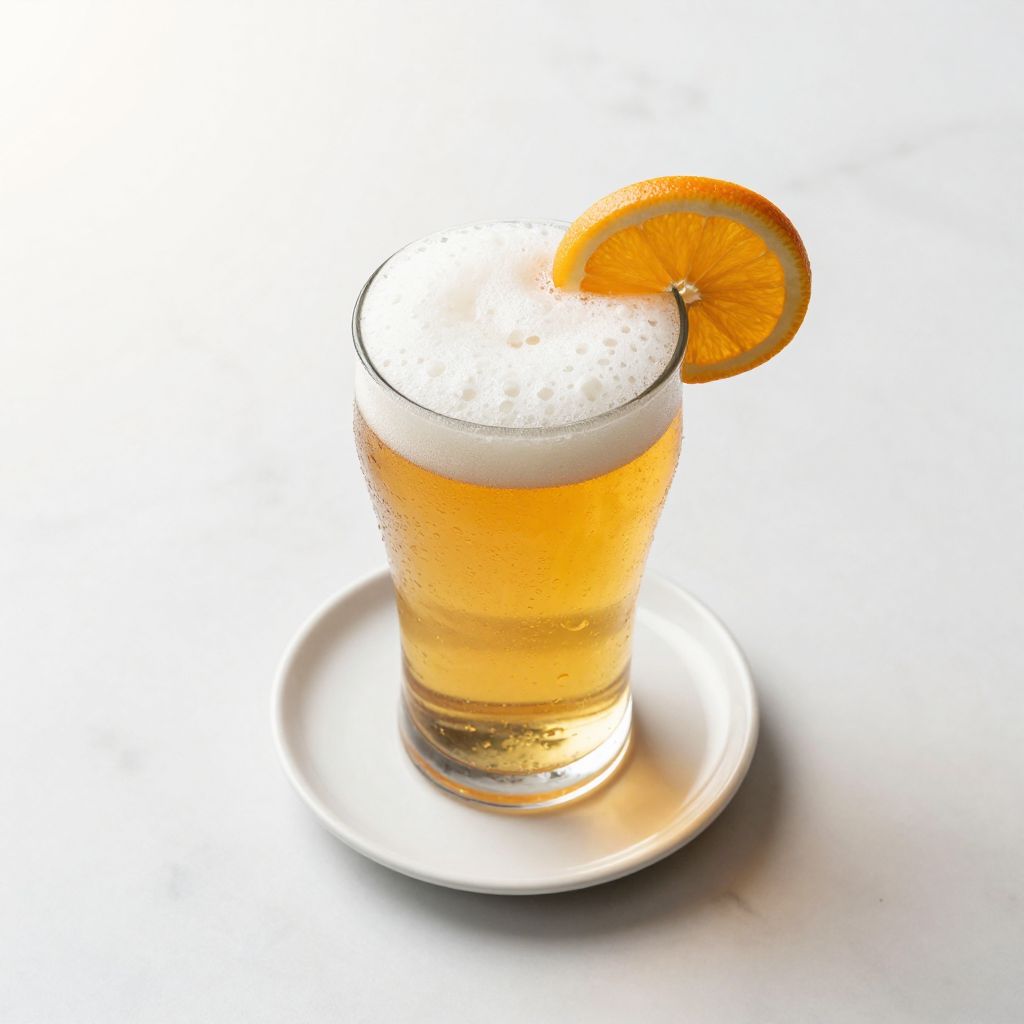
Serve BDO beer ice-cold in a clean pint glass to showcase its bright citrus character and crisp finish. The refreshing profile makes it perfect for casual gatherings, outdoor barbecues, or simply enjoying on a warm evening.
- Pair with grilled chicken seasoned with lemon and herbs for a harmonious flavor match
- Serve alongside spicy tacos where the beer’s citrus cuts through heat and cleanses the palate
- Enjoy with sharp cheddar cheese and pretzels for an easy snack pairing
- Complement seafood dishes like fish tacos or shrimp ceviche
- Drink on its own as a refreshing quencher after outdoor activities or yard work
Variations to Try
- West Coast IPA: Increase Cascade and Centennial hops by 50 percent and add a small amount of crystal 60L malt for deeper color and body, creating a more assertive beer.
- Blonde Ale: Reduce all hop additions by half and skip the dry hopping for a lighter, more approachable version perfect for non-craft-beer drinkers.
- Citrus Wheat: Replace 2 pounds of pale malt with wheat malt and add 0.5 ounces of dried orange peel to the last 5 minutes of the boil for a wheaty, aromatic take.
- Amber Version: Add 0.25 pounds of crystal 60L malt and reduce Centennial hops by half, creating a warmer, more caramel-forward beer with softer bitterness.
- Mosaic Hop Edition: Substitute Mosaic hops for Centennial to introduce berry and herbal notes, creating a modern variation on the original recipe.
Dietary Adaptations
- Gluten-free: Replace two-row malt with gluten-free brewing malt blend and use a gluten-free ale yeast; the beer will have slightly lower body but remains delicious and safe for celiac diets.
- Vegan: Most beers are naturally vegan, but confirm your yeast and any fining agents used during clarification contain no animal products.
- Low-carb: Reduce malt bill by 25 percent and increase mash temperature to 158 degrees for 90 minutes to produce a drier, lower-residual-sugar version.
- Dairy-free: Beer contains no dairy by default, so this recipe requires no modifications.
Storage and Reheating
Refrigerator
Store finished beer upright in the refrigerator where it will stay fresh for 3 to 4 months. Keep it away from light and heat, which cause oxidation and skunk flavors.
- Check the cap seal monthly to ensure no carbonation has escaped
- Drink within the window for the best flavor and freshness
Freezer
Beer can be frozen for up to 6 months, though extended freezing may cause slight flavor changes. Store bottles upright and allow them to thaw slowly in the refrigerator before opening.
- Never leave beer at room temperature before opening, as rapid temperature changes affect taste
- Avoid freezing bottles repeatedly, which breaks down hop character
Reheating
Beer is best served ice-cold straight from the refrigerator, around 45 to 55 degrees Fahrenheit. Never heat beer intentionally, as high temperatures destroy carbonation and create off-flavors.
- Allow warm beer to chill naturally rather than using ice, which dilutes flavor
- Use frozen glasses as an alternative for rapid chilling without dilution
Nutrition Information
| Nutrient | Amount |
|---|---|
| Calories | 155 |
| Total Fat | 0g |
| Saturated Fat | 0g |
| Carbohydrates | 12g |
| Fiber | 0g |
| Sugar | 0g |
| Protein | 1g |
| Sodium | 10mg |
| Cholesterol | 0mg |
Nutritional values are approximate and based on a twelve-ounce serving of finished beer. Values may vary slightly depending on actual fermentation efficiency and final gravity.
Frequently Asked Questions
Can I make this recipe without special brewing equipment?
Yes, you can use large stainless steel pots and a sanitized plastic bucket instead of a carboy, though glass offers better visibility and easier cleaning. The core process remains the same regardless of vessel material.
What happens if my beer doesn’t ferment?
Dead or old yeast causes fermentation failures; always check your yeast expiration date and store it in the refrigerator. If fermentation stalls, warm the carboy to 70 degrees, gently swirl it to resuspend yeast, and wait 48 hours before assuming true failure.
How do I know when fermentation is truly complete?
Take hydrometer readings 3 days apart; fermentation is finished when two consecutive readings are identical. This typically happens 14 to 21 days after pitching, though warmer temperatures speed up the process.
Can I use table sugar instead of corn sugar for priming?
Table sugar works but may cause slight cider-like flavors; corn sugar or dextrose is preferred because it ferments more cleanly. If using table sugar, dissolve it in water first to distribute it evenly.
Why does my beer taste skunky?
Light exposure creates skunk flavors through a chemical reaction with hop compounds, so store finished beer in dark bottles or a dark cabinet. Drinking the beer within a few months minimizes skunking risk even in clearer bottles.
Can I add more hops to make this recipe hop-forward?
Absolutely, increase Cascade and Centennial additions by 25 to 50 percent to create a more assertive IPA-style version. Start conservatively, taste the result, then adjust future batches based on your preference.
Final Thoughts
BDO beer proves that homebrewing doesn’t need to be complicated to produce genuinely impressive results. This recipe combines approachable simplicity with a flavor profile that impresses both casual drinkers and beer enthusiasts alike.
Your first batch might not be perfect, but that’s part of the adventure. Each batch teaches you something new, and you’ll find yourself tweaking this recipe in interesting ways as your skills grow and your palate develops.
If you enjoyed this BDO beer recipe, explore other homebrewing adventures on our site. Try our mini beer shot recipe for a fun twist on classic beer serving, or warm up with our hot butterbeer recipe during colder months for a completely different beer-based experience.
BDO Beer (Big Dumb Orange)
Ingredients
Equipment
Method
- Sanitize every piece of equipment that will touch your beer before starting brewing.
- Crush or mill your grains just before brewing to preserve freshness and avoid oxidation.
- Heat 2.5 gallons of filtered water to 168°F, add crushed grains while stirring, and mash at 152–154°F for 60 minutes.
- Sparge the grains with 170°F water, collecting about 5.5 gallons of wort into your kettle.
- Bring the wort to a rolling boil over high heat and boil for 60 minutes, skimming off foam as needed.
- Add 1 ounce of Cascade hops at the start of the boil for bittering (60-minute addition).
- Add 0.75 ounces of Centennial hops with 15 minutes remaining in the boil for flavor.
- Add 1 ounce of Cascade hops with 5 minutes remaining in the boil for aroma.
- Cool the wort quickly to 68–70°F using an ice bath or wort chiller.
- Transfer the cooled wort into a sanitized fermenter through a strainer and pitch the yeast.
- Ferment at 65–70°F for 14 to 21 days, monitoring specific gravity after 7 days until stable readings are achieved.
- Dry hop by adding 0.5 ounces of Centennial hops to the fermenter 3 to 5 days before bottling.
- Dissolve 0.75 cups corn sugar in 1 cup boiling water, cool, mix into beer, then siphon into sanitized bottles and cap.
- Condition bottles upright in a cool, dark place for 2 to 3 weeks to allow carbonation to develop.