
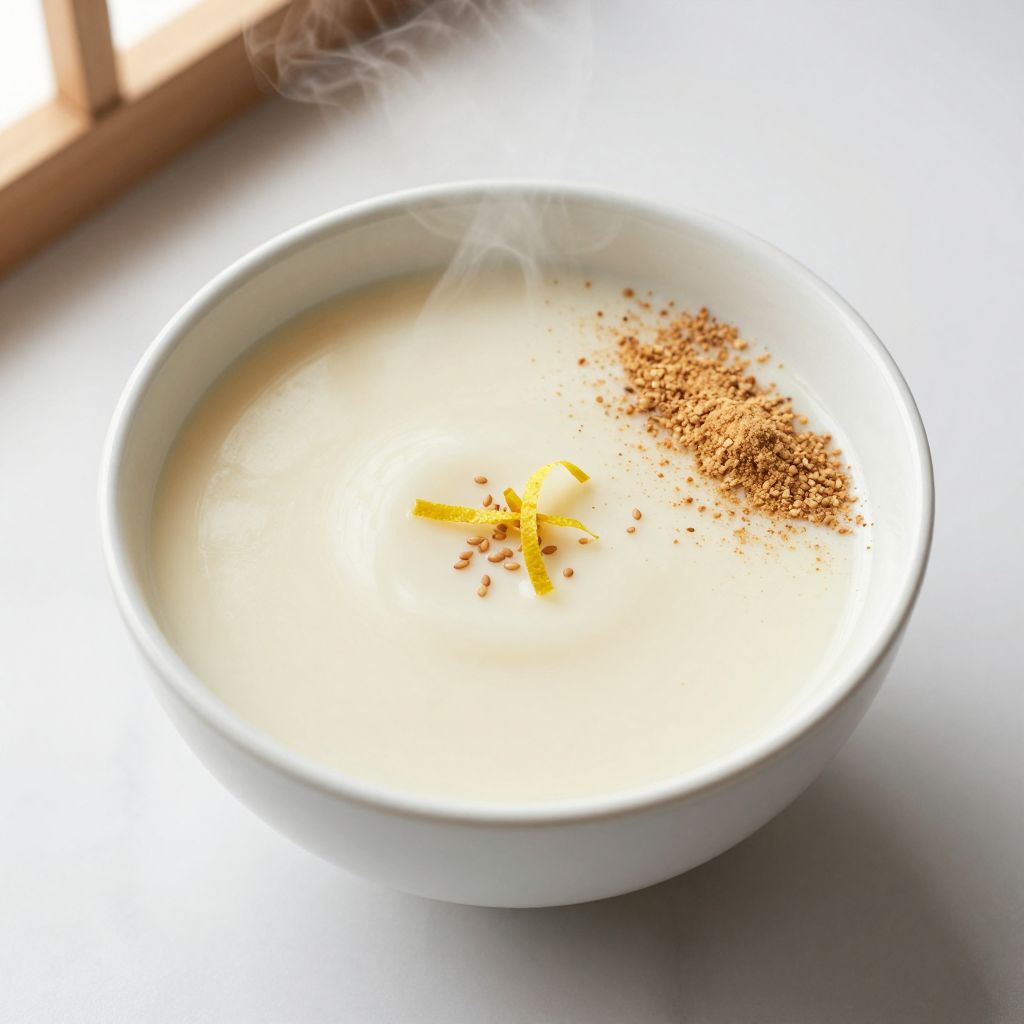
There’s something almost magical about the first sip of amazake, a naturally sweet Japanese rice drink that tastes like liquid comfort wrapped in umami warmth. This creamy, slightly thick beverage has been brewed for centuries, and once you taste its subtle sweetness and velvety texture, you’ll understand why it’s cherished in Japanese households and temples alike.
Amazake is special because it requires just three simple ingredients and minimal hands-on time, yet delivers restaurant-quality results at home. The fermentation process transforms plain rice into something unexpectedly delicious, with natural enzymes breaking down starches into glucose without any added sugar or complicated chemistry.
Whether you drink it warm on a cold morning, blend it into smoothies, or use it as a dessert base, this recipe will become your go-to for a naturally sweet, probiotic-rich treat that feels fancy but tastes like home.
Why You’ll Love This Recipe
Amazake delivers impressive results with almost zero effort, making it perfect for anyone curious about fermented foods but intimidated by complexity. You’ll end up with a silky, naturally sweet drink that tastes nothing like store-bought versions.
- Only three ingredients needed, no special equipment required
- Ready in 8 to 12 hours with mostly passive fermentation time
- Naturally sweet without any refined sugar
- Probiotic-rich and gentle on digestion
- Versatile enough for drinks, smoothies, or dessert bases
My Experience Making This Recipe
The first time I made amazake, I was skeptical that boiled rice, koji, and water could transform into something this delicious. I followed the steps carefully, and within hours, my kitchen filled with the most comforting aroma of fermented sweetness.
My family gathered around steaming bowls the next morning, and their expressions told the whole story. One sip and everyone agreed we’d stumbled onto something special, way better than the bottled versions we’d tried at Japanese grocery stores.
Now I make a batch every week and keep it in the fridge for quick breakfasts or afternoon treats. The beauty is that once you nail the temperature control, the process becomes almost effortless.
Recipe Overview
- Recipe Name: Homemade Amazake
- Servings: 4 to 6 servings
- Prep Time: 15 minutes
- Cook Time: 30 minutes
- Total Time: 8 to 12 hours plus cooling
- Course: Beverage
- Cuisine: Japanese
- Calories per Serving: 85 calories
Equipment You Will Need
- Large pot with lid
- Instant-read thermometer
- Wooden spoon or rice paddle
- Measuring cups and spoons
- Cheesecloth or fine mesh strainer
- Blender or immersion blender
- Glass jars for storage
- Cooler or insulated container for temperature control
Ingredients for Homemade Amazake
- 2 cups short-grain white rice (sushi rice works perfectly)
- 4 cups water (for cooking rice)
- 1 cup koji spores (rice koji, fresh or dried)
- 3 cups water (for the fermentation mixture)
- Pinch of sea salt
Ingredient Notes and Substitutions
- Short-grain white rice: This starch-heavy rice breaks down quickly during fermentation, creating the signature creamy texture. Brown rice works but produces a grainier result and requires longer fermentation.
- Koji spores: These living enzymes are the magic ingredient that converts rice starches into natural sugars. You can source fresh or dried koji from Japanese markets or online suppliers; dried koji is more stable and shelf-stable.
- Water: Use filtered or spring water if your tap water is heavily chlorinated, as chlorine can interfere with fermentation. Tap water works fine in most cases.
- Sea salt: A tiny pinch enhances sweetness and prevents spoilage. Kosher salt is an acceptable alternative.
How to Make Homemade Amazake
Step 1: Rinse and Cook the Rice
Rinse the short-grain rice under cold water three times, swishing gently with your fingers until the water runs mostly clear. This removes excess starch that would create unwanted cloudiness in your final drink.
In a large pot, combine rinsed rice with 4 cups of water and bring to a boil over high heat. Once boiling, reduce heat to low, cover with a lid, and simmer for 15 minutes until rice is fully cooked and tender.
Step 2: Cool the Rice to Body Temperature
Remove the pot from heat and let the rice cool uncovered for about 10 minutes, stirring occasionally with a wooden spoon to release steam. The rice needs to reach approximately 140 degrees Fahrenheit (60 degrees Celsius) before adding koji, as temperatures above 150 degrees will kill the living enzymes.
Use an instant-read thermometer to check the temperature carefully. Patience here ensures successful fermentation and maximum sweetness development.
Step 3: Prepare the Fermentation Base
While the rice cools, pour 3 cups of water into the pot with the warm rice. Stir gently to combine, creating a rice and water mixture that looks like thin porridge.
The ratio of water to rice creates the final drink’s texture. More water produces a thinner, drink-like consistency, while less water creates a thicker, porridge-like base you can blend later.
Step 4: Add the Koji Spores
Once the rice mixture reaches 140 degrees Fahrenheit, crumble your koji spores directly into the pot and stir thoroughly to distribute the enzymes evenly throughout the rice. If using dried koji, break it into small pieces first to ensure even distribution.
The koji needs complete contact with the warm rice to activate fermentation. Stir for at least one full minute to fully incorporate.
Step 5: Maintain Temperature During Fermentation
Transfer the pot to an insulated cooler or wrap it heavily with towels to maintain a steady temperature between 130 and 145 degrees Fahrenheit for 8 to 12 hours. This temperature range allows the koji enzymes to work efficiently without becoming dormant or dying.
If using a cooler, fill it with hot water, then place the covered pot inside and close the lid. Check the temperature every 2 hours during the first 4 hours to ensure it stays in the ideal range.
Step 6: Monitor the Fermentation Process
After 6 to 8 hours, the rice should begin to taste noticeably sweeter as the enzymes convert starches into glucose. Taste a small spoonful to gauge sweetness development.
The mixture will smell pleasantly fermented and slightly fruity. Continue fermentation until you reach your desired sweetness level, typically around 10 to 12 hours for maximum glucose conversion.
Step 7: Heat to Stop Fermentation
Once your amazake reaches the desired sweetness, heat the mixture to 170 degrees Fahrenheit for 5 minutes while stirring constantly. This pasteurization step inactivates the koji enzymes and prevents continued fermentation, preserving your drink at peak sweetness.
Use an instant-read thermometer to ensure you hit the target temperature. Underheating leaves active enzymes that will continue fermenting, potentially over-sweetening the drink.
Step 8: Strain or Blend
For a smooth, drinkable consistency, pour the hot mixture through a fine mesh strainer lined with cheesecloth into a clean pot, pressing gently on the solids to extract maximum liquid. This creates a clear, refined amazake.
Alternatively, blend the entire mixture using an immersion blender until completely smooth for a thicker, creamier drink with more body. Both methods are traditional and delicious.
Step 9: Cool and Store
Pour your finished amazake into clean glass jars and allow it to cool to room temperature, approximately 2 hours. Once cooled, refrigerate for at least 2 hours before serving.
The drink will continue to thicken slightly as it cools. Chilling also improves the flavor, allowing the subtle sweetness and umami notes to develop fully.
Pro Tip: The temperature control is everything. Invest in a reliable instant-read thermometer and check it frequently during fermentation to ensure consistent, delicious results every single time.
Tips for the Best Homemade Amazake
- Use fresh koji if possible, as it ferments faster and produces superior sweetness compared to dried varieties. Fresh koji typically cuts fermentation time by 2 to 3 hours.
- Avoid opening your insulated container frequently during fermentation, as this causes temperature fluctuations that disrupt enzyme activity and slow sweetness development.
- If your home is cool, placing the insulated pot in a warm spot like near (but not touching) a sunny window or on top of a heating pad set to low maintains steady fermentation.
- Taste your amazake at the 8-hour mark to establish your personal sweetness preference, then note the exact time for future batches so you know precisely when to stop fermentation.
- For extra creamy amazake, use slightly less water in step 3, blend thoroughly in step 8, and dilute with water or milk only when serving.
- Always sanitize your jars and equipment with hot water before use to prevent unwanted bacteria from competing with your koji during fermentation.
Common Mistakes to Avoid
- Adding koji to rice that’s too hot kills the living enzymes instantly, resulting in failed fermentation and a drink that tastes like plain rice water. Always wait until the mixture cools to 140 degrees.
- Allowing fermentation temperature to drop below 130 degrees slows enzyme activity dramatically, potentially doubling fermentation time or producing weak sweetness. Consistent warmth is non-negotiable.
- Skipping the final pasteurization step at 170 degrees leads to continued fermentation in the refrigerator, which over-sweetens the drink and creates an unpleasantly alcoholic flavor over time.
- Using old or low-quality koji with weak spore viability produces minimal sweetness even after extended fermentation. Always source fresh koji from reputable suppliers.
- Blending too vigorously or for too long creates excessive foam and can break down the rice particles into an unpleasantly gritty texture rather than the desired silky smoothness.
Serving Suggestions
Serve amazake warm or cold depending on the season and your mood. A warm glass on a winter morning feels like a hug, while chilled amazake on a summer afternoon refreshes and energizes.
- Drink it straight from the refrigerator as a naturally sweet beverage, optionally thinned with water or milk to reach your preferred consistency
- Blend with fresh fruit like strawberries, bananas, or mango for a naturally sweetened smoothie without refined sugar
- Pour over vanilla ice cream or Greek yogurt for an elegant, simple dessert
- Mix into oatmeal or granola bowls for added creaminess and natural sweetness
- Combine with matcha powder or espresso for a unique breakfast drink combining traditional Japanese flavors with modern cafe culture
Variations to Try
- Brown Rice Amazake: Substitute brown rice for white rice to create a nuttier, earthier flavor with added fiber. This version requires 10 to 14 hours of fermentation and produces a thinner consistency, but offers deeper nutritional value.
- Sweet Sake Base: Replace some of the water with mirin or sweet sake to boost umami depth and create a more sophisticated, complex flavor profile ideal for special occasions.
- Ginger and Yuzu Amazake: Add fresh ginger slices during fermentation and stir in yuzu juice after cooling for a bright, citrusy twist that works beautifully as a palate cleanser or digestif.
- Koji-Infused Amazake: Double the amount of koji for extra-intense fermentation and maximum sweetness, creating an almost syrup-like concentrate you can dilute to taste.
- Mixed Grain Version: Replace half the white rice with barley, quinoa, or millet for added texture, nutrition, and subtle grain flavors that complement the base sweetness.
Dietary Adaptations
- Gluten-Free: This recipe is naturally gluten-free when made with pure rice and koji. Always verify your koji source is certified gluten-free if you have celiac disease or severe sensitivity.
- Dairy-Free: Amazake is inherently dairy-free. If serving with milk as a supplement, use any plant-based alternative like oat, almond, or coconut milk without affecting the core recipe.
- Vegan and Vegetarian: This recipe is entirely plant-based and vegan-friendly, containing no animal products or byproducts whatsoever.
- Low-Carb and Keto: Traditional amazake is too high in naturally fermented sugars for strict keto diets. Consider using cauliflower rice with koji instead for a lower-carb adaptation, though results will differ significantly.
Storage and Reheating
Refrigerator
Store your finished amazake in clean glass jars with tight-fitting lids for up to one week in the refrigerator. The drink may separate slightly, with thicker solids settling at the bottom; simply shake or stir before serving.
- Transfer to airtight glass containers immediately after cooling to prevent contamination
- Check for any off-odors or visible mold before each serving, though proper pasteurization makes spoilage unlikely
- Keep away from strong-smelling foods like onions or fish, as amazake absorbs odors easily
Freezer
Amazake freezes well for up to three months in airtight containers, though the texture becomes slightly grainier after thawing. Leave about half an inch of headspace to allow for expansion during freezing.
- Freeze in ice cube trays first, then transfer cubes to freezer bags for convenient single-serving portions
- Label containers with the freezing date for easy tracking
- Thaw overnight in the refrigerator rather than at room temperature to preserve quality
Reheating
Gently warm refrigerated or thawed amazake on the stovetop over medium-low heat, stirring frequently to prevent scorching on the bottom. Never microwave, as intense heat creates hot spots that damage the delicate texture.
- Heat until steaming, approximately 5 to 7 minutes, then serve immediately
- For cold serving, simply pour from the refrigerator into glasses without additional preparation
- If amazake seems too thick after storage, thin with water or milk to reach your preferred consistency before serving
Nutrition Information
| Nutrient | Amount |
|---|---|
| Calories | 85 |
| Total Fat | 0.3 g |
| Saturated Fat | 0.1 g |
| Carbohydrates | 18 g |
| Fiber | 0.2 g |
| Sugar | 9 g |
| Protein | 1.5 g |
| Sodium | 25 mg |
| Cholesterol | 0 mg |
These values are approximate and based on a standard recipe yield of 4 to 6 servings. Actual nutrition varies depending on the specific koji used, water content, and any ingredients added during blending or serving.
Frequently Asked Questions
Can I use instant rice or minute rice instead of short-grain white rice?
Instant rice ferments too quickly and produces mushy, unpleasant texture. Short-grain sushi rice has the optimal starch content and firmness to transform into silky amazake.
What happens if my fermentation temperature drops too low?
Low temperatures slow or stop enzyme activity entirely, meaning your amazake may taste like sweet rice water without the proper fermented flavor. The fermentation timeline extends dramatically, sometimes requiring 18 to 24 hours with minimal results.
Can I make amazake without a thermometer?
A thermometer is really the only way to nail consistent results, as guessing temperature leads to unpredictable fermentation and disappointing batches. An instant-read thermometer costs just 10 to 15 dollars and becomes your secret weapon.
Why does my amazake taste slightly alcoholic?
Extended fermentation or temperature fluctuations can produce trace amounts of alcohol as byproducts of enzyme activity. The pasteurization step should eliminate this; if the taste persists, heat your amazake to 170 degrees for a full 5 minutes next time.
Can I reuse koji for multiple batches?
Fresh koji works best for each batch, as its enzyme potency weakens after first use. Dried koji stores much longer and maintains viability better than fresh, making it more economical for regular amazake makers.
Is homemade amazake actually healthier than store-bought versions?
Homemade amazake contains living probiotics until pasteurization, while commercial versions are often heat-processed for shelf stability, killing beneficial bacteria. You control all ingredients and fermentation time, ensuring no additives or artificial sweeteners.
What does koji smell like, and how do I know if mine is good?
Fresh koji smells pleasantly sweet and slightly fruity with an earthy undertone. Mold or strongly unpleasant odors indicate contamination; discard immediately and source a new batch from a reputable supplier.
Final Thoughts
Making amazake at home transforms fermentation from an intimidating mystery into an accessible, rewarding process that yields better results than anything store-bought. The minimal ingredient list and straightforward steps mean you’ll nail this recipe on your first try once you understand temperature control.
Start your first batch this week and experience the magic of koji enzymes converting simple rice into liquid gold. Your morning routine, smoothie bowls, and dessert plates will never be the same once you taste truly excellent homemade amazake.
Homemade Amazake
Ingredients
Equipment
Method
- Rinse the rice under cold water three times until the water runs mostly clear.
- In a large pot, combine rinsed rice with 4 cups of water and bring to a boil over high heat.
- Reduce heat to low, cover, and simmer for 15 minutes until the rice is tender.
- Remove the pot from heat and let the rice cool uncovered for 10 minutes to reach 140°F.
- Stir in 3 cups of water to the cooled rice to create a thin porridge mixture.
- When the mixture reaches 140°F, crumble in 1 cup of rice koji spores and stir thoroughly for one minute.
- Transfer the pot to an insulated container and maintain the temperature between 130°F and 145°F for 8 to 12 hours, checking every 2 hours.
- Heat the fermented mixture to 170°F and hold for 5 minutes to stop fermentation.
- Strain the mixture through a cheesecloth-lined strainer or blend until smooth, depending on desired consistency.
- Cool to room temperature, transfer to glass jars, and refrigerate for at least 2 hours before serving.