
There’s something magical about the first sip of a chelada on a hot afternoon, that perfect blend of cold beer, zesty lime, and spicy heat hitting all at once. This Mexican street drink transforms a simple beer into something craveable and refreshing, with layers of flavor that keep you coming back for more.
A chelada is special because it takes minimal ingredients but delivers maximum flavor, making it the ultimate warm-weather drink for anyone who loves bold, tangy, and spicy combinations. Best of all, you can make one in under five minutes, and you’ll have complete control over how much heat and citrus you want in every glass.
Why You’ll Love This Recipe
This drink hits different. It’s refreshing, customizable, and feels like a mini vacation in a glass.
- Takes less than five minutes to prepare from start to finish
- Uses pantry staples you likely have on hand right now
- Endlessly customizable based on your spice and flavor preferences
- Perfect for hot days, backyard gatherings, or a solo afternoon treat
- Costs just a few dollars per serving, making it budget-friendly
My Experience Making This Recipe
I first tried a proper chelada at a small taqueria near my neighborhood, and I was hooked instantly. The bartender built it right in front of me, layering the flavors with confidence, and I realized this wasn’t just a casual drink but a craft with real technique.
When I made my first one at home, I experimented with different hot sauces and spice levels until I found my perfect balance. Now I keep all the ingredients ready for guests, and everyone’s amazed at how much better a homemade chelada tastes than anything store-bought.
The sensory experience is what gets me every time: that first cold sip, the immediate citrus punch, the slow-building heat, and the satisfying savory undertone from the spices. It’s become my go-to drink for warm evenings.
Recipe Overview
- Recipe Name: Chelada
- Servings: 1
- Prep Time: 2 minutes
- Cook Time: 0 minutes
- Total Time: 2 minutes
- Course: Beverage
- Cuisine: Mexican
- Calories per Serving: 150
Equipment You Will Need
- One 12-ounce pint glass or tall glass
- Bar spoon or regular spoon for stirring
- Knife for cutting limes
- Cutting board
- Bottle opener
- Small bowl or shallow dish for rimming (optional)
Ingredients for Chelada
- One 12-ounce bottle Mexican lager beer, ice-cold
- 1/2 fresh lime, cut into wedges
- 1 tablespoon hot sauce, such as Tabasco or sriracha
- 1/2 teaspoon Worcestershire sauce
- 1/4 teaspoon soy sauce
- Pinch of sea salt
- Pinch of chili powder, such as tajin or cayenne
- Ice cubes
Ingredient Notes and Substitutions
- Mexican Lager Beer: A light, crisp lager serves as the base and provides a neutral canvas for the bold flavors. Any light lager or pilsner works if you can’t find a Mexican brand, though Mexican lagers pair most authentically.
- Fresh Lime: Lime juice provides the bright acidity that balances the heat and salt. Bottled lime juice works in a pinch, but fresh lime always tastes fresher and more vibrant.
- Hot Sauce: Tabasco, sriracha, or Mexican hot sauce like Valentina all work beautifully. Choose based on your heat preference and whether you want vinegar or garlic notes in the drink.
- Worcestershire Sauce: This adds umami depth and a subtle tang that rounds out the flavors. If you don’t have it, skip it rather than substitute, as it has a distinct profile.
- Soy Sauce: Soy sauce brings saltiness and savory complexity to the drink. Fish sauce can work as an alternative for a different umami depth.
- Chili Powder or Tajin: This adds the final spicy kick and visual appeal with a rim. Tajin specifically adds lime and chili together, making it a popular choice.
How to Make Chelada
Step 1: Prepare Your Glass
Fill a 12-ounce pint glass with ice cubes, packing them in tightly. Cold glass and plenty of ice keep your chelada refreshing from the first sip to the last.
Step 2: Add the Lime Juice
Cut your fresh lime in half and squeeze both halves directly into the iced glass, capturing all the juice. Fresh lime juice is essential here, so don’t skip this step for bottled alternatives.
Step 3: Pour the Hot Sauce
Add one tablespoon of your chosen hot sauce to the glass. The hot sauce is your heat profile, so taste as you go if you prefer less or more spice.
Step 4: Add the Worcestershire Sauce
Pour in one-half teaspoon of Worcestershire sauce, which adds a savory umami layer that makes the drink feel more complex. This ingredient separates a good chelada from a great one, so don’t skip it.
Step 5: Add the Soy Sauce
Add one-quarter teaspoon of soy sauce for additional savory depth and saltiness. This small amount brings everything into balance without making the drink taste overtly Asian.
Step 6: Add the Salt
Sprinkle in a small pinch of sea salt, which heightens the savory notes and rounds out the citrus. Taste and add more if needed, as salt enhances every flavor in the drink.
Step 7: Stir Everything Together
Using a bar spoon or regular spoon, stir all the ingredients together thoroughly for about 20 seconds. This distributes all the seasonings evenly so every sip tastes perfectly balanced.
Step 8: Pour the Beer
Open your ice-cold beer and pour it slowly into the glass, filling to the top. Pour slowly to minimize foam and prevent the drink from overflowing.
Step 9: Add the Chili Powder Rim
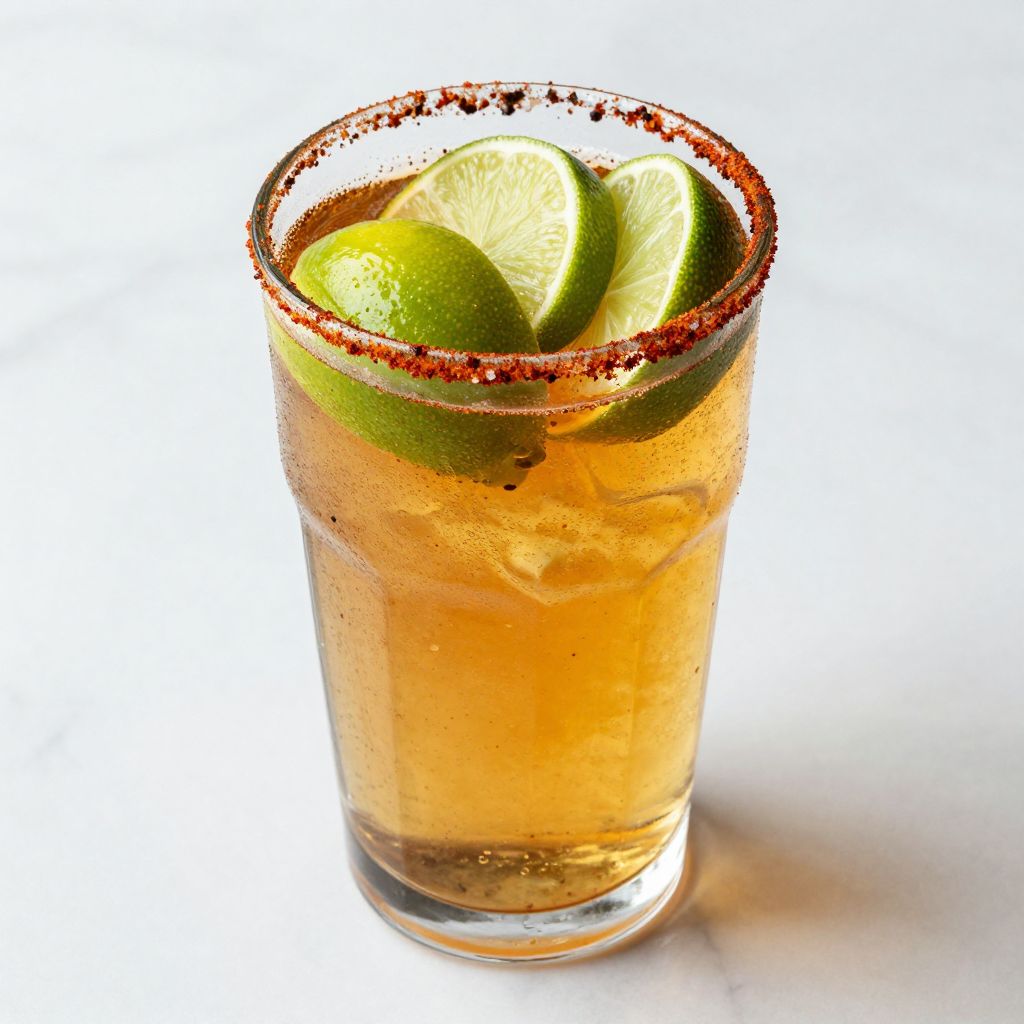
If you want the traditional presentation, rim the glass with chili powder or tajin by running a lime wedge around the rim and then dipping it into the spice. This adds visual appeal and an extra hit of spice with each sip near the rim.
Step 10: Taste and Adjust
Take your first sip and adjust as needed, adding more hot sauce, lime, or salt to match your preference. Every person’s heat tolerance differs, so make it your own from the start.
Pro Tip: Use tajin seasoning on the rim instead of plain chili powder; it combines lime, chili, and salt in one move and tastes more authentic.
Tips for the Best Chelada
- Keep your beer in the freezer for at least 30 minutes before making your drink so it stays ice-cold longer and doesn’t warm up quickly when you add ice.
- Use fresh lime every single time; the bright acidity is non-negotiable for this drink to shine.
- Squeeze the lime wedges directly into the glass instead of juicing them separately to catch all the oil and pulp for maximum flavor.
- Don’t skip the Worcestershire sauce; it’s what transforms this from a basic beer cocktail into something restaurant-quality.
- If making for a crowd, prep the base ingredients in a pitcher without the beer, then pour beer individually to keep everything fresh.
- Taste as you build the drink so you can dial in your personal spice and salt preferences before the beer goes in.
Common Mistakes to Avoid
- Using warm or room-temperature beer dilutes the chill factor and makes the drink taste flat and unbalanced. Always start with ice-cold beer straight from the fridge or freezer.
- Adding too much hot sauce at once creates an overwhelming burn that hides all the other flavors. Start with one-half tablespoon and add more gradually.
- Forgetting to stir the ingredients before adding the beer means the flavors don’t distribute evenly, leaving some sips bland and others intensely spicy.
- Using bottled lime juice instead of fresh loses the bright, natural citrus flavor that makes the drink feel alive and refreshing.
- Skipping the Worcestershire and soy sauce creates a one-dimensional drink that’s just beer with lime and hot sauce, missing the savory complexity that makes cheladas special.
Serving Suggestions
A chelada pairs beautifully with almost any casual food and makes the perfect complement to spicy meals. Serve it ice-cold in a glass with the rim spiced for maximum visual and flavor impact.
- Alongside fish tacos, carnitas tacos, or any grilled fish for a fresh, complementary pairing
- With ceviche or shrimp cocktail for a light, refreshing meal
- At outdoor barbecues alongside grilled meats and fresh salads
- With spicy chicken wings or nachos loaded with jalapeños
- As a standalone refreshment on a hot afternoon with just some tortilla chips and salsa
Variations to Try
- Michelada: Add one-quarter cup of tomato juice or Clamato juice to the mixture for a slightly thicker, more savory drink with additional vegetable depth.
- Spicy Mango Chelada: Add one tablespoon of mango nectar or fresh mango puree for tropical sweetness that balances the heat and spice.
- Cucumber Lime Chelada: Add thinly sliced fresh cucumber to the glass and muddle gently before adding the beer for cooling herbal notes.
- Spicy Pineapple Chelada: Add one tablespoon of pineapple juice for bright tropical flavor that plays beautifully with the heat.
- Smoky Chipotle Chelada: Replace regular hot sauce with chipotle hot sauce for a deeper, smokier heat profile that feels more complex.
Dietary Adaptations
- Gluten-Free: Most Mexican lagers and light beers are naturally gluten-free; check your specific brand to confirm, as the other ingredients are naturally gluten-free.
- Dairy-Free: This recipe contains no dairy ingredients at all, making it naturally dairy-free.
- Vegan: This drink is completely plant-based and vegan-friendly as long as your beer brand is certified vegan.
- Low-Carb or Keto: Use a low-carb or light beer to reduce carbohydrate content; the rest of the ingredients are negligible in carbs.
Storage and Reheating
Refrigerator
A chelada should be consumed immediately after making and cannot be stored in the refrigerator. Beer goes flat when left open, and the flavors separate over time.
- If you must store the base mixture, keep it in a sealed container for up to 24 hours and add fresh beer when you’re ready to drink.
Freezer
Don’t freeze a completed chelada; the carbonation will release and the drink will become mushy. You can freeze the base liquid, but you’ll lose quality when you thaw and add fresh beer.
- Keep your beer bottles in the freezer so they’re always ready for immediate use.
Reheating
This drink is consumed cold and should never be reheated. Make a fresh chelada each time you want one for the best taste and carbonation.
- Always start with fresh, cold beer and plenty of ice for optimal results.
Nutrition Information
| Nutrient | Amount |
|---|---|
| Calories | 150 |
| Total Fat | 0 g |
| Saturated Fat | 0 g |
| Carbohydrates | 5 g |
| Fiber | 0 g |
| Sugar | 0 g |
| Protein | 1 g |
| Sodium | 380 mg |
| Cholesterol | 0 mg |
Nutrition values are approximate and based on a standard 12-ounce Mexican lager beer with the listed ingredients. Actual nutrition varies by specific brands used.
Frequently Asked Questions
Can I make a batch of cheladas ahead of time?
You can prepare the base mixture a few hours ahead and store it in the refrigerator, but you must add fresh cold beer to each individual glass right before serving. Mixing everything together and letting it sit causes the beer to go flat and flavors to separate.
What beer works best for a chelada?
Mexican lagers like Corona, Modelo, or Pacifico are traditional choices because their light, crisp profile doesn’t overpower the seasonings. Any light lager or pilsner works, but avoid hoppy IPAs or dark beers that clash with the citrus and spice.
How spicy should a chelada be?
Start with one-half tablespoon of hot sauce and taste before adding beer; you can always add more but can’t remove it. The heat should be noticeable but not overwhelming, letting you taste the lime, salt, and savory undertones.
Can I use bottled lime juice instead of fresh?
Bottled lime juice works in a pinch, but fresh lime tastes noticeably brighter and more alive. If you must use bottled, look for brands with no added sugar and use slightly less since the flavor is more concentrated.
What is the difference between a chelada and a michelada?
A chelada is simple: beer, lime, hot sauce, and a few savory seasonings. A michelada adds tomato juice or Clamato juice, making it thicker and more complex, almost like a spicy Bloody Mary with beer.
Can I make a non-alcoholic version?
You can use non-alcoholic beer as a base, and the drink will taste similar though slightly less refreshing. Non-alcoholic beers tend to taste sweeter, so you may want to add a touch more salt and lime juice to balance it out.
Should I rim the glass with salt or chili powder?
Tajin or chili powder rims are more traditional and add visual appeal plus spice; a salt rim is simpler but less flavorful. Use whichever matches your desired heat level and presentation style.
Final Thoughts
A chelada is proof that simple ingredients in the right combination create something magical. You don’t need fancy equipment or hard-to-find ingredients; just cold beer, fresh lime, and a handful of pantry staples transform into a drink that tastes like a mini vacation.
Make one today and taste why this Mexican street drink has become a global favorite. Once you nail your personal version, you’ll find yourself craving it on every warm afternoon.
Chelada
Ingredients
Equipment
Method
- Fill a 12-ounce pint glass with ice cubes, packing them in tightly.
- Cut your fresh lime in half and squeeze both halves directly into the iced glass, capturing all the juice.
- Add 1 tablespoon of your chosen hot sauce to the glass.
- Pour in 1/2 teaspoon of Worcestershire sauce.
- Add 1/4 teaspoon of soy sauce.
- Sprinkle in a small pinch of sea salt.
- Using a bar spoon or regular spoon, stir all the ingredients together thoroughly for about 20 seconds to distribute the seasonings evenly.
- Open your ice-cold beer and pour it slowly into the glass, filling to the top. Pour slowly to minimize foam.
- If desired, rim the glass with chili powder or tajin by running a lime wedge around the rim and then dipping it into the spice.
- Take your first sip and adjust as needed, adding more hot sauce, lime, or salt to match your preference.