
There’s something about the thick, creamy sweetness of a peanut butter milkshake that instantly transports you back to childhood afternoons at the ice cream parlor. This classic treat strikes the perfect balance between indulgent and simple, made with just a handful of pantry staples and a blender.
What makes this recipe special is how customizable it is: you can make it as thick or as thin as you like, swap in different ice cream flavors, or add protein powder for a post-workout boost. Whether you’re looking for a quick afternoon pick-me-up or a dessert that feels fancy but requires zero cooking skills, this milkshake delivers every single time.
Why You’ll Love This Recipe
A peanut butter milkshake is the kind of recipe that seems almost too good to be true, yet somehow manages to be delicious, fast, and endlessly adaptable to your preferences.
- Ready in under 5 minutes with zero cooking required
- Uses everyday ingredients you likely already have at home
- Tastes like a professional ice cream shop creation
- Works perfectly for breakfast, dessert, or a protein-packed snack
- Naturally customizable for dietary preferences and flavor cravings
My Experience Making This Recipe
I first made this milkshake on a random Tuesday afternoon when my kids were asking for a snack and I had zero inspiration. I threw together what I had in the kitchen and was shocked at how restaurant-quality the result turned out.
The texture is what really got me: thick enough that you feel like you’re eating something substantial, but still smooth and easy to drink through a straw. My kids went back for seconds, which honestly never happens with homemade treats.
Since then, I’ve made it easily a hundred times, tweaking it based on what I have on hand. It’s become my go-to solution for those moments when everyone needs something satisfying fast.
Recipe Overview
- Recipe Name: Peanut Butter Milkshake
- Servings: 2
- Prep Time: 3 minutes
- Cook Time: 0 minutes
- Total Time: 3 minutes
- Course: Dessert
- Cuisine: American
- Calories per Serving: 340
Equipment You Will Need
- Blender (standard or high-powered)
- Measuring cups and spoons
- Two tall glasses
- Two wide straws or spoons for drinking
Ingredients for Peanut Butter Milkshake
- 2 cups vanilla ice cream
- 1/2 cup creamy peanut butter
- 1 cup whole milk
- 1 tablespoon honey
- 1/2 teaspoon vanilla extract
- Pinch of salt
- Optional: 2 tablespoons chocolate syrup for drizzle
Ingredient Notes and Substitutions
- Vanilla ice cream: The base that gives the milkshake its smooth, creamy texture. You can swap this for chocolate, cookies and cream, or even caramel ice cream depending on your mood.
- Creamy peanut butter: The star ingredient that provides rich flavor and body. Natural peanut butter works too, but might separate slightly, so give it a good stir before measuring.
- Whole milk: Creates the right consistency and adds richness. Use 2% milk if you prefer something lighter, or almond milk for a dairy-free version with slightly less creaminess.
- Honey: Adds subtle sweetness without making the shake too sugary. Maple syrup or agave nectar work as 1:1 replacements with slightly different flavor notes.
- Vanilla extract: Enhances the overall flavor profile. You can leave it out entirely if you don’t have it, with minimal impact on the final shake.
How to Make Peanut Butter Milkshake
Step 1: Gather Your Ingredients
Pull out your ice cream, peanut butter, milk, honey, and vanilla extract. Having everything ready before you start blending makes the process faster and ensures nothing gets forgotten.
Step 2: Soften the Ice Cream Slightly
Let the ice cream sit at room temperature for 2-3 minutes so it blends more easily. Hard ice cream can strain your blender, while slightly softened ice cream incorporates smoothly with minimal effort.
Step 3: Add Ice Cream to the Blender
Scoop the 2 cups of vanilla ice cream into your blender. Starting with the ice cream helps it mix evenly with the liquid ingredients.
Step 4: Add the Peanut Butter
Pour in the 1/2 cup of creamy peanut butter on top of the ice cream. Adding peanut butter early ensures it gets fully incorporated rather than clumping at the bottom.
Step 5: Pour in the Milk
Add the 1 cup of whole milk over the other ingredients. The milk acts as the liquid medium that helps everything blend together smoothly.
Step 6: Add Sweetener and Vanilla
Drizzle in the 1 tablespoon of honey and pour in the 1/2 teaspoon of vanilla extract. These small amounts of flavoring elevate the shake from basic to restaurant-quality.
Step 7: Add a Pinch of Salt
Add just a pinch of salt to the mixture. This tiny amount brings out the peanut butter flavor and balances the sweetness without making the shake taste salty.
Step 8: Blend Until Smooth
Blend on high speed for 30-45 seconds until the mixture is completely smooth and creamy. Stop before over-blending, which incorporates too much air and can make the shake thinner and icy.
Step 9: Divide and Serve
Pour the milkshake into two tall glasses immediately while it’s still cold and thick. Serve right away with a wide straw or spoon.
Pro Tip: Freeze your glasses for 10 minutes before pouring if you like your shake extra cold and want it to stay thick longer.
Tips for the Best Peanut Butter Milkshake
- Use quality ice cream with a higher fat content; cheaper brands often contain more air and won’t blend as smoothly. The difference in final texture is noticeable.
- Don’t add all the milk at once if you like your shake extra thick. Start with 3/4 cup and add more only if needed.
- If your peanut butter is natural or separated, give it a good stir before measuring to ensure even peanut flavor throughout.
- Chill your blender pitcher by filling it with ice water for 2 minutes before blending. This keeps the shake cold and prevents the ice cream from melting too quickly.
- Make the shake right before serving for the best texture. Letting it sit too long allows the ice cream to melt, making it more like a peanut butter drink than a thick shake.
- Add a tablespoon of cocoa powder to half the batch if you want a chocolate-peanut butter version without making two separate shakes.
Common Mistakes to Avoid
- Adding cold milk straight from the fridge can cause the blender to work too hard and create an inconsistent texture. Let the milk sit out for a minute or use the milk that’s been sitting on the counter.
- Using softened ice cream that’s almost melted turns the shake into a thin drink instead of a thick, sippable texture. Aim for just slightly softened, not mushy.
- Over-blending creates too many air bubbles, making the shake foamy and thin rather than creamy and substantial. Aim for 30-45 seconds only.
- Forgetting the salt makes the shake taste flat and one-dimensional. This tiny ingredient makes a surprising difference in flavor depth.
- Using low-fat ice cream results in a watery, less satisfying final product. The fat content is what creates that luxurious mouthfeel.
Serving Suggestions
A peanut butter milkshake stands beautifully on its own, but pairing it with the right accompaniments makes it feel like a complete treat.
- Serve with chocolate chip cookies on the side for dipping or dunking
- Top with a small dollop of whipped cream and a drizzle of chocolate syrup
- Pair with a warm brownie for a textural contrast of hot and cold
- Offer alongside fresh banana slices or apple wedges for a lighter accompaniment
- Add a handful of pretzels to the edge of the glass for salty-sweet balance
Variations to Try
- Chocolate Peanut Butter: Add 1-2 tablespoons of chocolate syrup or cocoa powder to the blender. This creates a classic combination that tastes like a candy bar in shake form.
- Banana Peanut Butter: Add one frozen banana to the mix. The banana adds creaminess and subtle sweetness that complements peanut butter beautifully.
- Protein-Packed Version: Stir in 2 tablespoons of vanilla protein powder when adding the other ingredients. Perfect for post-workout recovery or a filling breakfast shake.
- Caramel Swirl: Replace honey with 1 tablespoon of caramel sauce and drizzle more caramel into the glass before pouring. This adds decadent sweetness and depth.
- Cookies and Cream Peanut Butter: Use cookies and cream ice cream instead of vanilla and add 2-3 crushed cookies to the blender. You get two crowd-pleasing flavors in one shake.
Dietary Adaptations
- Dairy-Free: Swap vanilla ice cream for coconut or cashew-based dairy-free ice cream, and use almond or oat milk. The shake will be slightly less thick but still delicious and creamy.
- Vegan: Use plant-based ice cream and milk, and replace honey with maple syrup or agave. Check that your peanut butter contains no animal products.
- Low-Carb/Keto: Use keto-friendly ice cream (or blend avocado with heavy cream as a base), natural peanut butter with no added sugar, and skip the honey. The shake will be less sweet but still satisfying.
- Nut-Free: Substitute tahini or sunflower seed butter for peanut butter in equal amounts. The shake will have a different but equally delicious flavor profile.
Storage and Reheating
Refrigerator
You cannot really store a finished milkshake since it separates and melts, but you can prepare individual shake components ahead. Store the measured peanut butter, honey, and vanilla in a small container for up to 5 days.
- Keep ice cream and milk separate at their proper temperatures
- Measure all other ingredients into a small jar for grab-and-blend mornings
Freezer
Freeze overripe bananas or other fruits you plan to add to future shakes in labeled freezer bags or containers. Frozen fruit adds creaminess without requiring as much ice cream.
- Freeze bananas in chunks for easy blending later
- Keep ice cream stored at the back of the freezer where it stays coldest
Reheating
There’s no reheating involved with milkshakes, but you can let a shake sit for a minute or two if it’s too thick to drink comfortably through a straw. Never microwave or heat a milkshake, as this ruins the texture entirely.
- If too thick, let it rest at room temperature for 1-2 minutes
- Stir gently if separation has occurred
Nutrition Information
| Nutrient | Amount |
|---|---|
| Calories | 340 |
| Total Fat | 18g |
| Saturated Fat | 8g |
| Carbohydrates | 38g |
| Fiber | 2g |
| Sugar | 32g |
| Protein | 9g |
| Sodium | 185mg |
| Cholesterol | 20mg |
Nutritional values are approximate and calculated based on standard ingredient measurements. Individual nutrition will vary based on specific brands and any substitutions made.
Frequently Asked Questions
Can I Make This Shake Ahead of Time?
Finished shakes separate and become watery within 15 minutes, so blend right before serving for the best texture. You can prep all dry and wet ingredients separately ahead of time for quick blending later.
What Type of Peanut Butter Works Best?
Creamy peanut butter blends most smoothly, but natural peanut butter works too if you stir it first since the oil separates. Avoid chunky peanut butter, which creates an uneven texture in the shake.
Can I Use Frozen Bananas Instead of Ice Cream?
You can use one frozen banana plus less milk, but the shake will be less creamy and thick without some ice cream. Try using half ice cream and half frozen banana for a lighter version.
How Do I Make a Thicker Milkshake?
Use less milk (start with 3/4 cup instead of 1 cup) or add slightly more ice cream. You can also freeze your blender pitcher beforehand to keep the shake cold and thick longer.
Is This Recipe Easy to Double for a Party?
Yes, simply double all ingredients, but you may need to blend in two batches depending on your blender size. A high-powered blender can handle doubling more easily than a standard one.
Can I Add Protein Powder to Make It More Filling?
Add 2-3 tablespoons of vanilla protein powder to the blender with the other ingredients. You might need to add an extra 2-3 tablespoons of milk since protein powder absorbs liquid.
Final Thoughts
The peanut butter milkshake is one of those recipes that feels indulgent but requires almost no effort, making it perfect for those days when you need something satisfying fast. It’s the kind of treat that tastes like you spent time in the kitchen when really you just opened a few jars and turned on the blender.
Give this recipe a try this week, and don’t hesitate to make it your own by experimenting with the variations and additions that appeal to you. Your future self will thank you for keeping the ingredients on hand for those moments when a creamy, dreamy shake is exactly what you need.
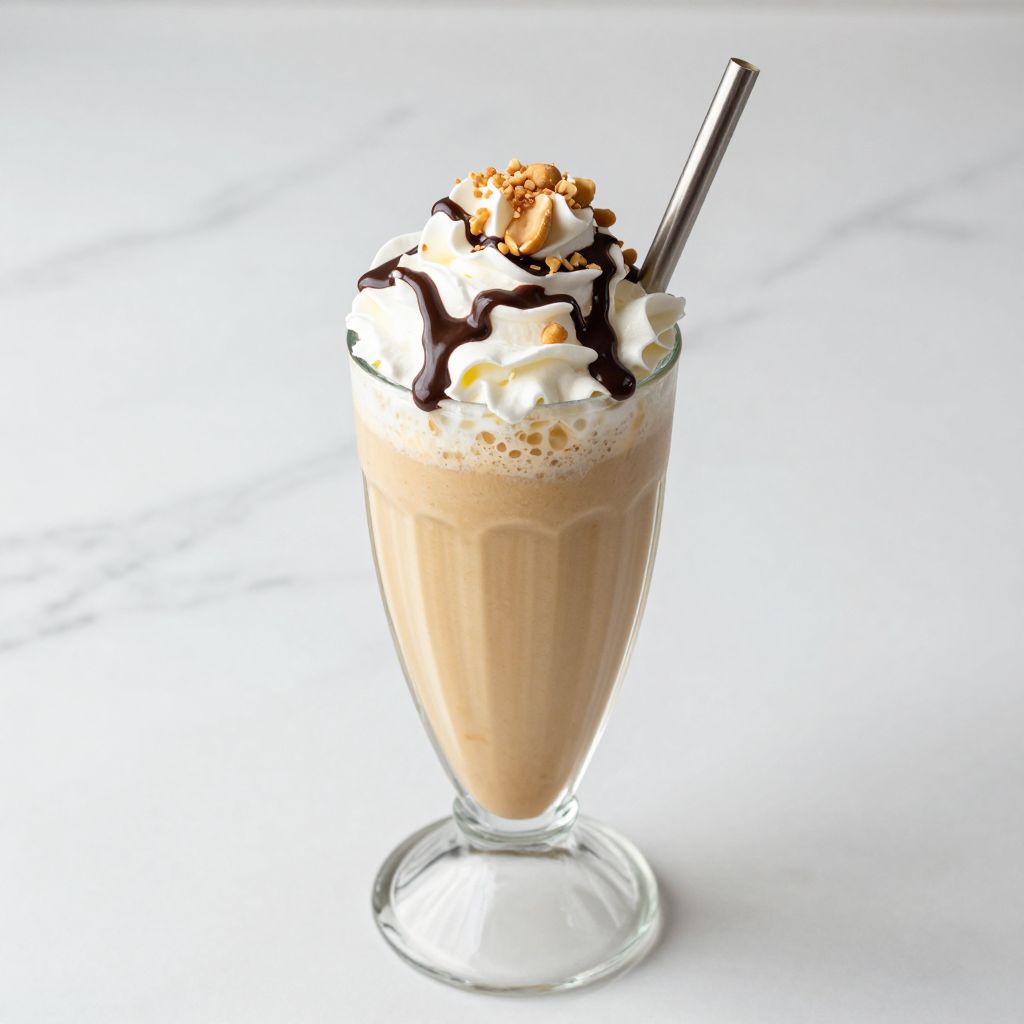
Peanut Butter Milkshake
Ingredients
Equipment
Method
- Pull out your ice cream, peanut butter, milk, honey, and vanilla extract. Having everything ready before you start blending makes the process faster and ensures nothing gets forgotten.
- Let the ice cream sit at room temperature for 2-3 minutes so it blends more easily. Hard ice cream can strain your blender, while slightly softened ice cream incorporates smoothly with minimal effort.
- Scoop the 2 cups of vanilla ice cream into your blender. Starting with the ice cream helps it mix evenly with the liquid ingredients.
- Pour in the 1/2 cup of creamy peanut butter on top of the ice cream. Adding peanut butter early ensures it gets fully incorporated rather than clumping at the bottom.
- Add the 1 cup of whole milk over the other ingredients. The milk acts as the liquid medium that helps everything blend together smoothly.
- Drizzle in the 1 tablespoon of honey and pour in the 1/2 teaspoon of vanilla extract. These small amounts of flavoring elevate the shake from basic to restaurant-quality.
- Add just a pinch of salt to the mixture. This tiny amount brings out the peanut butter flavor and balances the sweetness without making the shake taste salty.
- Blend on high speed for 30-45 seconds until the mixture is completely smooth and creamy. Stop before over-blending, which incorporates too much air and can make the shake thinner and icy.
- Pour the milkshake into two tall glasses immediately while it's still cold and thick. Serve right away with a wide straw or spoon.